| 4.2. Align and Distribute | ||
|---|---|---|

|
4. Transformationswerkzeuge |  |
| 4.2. Align and Distribute | ||
|---|---|---|
|
|
4. Transformationswerkzeuge | |
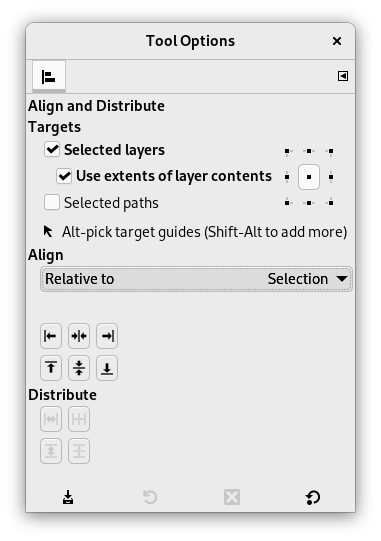
The Align and Distribute tool is useful to align the image layers with various image objects. When this tool is selected, the mouse pointer turns to a small hand. By clicking on an element of a layer in the image, you choose the layer which will be moved (with Shift + click, you can choose several layers to be aligned); this focused layer has small squares in corners and is called source. Then buttons in the dialog become active (they remain active during all the GIMP session): they allow you to select the target, i.e other layer, selection, path, the source will be aligned with.
Sie haben verschiedene Möglichkeiten, dieses Werkzeug zu aktivieren:
From the main menu: → → .
By clicking the tool icon
![]() in the Toolbox.
in the Toolbox.
By pressing the Q keyboard shortcut.
Bei gedrückter Umschalt-Taste können Sie mehr als eine Ebene auswählen.
![[Tipp]](images/tip.png)
|
Tipp |
|---|---|
|
Sie können mehrere Ebenen auch einfach mit der üblichen »Gummiband«-Funktion auswählen: Klicken Sie außerhalb der anvisierten Ebenen ins Bild und ziehen Sie die Maus so, dass sich alle betreffenden Ebenen innerhalb des entstehenden rechteckigen Bereichs befinden. Wenn Sie jetzt die Maustaste loslassen, werden alle eingeschlossenen Ebenen ausgewählt. Beachten Sie, dass es hier kein »erstes Objekt« als Ziel gibt, an dem die ausgewählten Ebenen ausgerichtet werden können. |
Normally, tool options are displayed in a window attached under the Toolbox as soon as you activate a tool. If they are not, you can access them from the main menu through → → which opens the option window of the selected tool.
In this drop-down list, you select the target, the image object the layer will be aligned with.
Bild: das Bild selbst ist das Ziel.
Auswahl: die Auswahl ist das Ziel.
Picked reference object: The selected object (layer, path, guide) on the canvas.
Diese Knöpfe werden verfügbar, sobald ein Ziel ausgewählt wurde.
![]() : to
align left edge of source with left edge of target.
: to
align left edge of source with left edge of target.
![]() : to
align center of source on the
vertical middle line of target.
: to
align center of source on the
vertical middle line of target.
![]() : to
align right edge of source with right edge of target.
: to
align right edge of source with right edge of target.
![]() : to
align top edge of source with top edge of target.
: to
align top edge of source with top edge of target.
![]() : to
align center of source on the
horizontal middle line of target.
: to
align center of source on the
horizontal middle line of target.
![]() : to
align bottom edge of source with bottom edge of target.
: to
align bottom edge of source with bottom edge of target.
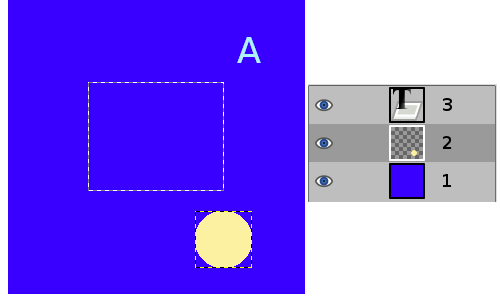
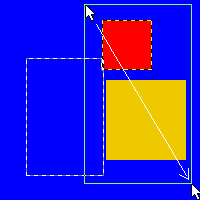
Ein Bild mit einer Auswahl. Ebene 1 (Hintergrund) ist aktiv, Ebene 2 ist auf ihren Inhalt zugeschnitten, Ebene 3 ist eine Textebene.
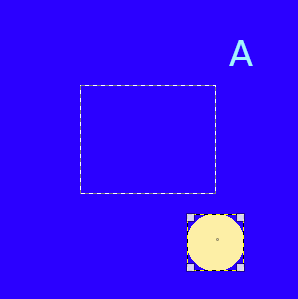
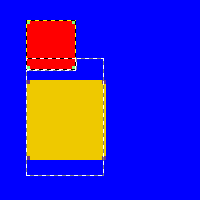
Durch Klicken auf den gelben Kreis wird Ebene 2 die Quelle. Sie soll mittig zur Auswahl ausgerichtet werden: die Auswahlliste Relativ zu ist auf „Auswahl“ eingestellt.
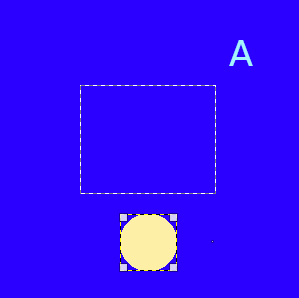
Nach
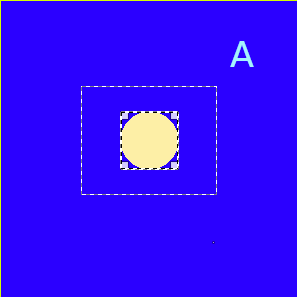
Nach
These options are used when you have several targets and want to arrange them. Here, layers selected with Shift + Click are called „targets“. But they are actually sources. „Relative to“ options are active to set the target. These transformations are usually relative to „Image“.
These options work as Align options, but you can distribute sources evenly.
![]() : to distribute sources evenly
horizontally.
: to distribute sources evenly
horizontally.
![]() : to distribute centers of sources
with center of the target horizontally.
: to distribute centers of sources
with center of the target horizontally.
![]() : to distribute sources evenly
vertically.
: to distribute sources evenly
vertically.
![]() : to distribute centers of sources
with center of target.
: to distribute centers of sources
with center of target.
Abbildung 14.93. Beispiel für Befehle von »Verteilen«
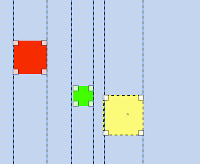
Base image: three layers.
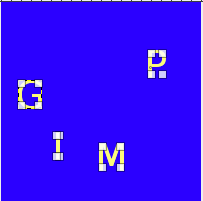
![]() (Distribute right edges of targets) will be used.
(Distribute right edges of targets) will be used.
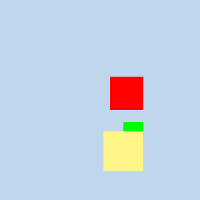
Abbildung 14.94. Original
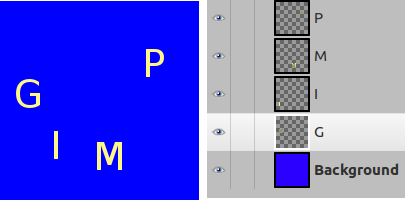
Wir wählen sie als Quellen per Umschalt + Klicken aus.

The default target (Relative to) is
„Image“. We used the
![]() (Distribute vertical centers of targets) command.
(Distribute vertical centers of targets) command.

After using the
![]() (Distribute targets
evenly in the horizontal).
(Distribute targets
evenly in the horizontal).