| 5.4. Creating a brush quickly | ||
|---|---|---|

|
5. Siveltimet |  |
| 5.4. Creating a brush quickly | ||
|---|---|---|
|
|
5. Siveltimet | |
There are two methods to create a new brush:
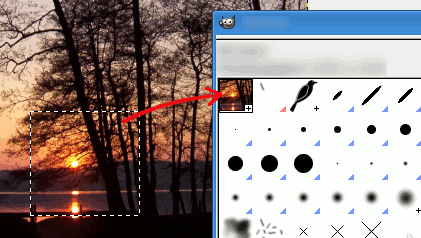
First, the quick temporary method. You have an image area from which you want to make a brush, to be used with a tool like pencil, airbrush, etc. Select it with the rectangular (or elliptical) select tool, then this selection. Immediately you can see this copy in the first position of the Brush Dialog, and its name is ”Clipboard”. It is immediately usable.
This brush is temporary: it disappears when you close GIMP. You can make it permanent by clicking on the at the bottom of the brush panel.
The second method is more elaborate.
Select → from the main menu.
Set Width and Height for example to 30 pixels.
In the Advanced Options, set for example the Color space to Grayscale and set Fill with to White.
Zoom on this new image to enlarge it and draw on it with a black pencil.
Select → from the main menu.
Export the image with a .gbr extension in the
brushes directory in your personal
GIMP folder. The location of this folder depends on your
OS:
Linux: /home/user_name/.config/GIMP/2.99/
macOS: /Users/user_name/Library/Application Support/GIMP/2.99/
Windows: C:\Users\user_name\AppData\Roaming\GIMP\2.99\
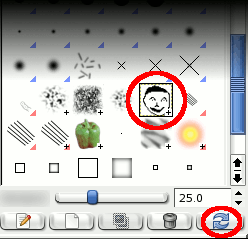
In the Brush Dialog, click on
the button
![]() .
.
Your brush appears among the other brushes. You can use it immediately, without restarting GIMP.