| 5. 직선 그리기 | ||
|---|---|---|

|
3장. First Steps with GIMP |  |
| 5. 직선 그리기 | ||
|---|---|---|
|
|
3장. First Steps with GIMP | |
이 강좌의 글과 이미지에 대한 저작권은 Seth Burgess (Copyright © 2002) 에게 있습니다. 원본 강좌는 [TUT01]에 있습니다.
이 강좌에서는 김프에서 직선을 그리는 방법을 소개합니다. 직선을 이용하면, 마우스나 태블릿의 부정확성에 크게 영향받지 않으면서 상당히 깔끔하고 정돈되어 보이는 물체를 그릴 수 있습니다. 이 강좌에서는 간단하게 직선을 그리는 방법만을 소개할 뿐, 직선을 이용한 복잡한 작업은 다루지 않습니다.
Create a New Image
First, create a new image. Any size will do. Use → to create a new image.
도구 선택하기
Select a paint tool from the
Toolbox, for example
the
![]() Pencil tool or the
Pencil tool or the
![]() Paintbrush tool.
Paintbrush tool.
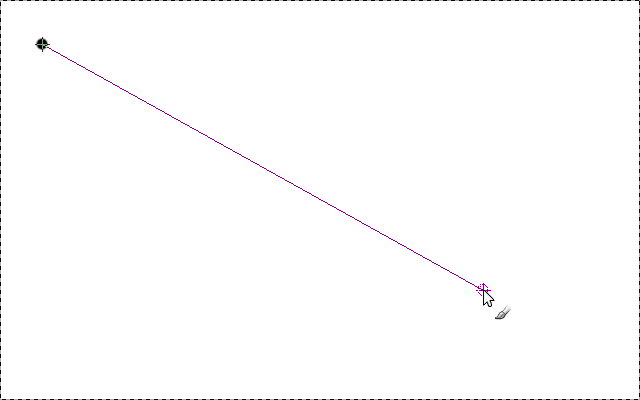
시작점 만들기
Left-click in the image where you want a line to start or end. A
single dot will appear on the screen. The size of this dot
represents the current brush size, which you can change in the Brush
Dialog (see 3.2절. “Brushes Dialog”). Now hold down the
![]() Shift key on your keyboard, and keep it down.
Shift key on your keyboard, and keep it down.
Draw the Line
시작점을 찍은 뒤 Shift 키를 누르고 있으면, 마우스 커서를 따라 위 화면과 같이 직선이 표시됩니다. 이제 Shift 키를 누른 상태로 마우스를 움직여 원하는 곳을 “클릭”합니다.
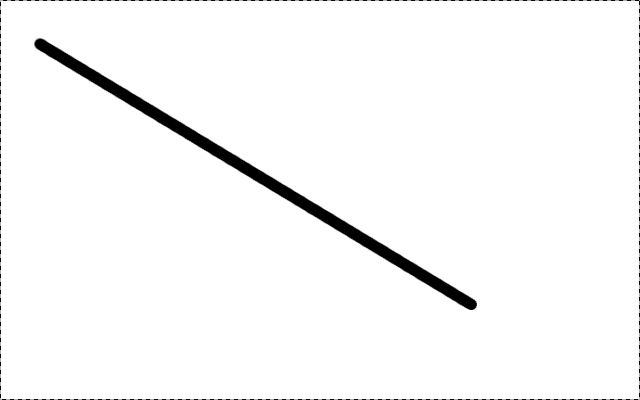
Final Result
You can draw straight lines with any of the Paint tools. The last step is to let go of the Shift key. We are finished. Some examples are shown in the next section.