| 5.5. Målingar | ||
|---|---|---|

|
5. Andre verktøy |  |
| 5.5. Målingar | ||
|---|---|---|
|
|
5. Andre verktøy | |
Måleverktøyet vert brukt når du har behov for å finna pikselavstandar og vinklar på biletet ditt. Ved å klikka og dra musepeikaren kan du finna ut kor stor ein vinkel er eller kor mange pikslar det er frå der du klikka til der musepeikaren er. Informasjonen vert vist på statuslinja nedst i biletvindauget, eller i informasjonsvindauget.
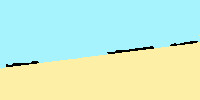
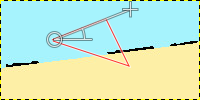
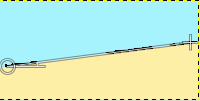
Eit nokså vanleg bruksområde for «Måleverktøyet» er å rekna ut rotasjonsvinkelen når horisonten ikkje er vassrett på eit foto. For å retta opp horisonten, trykk på knappen Rett oppetter at du har målt vinkelen.
Denne knappen kan brukast for å retta opp vassrette eller loddrette linjer: startpunktet kjem med ein liten stolpe som viser retninga.
Når du held musepeikarren over endepunktet vil peikaren vise eit flyttemerke. Klikk for å lese av målinga.
Informasjonen blir vist på statuslinja nedst i biletvindauget:
Avstanden mellom startpunktet og musepeikaren målt i pikslar.
Vinkelen i kvar kvadrant, frå 0° til 90°.
Peiarkoordinata i høve til startpunktet.
Du kan slå på verktøyet på mange måtar:
Frå hovudmenyen: → .
Ved å klikka på verktøysymbolet
![]() i verktøykassa.
i verktøykassa.
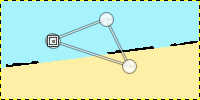
Hald nede Shift-tasten når du ønskjer å byrje ei ny måling frå der musepeikaren er no, utan å fjerna den føregåande målinga. Vinkelen mellom dei to linjene vert vist. Eit endepunkt kan flyttast ved å klikka og dra. Denne metoden nyttig for å måla vinklar i biletet:
Figur 14.137. Shiftmodifikator
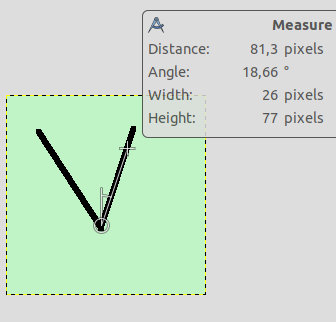
Klikk på startpunktet og følj eitt av vinkelbeina.
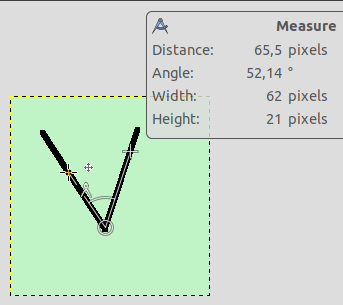
Så held du nede Shift-tasten og trykkjer på startpunktet igjen og dreg langs det andre vinkelbeinet: Du får no opp verdien på denne vinkelen.
Ved å halde nede Ctrl-tasten medan du utførar målingane, blir verktøyet avgrensa til å måle rette linjer i vinklar som er multiplar av 15º, dvs. 0º, 15º, 30º osv.
Hald nede Ctrl-tasten og klikk på eit endepunkt for å laga ei vassrett hjelpekinje. Musepeikaren føljer med
 -ikonet.
I vassrett eller loddrett modus, vil Ctrl veksla mellom vassrett og loddrett.
Held du nede Alt-tasten medan du klikkar på eit endepunkt, vert det sett inn ei loddrett hjelpelinje.
Denne tastekombinasjonen og klikk på ei målelinje for å flytta målinga.
Ctrl + Alt medan du klikkar på eit endepunkt, vil det bli sett inn ei vassrett og ei loddrett hjelpelinje.
Normalt vert innstillingane for det valde verktøyet vist under verktøykassa så snart som du slår på verktøyet. Dersom dette ikkje er tilfelle, kan du få tilgang til dei frå biletmenyen via → → som vil opna verktøyinnstillingane for det valde verktøyet. Du kan også opna verktøyinnstillingane ved å dobbeltklikka på det tilsvarande verktøyikonet i verktøykassen.
I Auto-modus (standard) vil kopla seg til den minste vinkelen mellom den målte linja og vassrett eller loddrett retning. Du kan overstyra dette ved å spesifisera retninga med Vassrett og Loddrett.
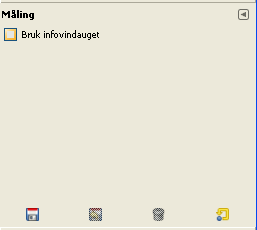
Dette valet vil visa eit infovindauge med detaljar om målinga. Du kan også finna meir fullstendige resultat på statuslinja.
Transformer, Interpolering og Klipping vert handsama i Del 4.1.1, «Innstillingar». Her er eit eksempel på oppretting av ein bane:
Det opphavlege biletet
Strek opp bane
Gjer banen synleg
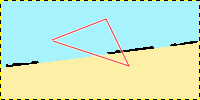
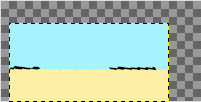
Teikna ei målelinje på segmentet du vil retta opp
Rett opp
Figur 14.139. «Rett opp» klippeinnstillingar
Teikna ei målelinje
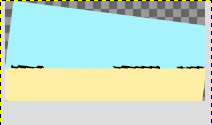
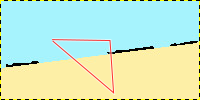
Rett opp med «justering»
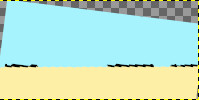
Rett opp med «Klipp»
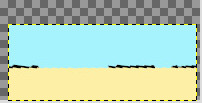
Rett opp med «Beskjer til resultatet»
Rett opp med «Beskjer med sideforhold»
: trykk på denne knappen for å utføra opprettinga.
Det er ikkje råd å måle flater direkte med dette verktøyet. I staden kan du prøve verktøyet histogram, som mellom anna viser kor mange pikslar det er i utvalet.