| 5.4. Efectos de iluminación | ||
|---|---|---|
 |
5. Filtro luces y sombras |  |
| 5.4. Efectos de iluminación | ||
|---|---|---|
| |
5. Filtro luces y sombras | |
Figura 16.98. La misma imagen, antes y después de aplicar el filtro efectos de iluminación
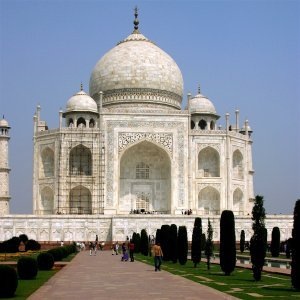
Original image
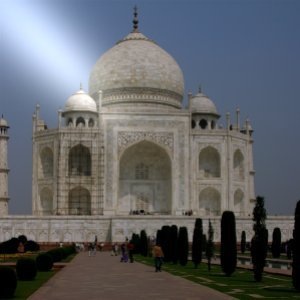
Filtro “Efectos de iluminación” aplicado
Puede encontrar este filtro en → →
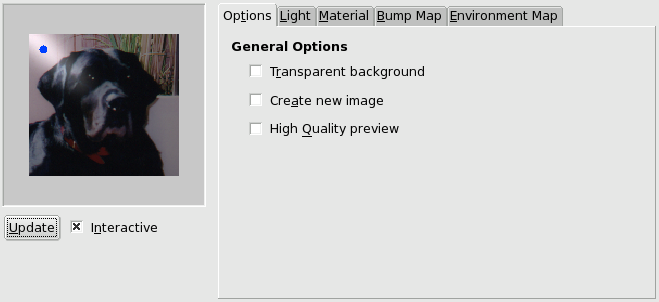
Cuando está marcado Interactivo, los resultados de la configuración se muestran interactivamente en la vista previa sin modificar la imagen hasta que se pulsa el botón Aceptar.
If Interactive is not checked, changes are displayed in preview only when you click on the button. This option is useful with a slow computer.
Any other options are organized in tabs:
Hace la imagen destino transparente cuando la altura del mapa de relieve es cero (la altura es cero en las áreas negras del mapa).
Crea una nueva imagen cuando se aplica el filtro.
Para CPU rápidas...
FIXME
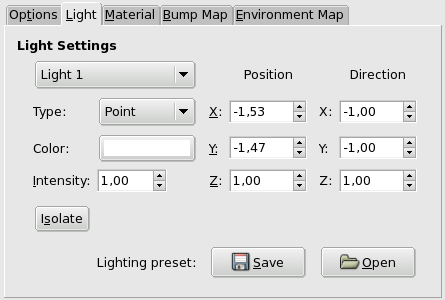
In this tab, you can set light parameters. With Light 1 ... Light 6 you can create six light sources and work on each of them separately.
The filter provides several light types in a drop-down list:
Displays a blue point at center of preview. You can click and drag it to move light all over the preview.
The blue point is linked to preview center by a line which indicates the direction of light.
This deletes the light source (light may persist...).
Cuando pulsa sobre la caja de color, se abre una ventana de diálogo donde se puede seleccionar el color de la fuente de luz.
Con esta opción, puede seleccionar la intensidad de la luz.
Determina la posición del punto de luz según tres coordenadas: X para la posición horizontal, Y para la vertical, Z para la distancia de la fuente (la luz se oscurece cuando se incrementa la distancia). Los valores son de -1 a +1.
Esta opción debería permitir fijar la dirección de la luz en sus tres coordenadas X, Y y Z.
Con esta opción, puede decidir si todas las fuentes de luz deben aparecer en la vista previa o solo la fuente con la que está trabajando.
Puede guardar su configuración con el botón y recuperarla con el botón .
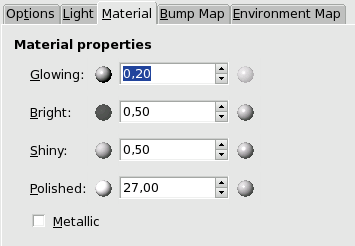
Estas opciones no conciernen a la luz emitida, sino a la luz reflejada en los objetos.
Las esferas pequeñas, a ambos lados de las cajas de entrada, representan la acción de cada opción, desde su mínimo (a la izquierda) a su máximo (a la derecha). Los mensajes de ayuda emergentes son muy útiles.
Con esta opción, puede seleccionar la cantidad del color original que se mostrará en donde la luz directa no llega.
Con esta opción, puede seleccionar la intensidad del color original cuando es iluminado directamente por la fuente de luz.
Esta opción controla como será la intensidad de la luz.
En esta opción, los valores altos concentran más la luz.
Cuando esta opción está marcada, las superficies parecen metálicas.
In this tab, you can set filter options that give relief to the image. See Bump mapping .
Con esta opción, las partes claras de la imagen aparecerán elevadas y las partes oscuras serán depresiones. El aspecto depende de la posición de la fuente de luz.
You have to select there the grey-scale image that will act as a bump map. See Bump Map plug-in for additional explanations.
This option defines the method that will be used when applying the bump map; that is, the bump height is a function of the specified curve. Four curve types are available: Linear, Logarithmic, Sinusoidal and Spherical.
Representa la altura máxima del relieve.
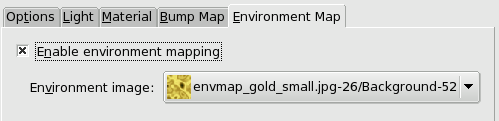
uando marca esta casilla, se habilita la siguiente opción:
You have to select there a RGB image, present on your screen. Please note that for this option to work you should load another image with GIMP before using it.
An example can be found at [BUDIG01].