| 7.2. Difference of Gaussians | ||
|---|---|---|

|
7. 경계 검출 필터 |  |
| 7.2. Difference of Gaussians | ||
|---|---|---|
|
|
7. 경계 검출 필터 | |
그림 17.138. Applying example for the “Difference of Gaussians” filter
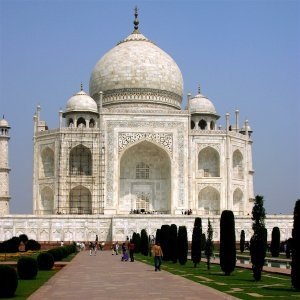
Original image
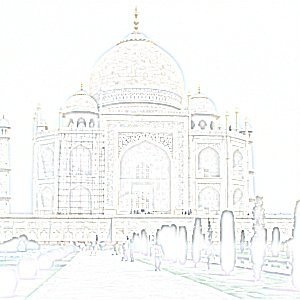
Filter “Difference of Gaussians” applied
This filter does edge detection using the so-called “Difference of Gaussians” algorithm, which works by performing two different Gaussian blurs on the image, with a different blurring radius for each, and subtracting them to yield the result. This algorithm is very widely used in artificial vision (maybe in biological vision as well!), and is pretty fast because there are very efficient methods for doing Gaussian blurs. The most important parameters are the blurring radii for the two Gaussian blurs. It is probably easiest to set them using the preview, but it may help to know that increasing the smaller radius tends to give thicker-appearing edges, and decreasing the larger radius tends to increase the “threshold” for recognizing something as an edge. In most cases you will get nicer results if Radius 2 is smaller than Radius 1, but nothing prevents you from reversing them, and in situations where you have a light figure on the dark background, reversing them may actually improve the result.
Radius 1 and Radius 2 are the blurring radii for the two Gaussian blurs. The only constraints on them is that they cannot be equal, or else the result will be a blank image. If you want to produce something that looks like a sketch, in most cases setting “Radius 2” smaller than “Radius 1” will give better results.
Checking this box causes the brightness range in the result to be stretched as much as possible, increasing contrast. Note that in the preview, only the part of the image that is shown is taken into account, so with Normalize checked the preview is not completely accurate. (It is accurate except in terms of global contrast, though.)
Checking this box inverts the result, so that you see dark edges on a white background, giving something that looks more like a drawing.


