| 4.4. Сжатие изображений | ||
|---|---|---|

|
4. Обычные задачи |  |
| 4.4. Сжатие изображений | ||
|---|---|---|
|
|
4. Обычные задачи | |
Если у вас есть изображения, которые занимают много места на диске, их размеры можно уменьшить, не изменяя размер изображения. Наилучшее сжатие достигается форматом JPG, но даже если изображение уже в этом формате, его всё равно можно уменьшить, так как у формата JPG есть адаптивная схема сжатия, позволяющая сохранять изоражение с разной степенью сжатия. Компромис здесь заключается в том, что чем меньше места занимает изображение, тем больше деталей теряется при сжатии. Нужно также помнить, что повторные сохранения в формате JPG также приводят к ухудшению качества изображения.
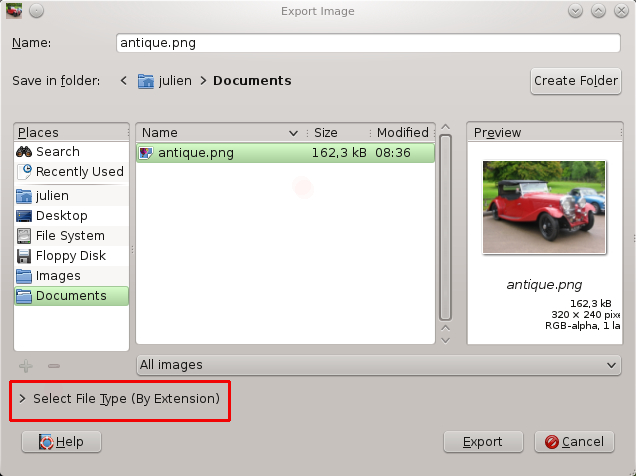
Since GIMP-2.8, images are loaded and saved as .XCF files. Your JPG image has been loaded as XCF. GIMP offers you to Overwrite image-name.jpg or → to open the «Export Image» dialog.
The dialog opens with the file name already typed in the Name box, with the default.png extension. Delete the existing extension and type JPG instead, and GIMP will determine the file type from the file extension. Use the file extension list, red circled in the figure above, to see the types supported by GIMP. The supported extensions change depending on your installed libraries. If GIMP complains, or if «JPEG» is grayed out in the Extensions menu, cancel out of everything and step through the Раздел 4.7, «Изменить режим». Once you have done this, click . This opens the «Export Image as JPEG» dialog that contains the quality control.
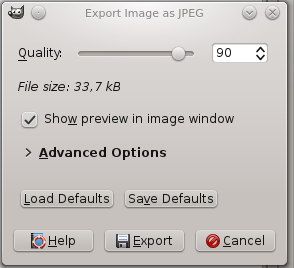
The «Export Image as JPEG» dialog uses default values that reduce size in memory while retaining good visual quality; this is the safest and quickest thing to do.
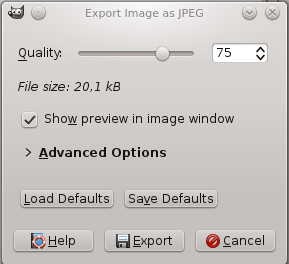
Reduce the image Quality to make the image even smaller. Reduced quality degrades the image, so be certain to check «Show preview in image window» to visually gauge the degradation. A Quality setting of 10 produces a very poor quality image that uses very little disk space. The figure below shows a more reasonable image. A quality of 75 produces a reasonable image using much less disk space, which will, in turn, load much faster on a web page. Although the image is somewhat degraded, it is acceptable for the intended purpose.
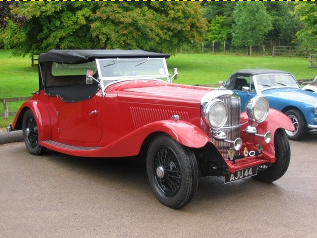
И наконец, сравнение той же картинки и разными степенями сжатия:
Рисунок 3.25. Пример высокого сжатия JPEG

Качество: 10; Размер: 3,4 килобайтов

Качество: 40; Размер: 9,3 килобайтов
Рисунок 3.26. Пример среднего сжатия JPEG

Качество: 70; Размер: 15,2 килобайтов

Качество: 100; Размер: 72,6 килобайтов