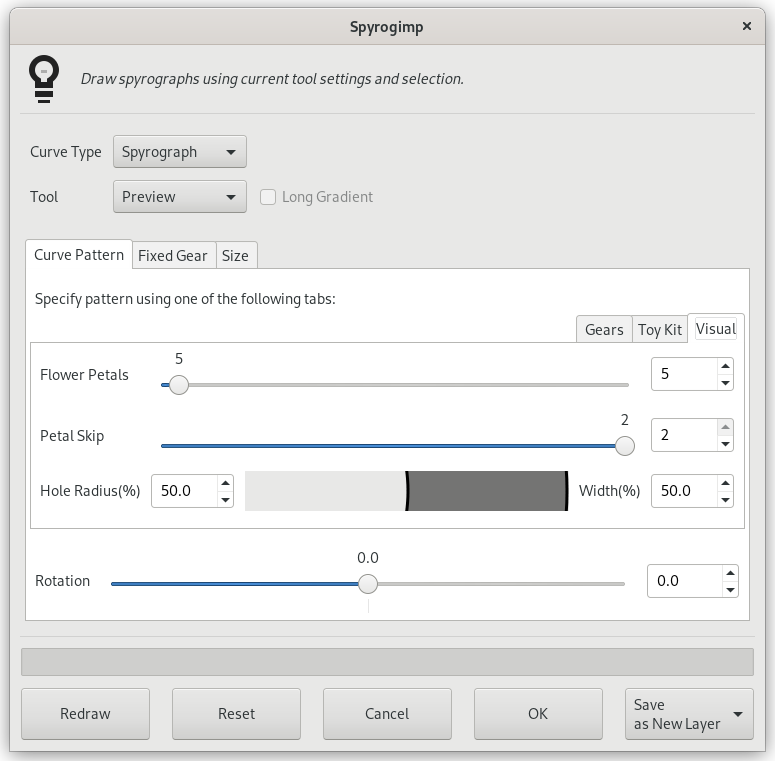
| 14.24. Spyrogimp | ||
|---|---|---|

|
14. Filtre til gengivelse |  |
| 14.24. Spyrogimp | ||
|---|---|---|
|
|
14. Filtre til gengivelse | |
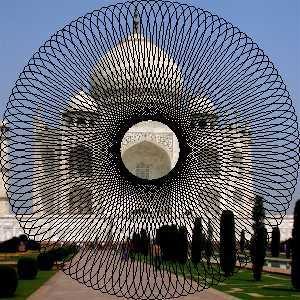
This filter draws Spirographs, Epitrochoids, and Lissajous curves. Immediate feedback is provided, by drawing to a temporary layer.
It reproduces curves drawn by Spirograph© toys. Here is an example from Wikipedia showing what gears and holes are:
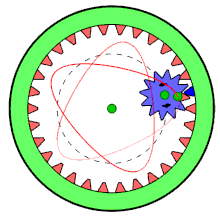
Moving gear is inside fixed gear and only one hole is used.
Much of the behavior of the plugin is determined by options set outside of the plugin, such as the current selection, or the settings of GIMP's tools. These settings can be changed while the plugin is running.
![[Bemærk]](images/note.png)
|
Bemærk |
|---|---|
|
In contrast to options within the plugin, changing the current selection or tool settings will not redraw the pattern. To show the changes, click the button at the bottom of the plugin. |
As in most plugins, the current selection determines the area where the pattern will be rendered. Typically, this would be a rectangular selection. There is however, an additional way the selection can be used.
The selection can be used as the shape of the fixed gear (under the Fixed Gear tab). The plugin will attempt to extract shapes from the selection, and draw a pattern inside of each shape. This is more interesting if you select a non-rectangular selection.
To have the pattern hug the boundaries of the shapes, use hole percent=100.
Spyrogimp uses GIMP's tools to perform the drawing. All the settings with which the drawings are done are taken from the chosen tool. For example, if you want to use the tool (by choosing it from the Tool menu), then all the settings of this tool will be used for drawing. You can change any of the tool settings while the plugin is running, and press the button to see how the pattern looks.
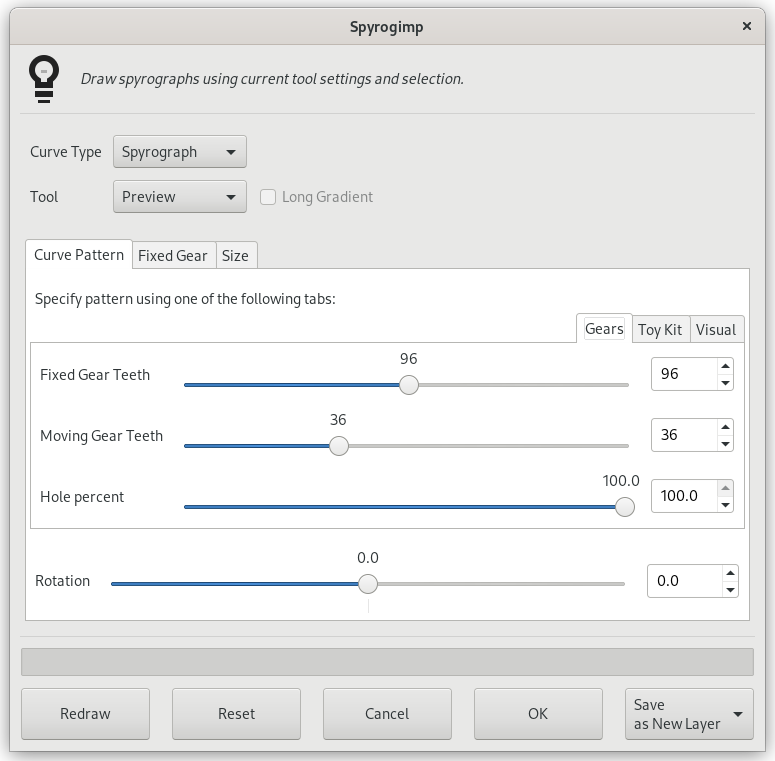
Most of the options are organized under three tabs: Curve Pattern, Fixed Gear, and Size.
|
|
Bemærk |
|---|---|
|
This filter has been totally reimplemented since GIMP 2.10.10. If you are using an older version of GIMP, your dialog will look different. |
The available curve types are: , , , and . These correspond to physical models for drawing them, using either gears or springs. Spyrograph and Epitrochoid curves are obtained by using two gears - a fixed gear, and a moving gear. A pattern is obtained when the moving gear is rotated inside the fixed gear. When the moving gear is outside the fixed gear, an pattern is generated. The curve uses the fixed gear, but instead of a moving gear, there is a spring that moves perpendicular to the fixed gear's edge. The curve is generated by two springs, which move on the x and y axis. It does not use the fixed ring at all, and thus is not affected by changing it.
Figur 17.372. “Spyrogimp” Curve Types
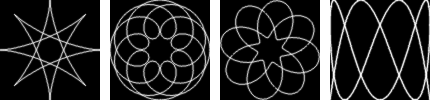
Curve types from left to right: Spyrograph, Epitrochoid, Sine and Lissajous.
The GIMP tool with which to draw the pattern. The first tool is named and its purpose is to draw quickly, rather than beautifully - so the pattern can be previewed. The other available tools are: , , , , , and .
When unchecked, the current tool settings will be used - this can either produce a gradient or not, depending on the tool settings. When checked, the plugin will produce a long gradient to match the length of the pattern, based on the current gradient, the "Reverse" setting, and the Repeat mode from the gradient tool settings. Setting the Repeat mode to will produce a pattern that changes continuously, with no abrupt breaks. This is done by using the gradient followed by its reverse. Any other Repeat mode will simply use the gradient from start to finish.
Figur 17.373. “Spyrogimp” Long Gradient Examples
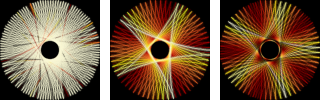
The left image, without Long Gradient, used the paintbrush tool with a gradient. The two right images were generated with the same gradient, but with Long Gradient checked. The right image used the Repeat mode.
Figur 17.374. “Spyrogimp” filter options (Curve Pattern)
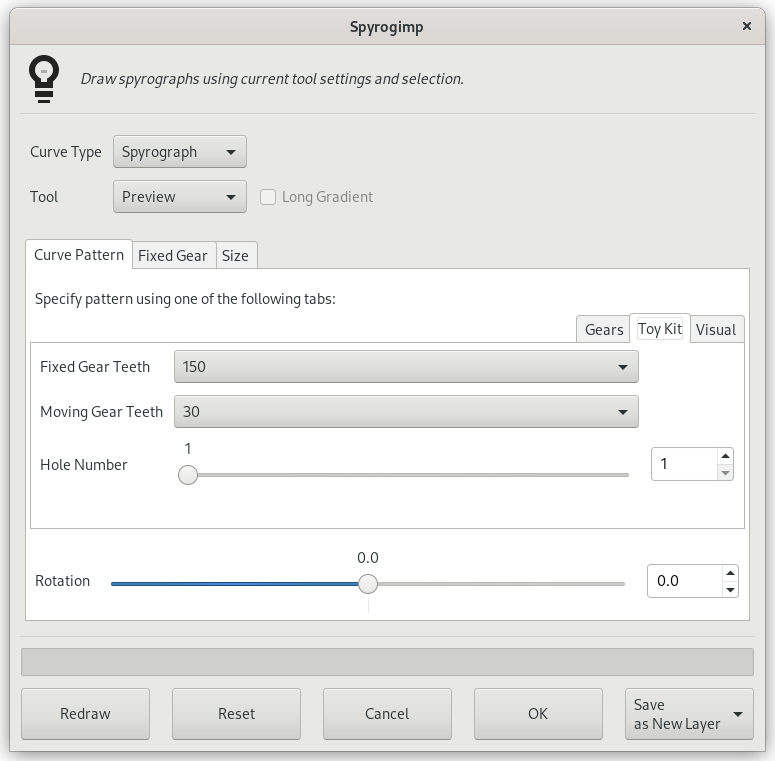
The inner Toy Kit tab is shown on the right.
Specify a pattern using the Gears, Toy Kit or Visual tabs. The pattern is based only on the settings of the active tab. Toy Kit is similar to Gears, but it uses gears and hole numbers which are found in toy kits. If you follow the instructions from the toy kit manuals, you should obtain similar results.
Number of teeth of fixed gear. The size of the fixed gear is proportional to the number of teeth.
Number of teeth of moving gear. The size of the moving gear is proportional to the number of teeth.
How far is the hole from the center of the moving gear. 100% means that the hole is at the gear's edge.
The Toy Kit tab also has Fixed Gear Teeth and Moving Gear Teeth options. In this case, however, they are limited to gear sizes that are provided with toy kits for drawing Spyrographs.
Hole #1 is at the edge of the gear. The maximum hole number is near the center. The maximum hole number is different for each gear.
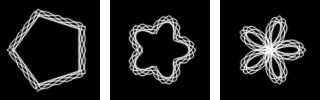
Figur 17.375. “Spyrogimp” Toy Kit Examples
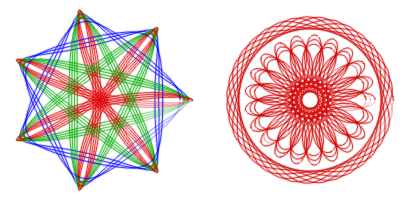
The Toy Kit helps recreate designs from the toy kit. The left image uses a 105 fixed gear, and a 30 (blue), 45 (green) and 60 (red) moving gears, where each moving gear was used several times with Hole Number varying from 3 to 7. The right image also uses the 105 fixed ring, with moving ring 24 (Hole Number 4), and moving ring 80 (Hole numbers 16, 18, 20).
Figur 17.376. “Spyrogimp” filter options (Curve Pattern)
The Visual tab is shown in the middle on the right side.
The Visual tab creates more rounded, flower petal like patterns. It has the following settings:
The number of flower petals to draw.
The number of petals to skip.
The size of the hole.
The width of the drawing.
Below the tabs there is an additional option.
Rotation of the pattern, in degrees. The starting position of the moving gear in the fixed gear. Note that this also changes the pattern when drawing Lissajous curves.
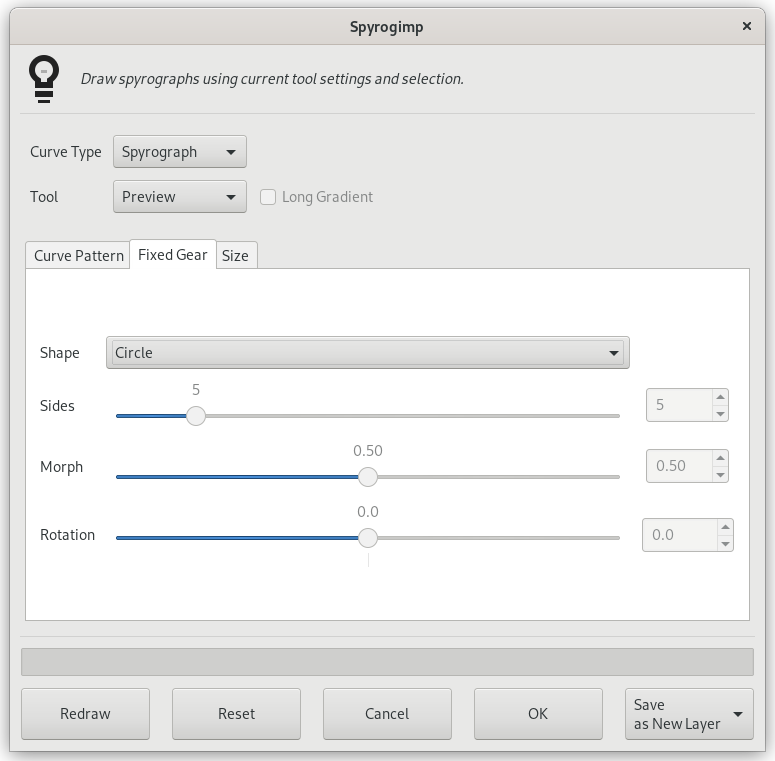
The shape of the fixed gear to be used inside current selection.
is a long round-edged shape provided in the toy kits.
hugs the boundaries of the rectangular selection, use hole=100 in Gear notation to touch boundary. To generate a narrow frame width, use a small number of teeth for the moving gear.
will hug boundaries of current selection - try something non-rectangular.
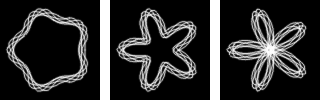
morphs from an n-sided polygon (morph=0) to an n-sided star (morph=0.3) to a crazy flower (morph=1).
with morph=0, it is just like a circle, but becomes more wavy as morph increases.
morphs from a polygon (morph=0) to a scalloped circle.
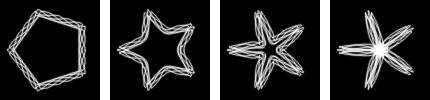
Figur 17.378. “Spyrogimp” Shape Examples
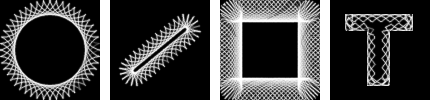
From left to right, , , , and shapes of the fixed gear. The selection in the right image was generated by selecting a large letter "T" that was produced by the text tool.
Number of sides of the shape.
This applies only to the , , and shapes. Otherwise this option is disabled.
Morph fixed gear shape.
This applies only to the , , and shapes. Otherwise this option is disabled.
Rotation of the fixed gear, in degrees.
Margin from the edge of selection. This controls the size of the pattern.
When unchecked, the pattern will fill the current image or selection. When checked, the pattern will have same width and height, and will be centered. The difference between checked and unchecked will only be noticed if the size of the width and height of the selection differ.
If you change the settings of a tool, change color, or change the selection (i.e., any settings outside of the plugin that affect the pattern), press this to update the preview to see how the pattern looks.
Resets the dialog to its default settings.
Delete the temporary layer, and exit the plugin.
Render pattern to image. If Keep Layer is unchecked, this might take some extra time to complete, as the pattern needs to be redrawn on the active layer.
Determines what will happen to the temporary layer once is pressed. If checked, then once OK is pressed, the temporary layer is kept, and the plugin exits quickly. If unchecked, the layer is deleted, and the pattern is redrawn on the active layer.
One reason not to keep the layer, is that by using specific paint modes, redrawing the pattern on the active layer can give interesting results. This can produce a different pattern than when it been drawn on a new layer.