| 4.2. Align and Distribute | ||
|---|---|---|

|
4. Transformeergereedschappen |  |
| 4.2. Align and Distribute | ||
|---|---|---|
|
|
4. Transformeergereedschappen | |
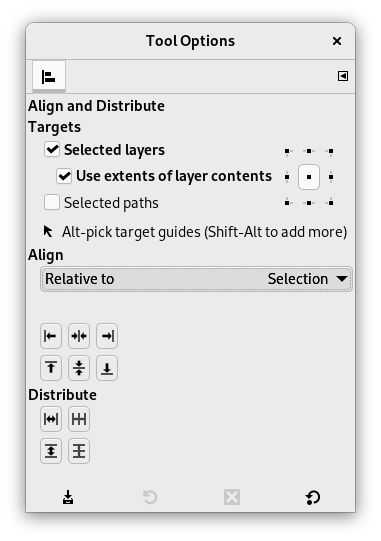
The Align and Distribute tool is useful to align the image layers with various image objects. When this tool is selected, the mouse pointer turns to a small hand. By clicking on an element of a layer in the image, you choose the layer which will be moved (with Shift + click, you can choose several layers to be aligned); this focused layer has small squares in corners and is called source. Then buttons in the dialog become active (they remain active during all the GIMP session): they allow you to select the target, i.e other layer, selection, path, the source will be aligned with.
U kunt het gereedschap op verschillende manieren activeren:
From the main menu: → → .
By clicking the tool icon
![]() in the Toolbox.
in the Toolbox.
By pressing the Q keyboard shortcut.
U kunt verschillende lagen selecteren door Shift ingedrukt te houden terwijl u op de lagen klikt.
![[Tip]](images/tip.png)
|
Tip |
|---|---|
|
Soms is het gemakkelijker om meerdere lagen te kiezen door een gebied aan te wijzen: klik op een hoek van een denkbeeldig rechthoekig gebied waar alle te selecteren lagen in passen. Sleep de muisaanwijzer naar de hoek ertegenover. Nu wordt elke laag, die zich volledig binnen de gesleepte rechthoek bevindt, geselecteerd. Merk op dat er nu geen doel “eerste item” is waarop de geselecteerde lagen kunnen worden uitgelijnd. |
Normally, tool options are displayed in a window attached under the Toolbox as soon as you activate a tool. If they are not, you can access them from the main menu through → → which opens the option window of the selected tool.
In this drop-down list, you select the target, the image object the layer will be aligned with.
Afbeelding: het doel is de hele afbeelding.
Selectie: de selectie is het doel.
Picked reference object: The selected object (layer, path, guide) on the canvas.
Deze knoppen worden actief wanneer een doel is geselecteerd.
![]() : to
align left edge of source with left edge of target.
: to
align left edge of source with left edge of target.
![]() : to
align center of source on the
vertical middle line of target.
: to
align center of source on the
vertical middle line of target.
![]() : to
align right edge of source with right edge of target.
: to
align right edge of source with right edge of target.
![]() : to
align top edge of source with top edge of target.
: to
align top edge of source with top edge of target.
![]() : to
align center of source on the
horizontal middle line of target.
: to
align center of source on the
horizontal middle line of target.
![]() : to
align bottom edge of source with bottom edge of target.
: to
align bottom edge of source with bottom edge of target.
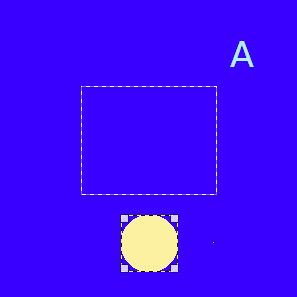
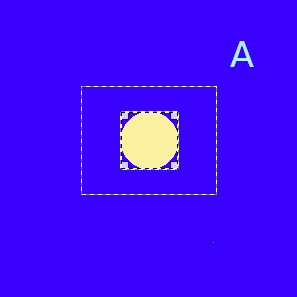
Een afbeelding met een selectie, laag #1 (achtergrond) is actief, laag #2 is bijgesneden tot inhoud, laag #3 is een tekstlaag.
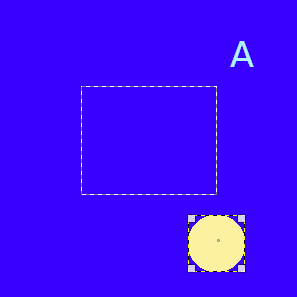
We klikken op de gele cirkel: laag #2 wordt de bron. We willen deze bron in het midden van de selectie hebben: de optie Ten opzichte van is ingesteld op “Selectie”.
Horizontale knop ingedrukt
Verticale knop ingedrukt
These options are used when you have several targets and want to arrange them. Here, layers selected with Shift + Click are called “targets”. But they are actually sources. “Relative to” options are active to set the target. These transformations are usually relative to “Image”.
These options work as Align options, but you can distribute sources evenly.
![]() : to distribute sources evenly
horizontally.
: to distribute sources evenly
horizontally.
![]() : to distribute centers of sources
with center of the target horizontally.
: to distribute centers of sources
with center of the target horizontally.
![]() : to distribute sources evenly
vertically.
: to distribute sources evenly
vertically.
![]() : to distribute centers of sources
with center of target.
: to distribute centers of sources
with center of target.
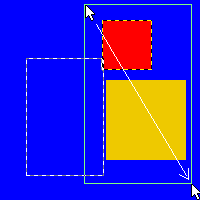
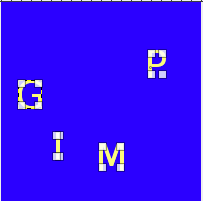
Afbeelding 14.93. Voorbeeld voor de opdrachten “Verdelen”
Base image: three layers.
![]() (Distribute right edges of targets) will be used.
(Distribute right edges of targets) will be used.
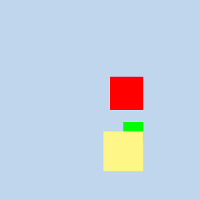
Afbeelding 14.94. Bron
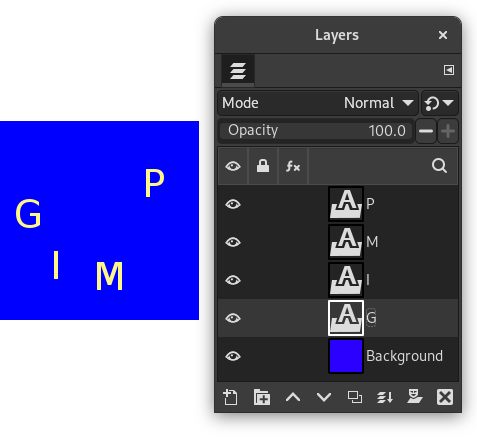
We selecteren ze als bronnen met Shift + Click.

The default target (Relative to) is
“Image”. We used the
![]() (Distribute vertical centers of targets) command.
(Distribute vertical centers of targets) command.

After using the
![]() (Distribute targets
evenly in the horizontal).
(Distribute targets
evenly in the horizontal).