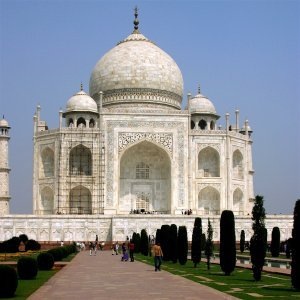
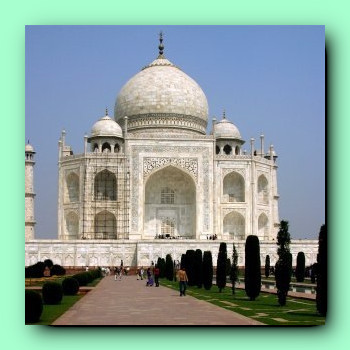
With this GEGL filter you can add a drop-shadow to an image, a selection or a text. You may choose the color, position, and size of the shadow.
This filter is found in the main menu under → → .
It is available if your image holds an Alpha channel (see 7.36절. “Add Alpha Channel”). Otherwise, it is disabled.
- Presets, “Input Type”, Clipping, Blending Options, Preview, Merge filter, Split view
-
![[참고]](images/note.png)
참고 These options are described in 2절. “공통 특징”.
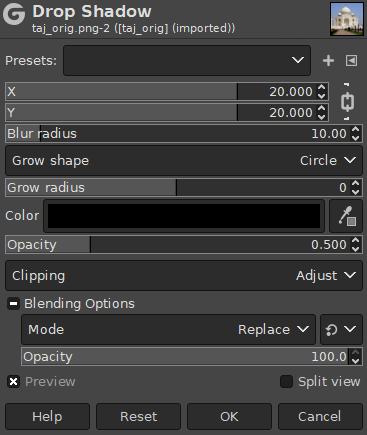
- X, Y
-
The layer containing the drop shadow will be moved horizontally by X pixels, vertically by Y pixels. So, X and Y offset determine where the shadow will be placed in relation to the image. High values make the imaginary source of light look like it's far away in horizontal or vertical direction, and low values will make it look closer to the image.
The offsets may be negative, leading to a shadow on the left of the selection if offset X < 0, or above the selection if offset Y < 0.
Out of sheer curiosity, you can see the drop shadow layer clearly by setting blur radius to 0 and moving the drop shadow with X and Y.
- Blur radius
-
After creating the shadow, a Gaussian blur with the specified radius is applied to the shadow layer, resulting in the realistic appearance of the drop shadow.
- Grow shape
-
You can choose the shape that will be used to expand or contract the shadow. The choices should be self explanatory: Circle (default), Square, or Diamond.
- Grow radius
-
The distance to expand the shadow before blurring. A negative value will contract the shadow instead.
- Color
-
You can choose the color of the shadow here. Just click on the color swatch, and select a color when the color selector pops up, or use the eye-dropper to pick a color from the image.
- Opacity
-
Shadow opacity. It defaults to 0.500, but you may select any other value from 0 (full transparency) to 2.00 (full opacity) here.
This GEGL Drop Shadow filter is surprising: if you apply the filter directly to the image as you do with the legacy filter, you get nothing, unless you have transparent areas in your image.
To get the same result as the legacy filter:
-
Open your original image.
-
Open a new image, a little bigger than your original image, filled with transparency.
-
Copy your original image and paste it into the new image. A floating selection is created in the Layers dialog.
-
Anchor the floating selection.
-
Select → .
-
Select → : set layer size to the same size than your image and filled with transparency; click on the button. Then click on the button.
-
Open the Drop Shadow dialog: the drop shadow is displayed in the on-canvas preview. You can change the default options values.
-
Eventually, add a new layer, with the same size as the image and filled with the color you want to give to the background. Move this layer to the bottom of the layer stack.
-
Click on the to apply filter.
Applying filter to a selection:
-
Open your original image.
-
Open a new image, the same size as your original image, filled with transparency.
-
Create the selection
-
Copy the selection and paste it into the new image. A floating selection is created in the Layers dialog.
-
Anchor the floating selection.
-
Select → .
-
Select → (with transparency).
-
Open the Drop Shadow dialog: the drop shadow is displayed in the on-canvas preview. You can change the default options values.
-
Eventually, add a new layer, with the same size as the image and filled with the color you want to give to the background. Move this layer to the bottom of the layer stack.
You can also use your original image as background: undo the selection, copy the image and paste it as new layer in the new image. Move the new layer to the bottom of the layer stack.
-
Click on the to apply filter.
Applying filter to a text:
The procedure is more simple to create a drop shadow for a text: create the text and apply the Drop Shadow filter directly.


