-
В зависимости от планов художника на конкретное изображение, для одних изображений применение тональной проекции с помощью операции «Цвета → Экспозиция», работающей с числами с плавающей запятой, может больше пойти на пользу, чем для других. Конечно, ваш опыт может отличаться от моего, но обычно пошаговая инструкция, описанная на этой странице, даёт наилучшие результаты для таких пейзажей и трёхмерных пространств с выраженной тональной разницей между тенями и бликами, как, например, типичные фото «небо и земля», сделанные в солнечный день.
-
Пошаговая инструкция по добавлению только одной опорной точки положительной компенсации экспозиции, описанная на этой странице, действительно, очень эффективна. В зависимости от изображения, может понадобиться размыть маску с помощью алгоритма, сохраняющего границы, и/или скорректировать маску с помощью операций «Цвета → Экспозиция», «Кривые» и им подобных. Но изменять маску следует только после применения к ней автоматического растягивания контраста. В противном случае результаты могут быть непредсказуемыми: при работе со значениями, выходящими за пределы диапазона, корректировка гаммы даёт странные результаты, а «Кривые» суммарно обрезают эти значения.
-
Для добавления более одной опорной точки компенсации экспозиции можно использовать один или более слоёв положительной компенсации экспозиции. В любом случае маски слоёв необходимо будет тщательно настраивать, что полностью зависит от конкретного изображения, а также от желаемых результатов. На Рисунке 7 показан пример использования двух слоёв компенсации экспозиции для добавления двух с половиной опорных точек компенсации экспозиции теням и полутонам изображения:
Использование инструмента GIMP «Уровни» с числами с плавающей запятой с неограниченной точностью и масок слоёв для добавления двух опорных точек положительной компенсации экспозиции теней и полутонов фотографии фруктового грузовичка, сделанной на ярком солнце.
Рисунок 7
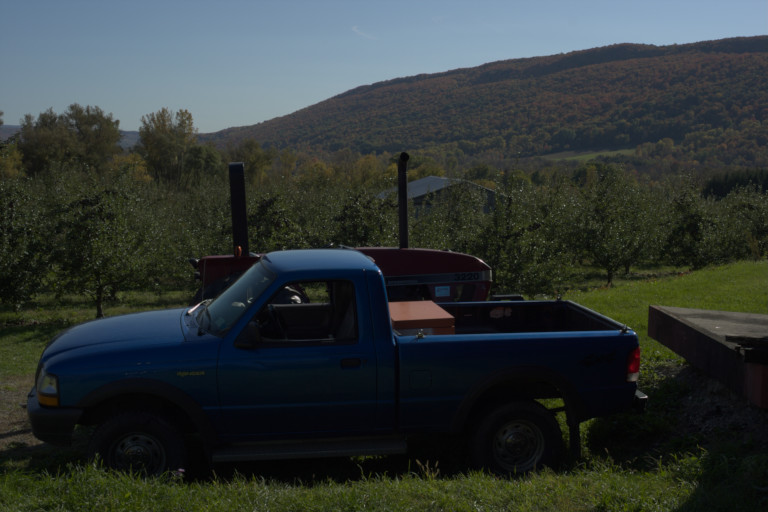
Изображение из камеры, недоэкспонированное для избежания пересвета светлых областей.
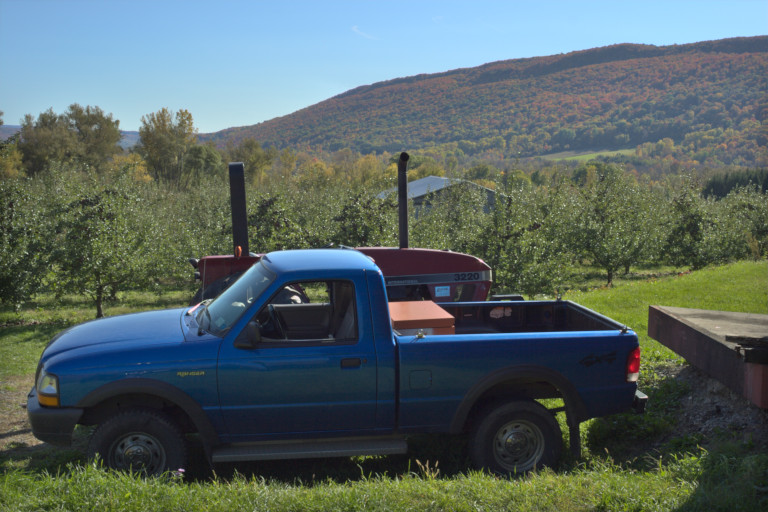
После применения тональной проекции/восстановления теней с помощью операции «Цвета → Экспозиция», работающей с числами с плавающей запятой и высоким значением глубины цвета.
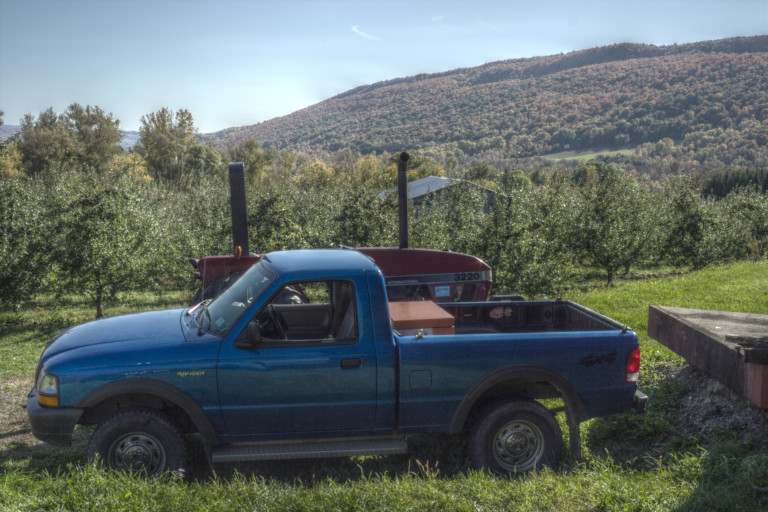
Для сравнения, тональная проекция по Мантиуку, с использованием исходных значений GEGL
Использование операции GIMP «Цвета → Экспозиция» и двух масок слоёв для добавления двух с половиной опорных точек положительной компенсации экспозиции теням и полутонам фотографии фруктового грузовичка, сделанной на ярком солнце.
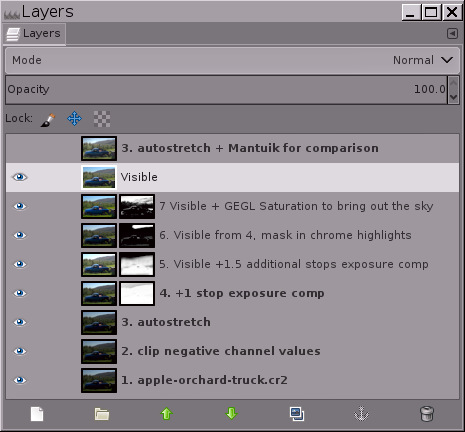
Снимок экрана со стопкой слоёв, которая была использована для выполнения тональной проекции фотографии фруктового грузовичка. Ручное выполнение тональной проекции даёт полный контроль над итоговым изображением. Алгоритмы тональной проекции по Мантиуку и другие «автомагические» алгоритмы тональной проекции используют большой объём ресурсов ЦП, непредсказуемы и часто дают неестественно выглядящий результат.
-
Перед использованием операции «Цвета → Экспозиция» для добавления положительной компенсации экспозиции контраст базового слоя должен уже быть растянут до максимальных значений динамического диапазона. Самым простым способом сделать это является применение операции → → . Не забудьте отметить пункт Сохранять цвета.
Замечание для тех, кто раньше не работал с редактором изображений, использующим числа с плавающей запятой: операция → → может привести к неожиданным результатам. Динамический диапазон цветов изображения может быть очень сильно урезан, дав в итоге либо осветлённые тени, либо затемнённые пятна, либо и то и другое:
До и после применения → → к базовому слою, плюс окончательная версия изображения после тональной проекции с помощью → :
Рисунок 8
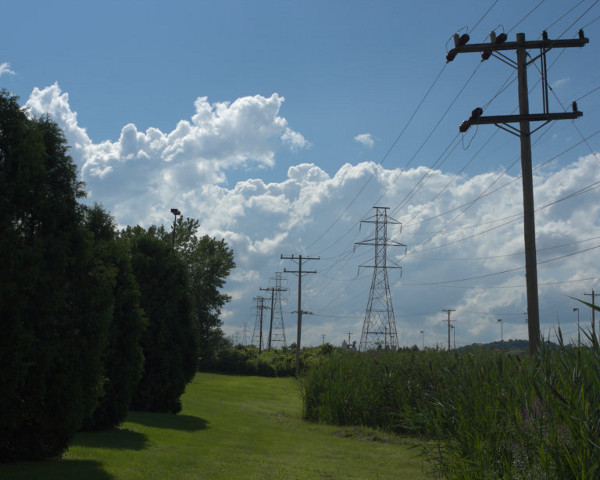
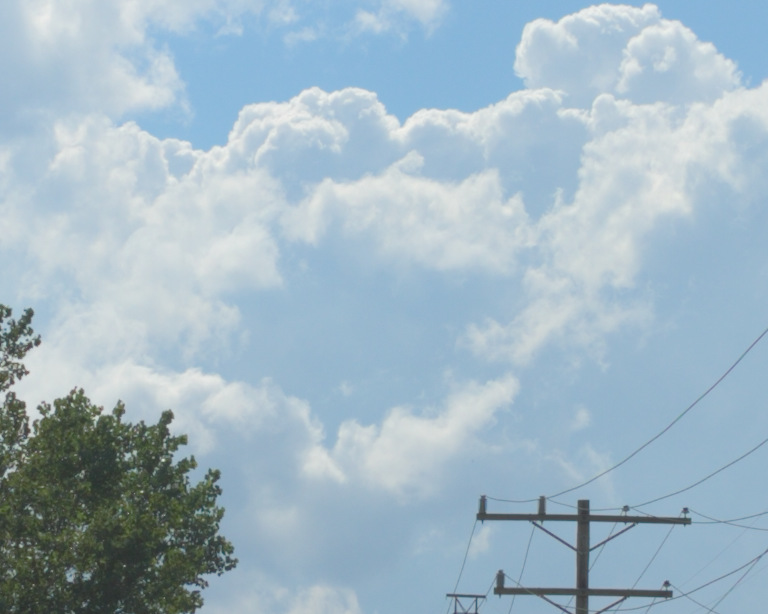
1. Изображение из камеры
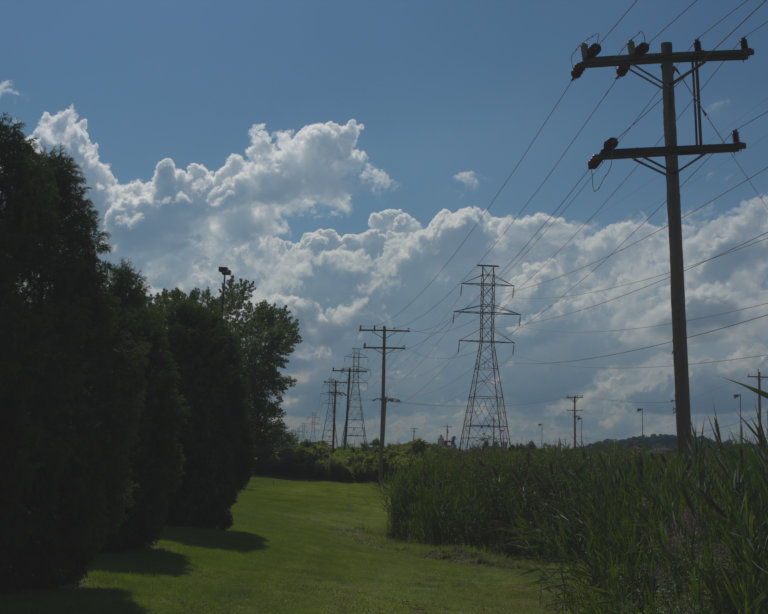
2. После выполнения → → .
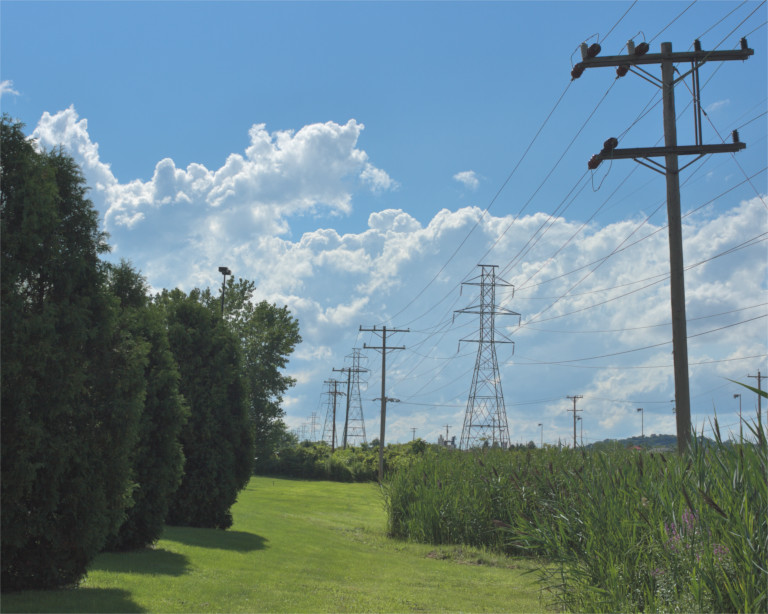
3. Окончательная версия изображения «Линии передачи».
-
Этот файл в формате raw, ориентированный на отображаемые объекты с интерполяцией, из обработчика файлов PhotoFlow (который располагает расширением GIMP для облегчения открытия файлов raw). Значения канала RGB данного файла выходят за пределы отображаемого диапазона, и они будут возвращены в диапазон с помощью операции → → .
-
После применения → → , тени стали светлее, а светлые области — темнее, в связи со сжатием динамического диапазона для вмещения его в отображаемый диапазон. Кажется, что такое редактирование — шаг в неправильном направлении, но на самом деле он необходим.
-
Вот окончательный вариант изображения «Линии передачи» после тональной проекции интерполированного файла raw, ориентированного на отображаемые объекты, с использованием процедуры, описываемой в данном руководстве.
Как показывает файл raw, это изображение уходящих вдаль линий передач является типичным результатом фотографирования в полдень ярким солнечным днём: небо и облака отлично смотрелись сразу после создания снимка, но почва была слишком тёмной. Поэтому изображение может выиграть от применения тональной проекции для осветления теней и полутонов. Первый шаг — применение → → для возвращения в отображаемый диапазон значений плавающей запятой от 0,0 до 1,0 всех значений каналов меньше 0,0f или больше 1,0f.
Выполнение операции → → для возвращения значений каналов в отображаемый диапазон не кажется шагом в правильном направлении по выполнению тональной проекции конкретно для этого изображения, но на самом деле это правильный шаг. Применение → для добавления положительной компенсации экспозиции теням и полутонам не будет иметь эффекта, если в изображении есть значения, выпадающие из отображаемого диапазона.
-
-
Отбрасывание «ненужных» данных теней и светлых областей: иногда интерполированные файлы raw фотографий трёхмерных пространств с высоким динамическим диапазоном содержат вкрапления пикселей теней и освещённых областей, фактически не содержащих полезных данных. Самое простое, что можно сделать с такими пикселями — применить «Цвета → Экспозиция» для настройки желаемых значений точек чёрного и точек белого, а затем обрезать итоговые данные, выходящие из диапазона.
-
Бесполезные данные световых областей: На фото «Линии передач», показанном на рис. 8 выше, после применения → → , ничтожные 48 пикселей заняли почти половину тонального диапазона (см. гистограмму справа). Небольшое расследование с помощью инструмента GIMP «Порог» показало, что все 48 пикселей являются пиковыми значениями световых бликов от керамических изоляторов на столбе линии передач на переднем плане.
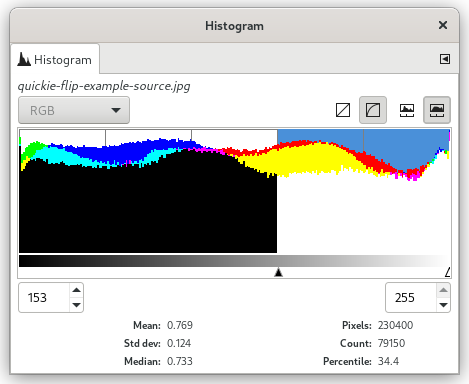
В случаях, когда почти половина гистограммы занята разбросанными по изображению зеркальными бликами, самым лучшим и простым решением является обрезка пикселей. В случае изображения «Линии передач» обсуждаемые 48 пикселей фактически не содержали никаких данных. Используйте → для поднятия точки белого, а затем → для непосредственной обрезки данных канала в светлых областях (на этот раз отметив пункт Обрезать значения пикселей выше этой границы).
-
Бесполезные данные теней: некоторые обработчики формата raw могут давать изображения с отрицательными значениями каналов. И предыдущие операции редактирования в GIMP с высоким значением глубины цвета могли в результате дать отрицательные значения. Если применение → → к базовому слоя изображения сильно уменьшает общий удельный вес теней, то причиной этому — отрицательные значения канала RGB. Одним из решений может быть применение → для перемещения точки чёрного на нужную пользователю позицию, а затем обрезка отрицательных значений канала. Вот два способа обрезки отрицательных значений канала:
-
Используйте → , убедившись, что снят флажок Обрезать значения пикселей выше этой границы.
-
Или же создайте сплошной чёрный слой над базовым слоем. Укажите режим смешивания «Только светлое» и создайте новый слой «Из видимого».
-
-
-
Размывание маски для восстановления микроконтраста: создание обратной маски для слоя, используемого для добавления положительной компенсации экспозиции обязательно слегка сплющит микроконтраст.В зависимости от художественных намерений относительно конкретного изображения, для восстановления микроконтраста может понадобиться размыть маску. Хитрость состоит в том, чтобы размыть маску и избежать появления «нимбов» вокруг объектов. Гауссово размывание с малым радиусом порождает малые, но болезненно очевидные нимбы вокруг тёмных границ. Гауссово размывание с большим радиусом иногда эффективно, но с такой же частотой порождает и большие очевидные нимбы, разделяющие светлые и тёмные части изображения. Для многих изображений лучшим решением является размыть маску с помощью сохраняющего границы фильтра, например, с помощью двустороннего сглаживающего фильтра GIMP G’MIC:
Добавление компенсации экспозиции с применением и без применения двустороннего сглаживания маски.
Рисунок 9
Без применения двустороннего сглаживания маски, микроконтраст сплющен.

После применения двустороннего сглаживания к маске, микроконтраст восстановлен.
Добавление компенсации экспозиции в сочетании с обратной маской в оттенках серого действительно сплющивает микроконтраст, что может являться, а может и не являться желаемым результатом, в зависимости от намерений художника. Для восстановления микроконтраста попробуйте использовать размывание с сохранением границ, например с помощью двустороннего сглаживающего фильтра GIMP G’MIC. GIMP G’MIC неприменим к маскам слоёв. Обходным решением тут является преобразовать неразмытую маску в выделение, сохранить выделение в канал, а затем перетащить канал на стопку слоёв для размывания.
-
Необходимо специально упомянуть базовый фактор применения «Цвета → Экспозиция» для добавления положительной компенсации экспозиции изображениям с тёмными тенями и полутонами: не только операция GIMP «Цвета → Экспозиция», работающая с высоким значением глубины цвета, имеет неограниченную точность при работе с числами с плавающей запятой, но и маски слоёв также имеют неограниченную точность.
Если бы обратные маски в оттенках серого обрезались суммарно (как в случае с редактированием при целочисленной точности), то операция, описываемая в данном руководстве, не давала бы результатов.


