| 4.2. Change the Size of an Image (Scale) | ||
|---|---|---|
 |
4. GIMPLite Quickies |  |
| 4.2. Change the Size of an Image (Scale) | ||
|---|---|---|
| |
4. GIMPLite Quickies | |
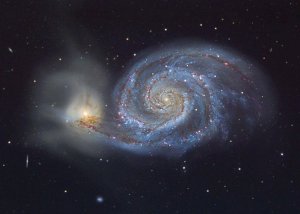
Problem: you have a huge image and you want to put it nicely for viewing on a web page. The GIMP is a quick solution. Our example image is this beauty m51_hallas_big.jpg from APOD [APOD03].
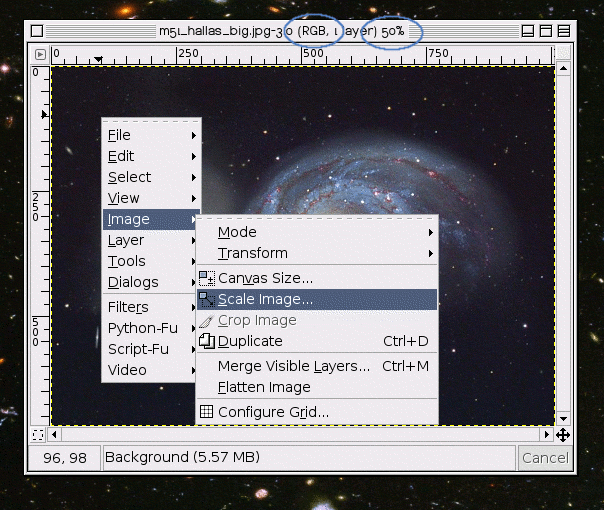
The first thing that you might notice is that The GIMP opens the image at a logical size for viewing. So, if your image is really big (like the sample image) it will display it zoomed out until it fits nicely. You can tell if The GIMP has done this by the percentage number in the title bar. Just because it looks right in this “View” doesn't mean anything.
The other thing to look at in the titlebar is the mode. If it says RGB in the title bar, you are fine. If it says Indexed or grayscale there, you should read the Section 4.6, “ Change the Mode ”.
entry in the menu and the sub menu from the screenshot should reveal itself. Click on . When ever you click an option from the menu that has ... behind it, expect another dialog. This time, you should get the Scale Image Dialog.
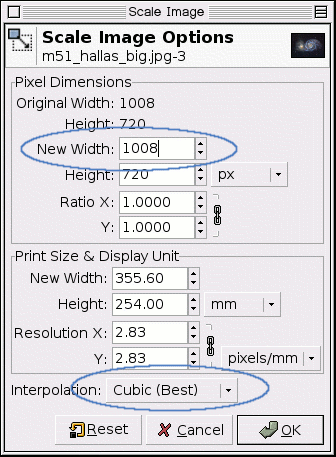
If you have a desired width, put it in the dialog at the top where it says New Width. If you don't have such a number in mind, you can steal the width of The GIMP's default image size, which is 256 pixels. This is demonstrated in the figure above.
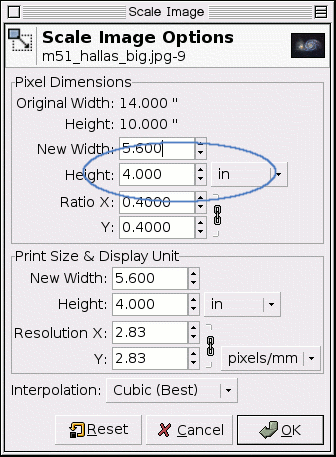
Perhaps you want your image to look more like a 4x6 inch photo on most image rendering web browsers. Simply switch the units to “inches” and put 4 inches in the height box (opting for smaller than 4x6 rather than bigger). You can see this dialog above.
Let The GIMP choose the other dimension length for you. Meaning, it will take more image knowledge to change both width and height and have it look correct. So only change one and let The GIMP change the rest. To change the other length see Section 4.4, “ Crop An Image ”.