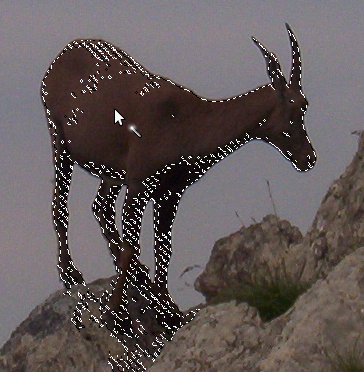
The Fuzzy Select tool is designed to select areas of the current layer or image based on color similarity.
Ao usar esta ferramenta, é muito importante escolher o ponto inicial correto. Se você selecionar o local errado, você pode obter algo muito diferente do que você quer, ou mesmo o oposto.
Fuzzy Select is a good tool for selecting objects with sharp edges. It is fun to use, so beginners often start out using it a lot. You will probably find, however, that the more you use it, the more frustrated you become with the difficulty of selecting exactly what you want, no more, no less. More experienced users find that the Path and Color Select tools are often more efficient, and use the Fuzzy Select tool less. Still, it is useful for selecting an area within a contour, or touching up imperfect selections. It often works very well for selecting a solid-colored (or nearly solid-colored) background area.
Note que como a área selecionada se expande para fora a partir do centro, não só para se propagar por pixels que se tocam: é capaz de saltar por cima de pequenos intervalos, dependendo da opção de limiar. Para aumentar/diminuir o limiar, durante a utilização de uma seleção contígua, depois de pressionar o botão, arraste o cursor em alguma direção, sem soltar o botão. Lembre-se: isso altera temporariamente o Limiar que diz quanto parecidas as cores tem que ser — o quanto você arrasta o ponteiro com o botão pressionado não está relacionado de outra forma com o tamanho da seleção.
There are different possibilities to activate the tool:
-
From the main menu: → → .
-
By clicking the tool icon
in the Toolbox.
-
By pressing the U keyboard shortcut.
A ferramenta de Seleção contígua não possui modificadores de teclas especiais, apenas os que afetam todas as ferramentas de seleção da mesma forma. Veja Seção 2.1, “Características comuns” para obter ajuda.
Ela começa a seleção quando você clica em um ponto na imagem, e se expande para fora, como água se espalhando no chão, selecionando pixels contíguos cujas cores são semelhantes ao pixel de partida. Você pode controlar o limiar de similaridade, arrastando o mouse para baixo ou para a direita: quanto mais você arrastá-lo, mais você vai selecionar a região. E você pode reduzir a seleção arrastando para cima ou para a esquerda.
You can move the selection outline using Alt + arrow keys.
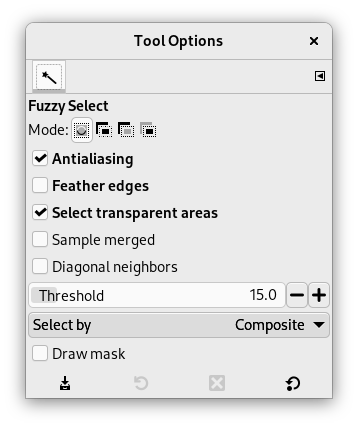
Normally, tool options are displayed in a window attached under the Toolbox as soon as you activate a tool. If they are not, you can access them from the main menu through → → which opens the option window of the selected tool. The available tool options can also be accessed by double clicking the corresponding tool icon in the Toolbox.
- Modo, Anti-serrilhamento, Feather edges
-
![[Nota]](images/note.png)
Nota See Selection Tools Options for help with options that are common to all these tools. Only options that are specific to this tool are explained here.
- Encontrando cores similares
-
These options affect the way Fuzzy Select expands the selection out from the initial point.
- Seleciona áreas transparentes
-
This option gives Fuzzy Select the ability to select areas that are completely transparent. If this option is not checked, transparent areas will never be included in the selection.
- Usar amostra combinada
-
If you enable this option, sampling is not calculated only from the values of the active layer, but from all visible layers.
For more information, see the Glossary entry.
- Diagonal Neighbors
-
When activated, the tool considers diagonally neighboring pixels as connected when calculating the affected area. In other words, instead of looking at the four orthogonal neighbors of each pixel, it looks at all eight pixels
Figura 14.20. Example for Diagonal Neighbors

A pixel with 4 orthogonal neighbors

A pixel with 4 diagonal neighbors

A pixel with 8 neighbors
Figura 14.21. Example for Diagonal Neighbors option applied
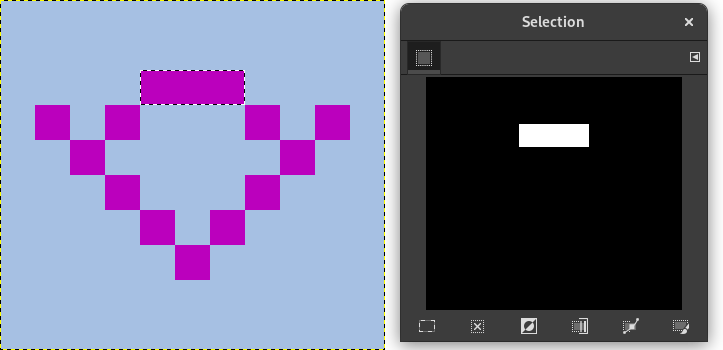
Diagonal Neighbors option unchecked
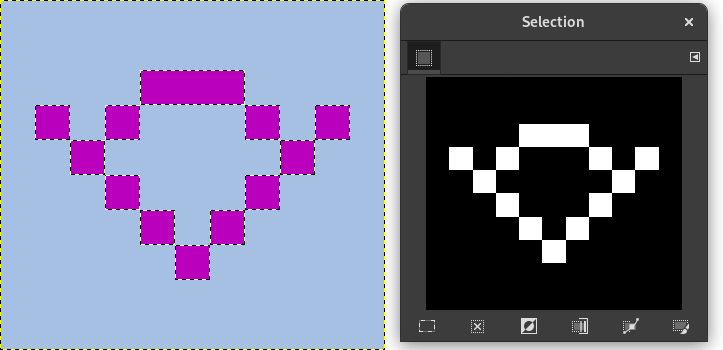
Diagonal Neighbors option checked
- Limiar
-
Esse controle deslizante determina a gama de cores que serão selecionadas no momento do clique no ponto inicial, antes de arrastá-lo: quanto maior o limite, maior a seleção resultante. Após pressionar o botão, arraste o cursor para baixo ou para a direita — isso vai aumentar o tamanho da seleção, e arrastar para cima ou para o lado esquerdo irá diminuir. Assim, você tem o mesmo conjunto de possibilidades, independentemente da configuração do Limiar: o que difere é a quantidade de arrastar que você tem que fazer para obter o resultado desejado.
- Select by
-
This option determines which component of the image GIMP uses to calculate the similarity in color.
You can choose from , , , , , , . , , , and .
- Draw Mask
-
This option can help to visualize the selection. Selected areas marked with marching ants may not be evident when selecting with Fuzzy Select. If this option is checked, selected areas will be filled with a magenta color as long as you keep pressing on the left mouse button, and this mask will disappear as soon as you release this button.
Figura 14.22. Example for Draw mask option applied
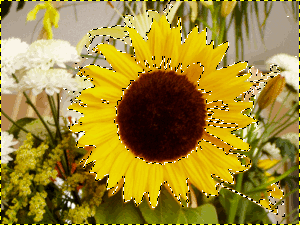
Fuzzy Select used with Draw Mask option unchecked
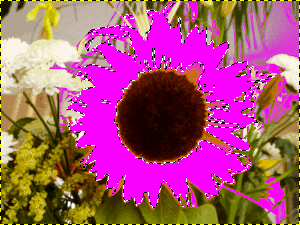
Fuzzy Select used with Draw Mask option checked, left mouse button not released yet.
