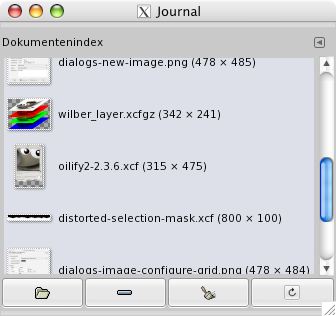
Der Dialog „Dokumentenindex“ ermöglicht Ihnen einen sehr schnellen und einfachen Zugriff auf die zuletzt in GIMP geöffneten Bilder.
Der Dialog „Ablagen“ ist dockbar. Informationen hierzu finden Sie im Abschnitt Abschnitt 2.3, „Docks und Dialoge“.
Er kann auf verschiedene Arten aufgerufen werden:
-
From the main menu: → → .
-
From the Tab menu in any dockable dialog by clicking on
 and selecting
→ .
and selecting
→ .
-
From the main menu: → → .
Durch Anklicken eines der im oberen Teil des Dialoges symbolisch dargestellten Bilder aktivieren Sie den entsprechenden Eintrag. Weitere Befehle auf den aktivierten Einträgen können Sie durch Anklicken der Knöpfe am unteren Rand des Dialoges ausführen.
Im Reitermenü des Dialoges können Sie zwischen und wählen. Bei der letzteren Anzeigeart werden nur die Vorschausymbole nebeneinander dargestellt. Im Listenmodus (Vorgabe-Einstellung) ist die Darstellung übersichtlicher, benötigt allerdings mehr Platz.
![[Tipp]](images/tip.png)
|
Tipp |
|---|---|
|
Strg+F öffnet ein Suchfeld. Siehe View as List. |
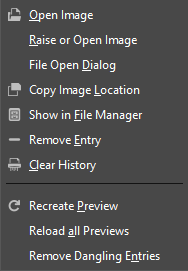
Use the Open the selected entry
![]() button or command of the dialog's
context menu, to open the image you have selected. With the
Shift key pressed, it raises an image hidden behind
others. With the Ctrl key pressed, it opens the Open
Image dialog.
button or command of the dialog's
context menu, to open the image you have selected. With the
Shift key pressed, it raises an image hidden behind
others. With the Ctrl key pressed, it opens the Open
Image dialog.
Use the Remove the selected entry
![]() button or command of the dialog's
context menu, to remove an image from the History dialog. The image
is removed from the recently open images list also. But the image itself
is not deleted.
button or command of the dialog's
context menu, to remove an image from the History dialog. The image
is removed from the recently open images list also. But the image itself
is not deleted.
Use the Clear the entire file history
![]() button or command of the
dialog's context menu, to remove all the files from the history.
button or command of the
dialog's context menu, to remove all the files from the history.
Use the Recreate Preview
![]() button or command of the
dialog's context menu, to update preview in case of change.
With Shift key pressed, it acts on all previews.
With Ctrl key pressed, previews that
correspond to files that can't be found out, are deleted.
button or command of the
dialog's context menu, to update preview in case of change.
With Shift key pressed, it acts on all previews.
With Ctrl key pressed, previews that
correspond to files that can't be found out, are deleted.
- Übersicht
-
You can get the document history context menu by right clicking on a file in the document history dialog, or by clicking the tab menu button
and opening the
submenu.
Several of the operations are also available through buttons at
the bottom of the dialog. Those operations are documented above.
The remaining ones are listed below.


