| 5.4. Esporta file | ||
|---|---|---|

|
5. File related Dialogs |  |
| 5.4. Esporta file | ||
|---|---|---|
|
|
5. File related Dialogs | |
GIMP usa il comando Salva solo per salvare le immagini nel suo formati nativo XCF. Per salvare le immagini in altri formati è necessario usare il comando Esporta.
You can access this command in the main menu through → ,
or from the keyboard by using the shortcut Ctrl+Shift+E.
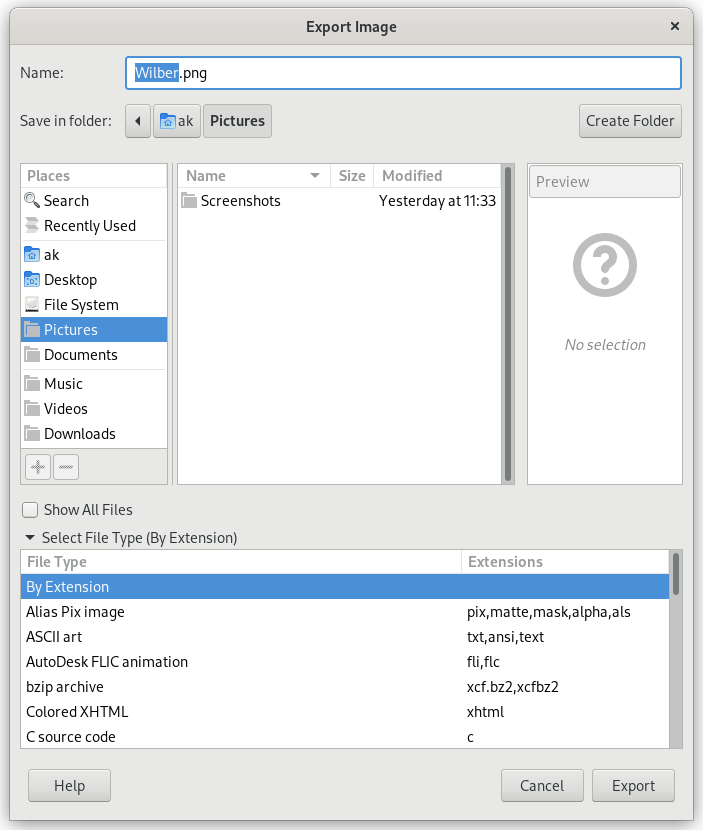
In the file browser, you can edit filename and extension directly in the Name field (default is «Untitled.png») or by selecting an existing file to override in name list. Navigate the folders if you prefer a different image destination. You can also create a new folder if necessary.
Seleziona il tipo di file. If you expand this option, you can select the file format and related file extension for your file in the list.
Le finestre di dialogo dei vari formati dei file sono descritte in Sezione 1, «File».
Quando il nome e la destinazione del file sono stati impostati, fare clic su . Si aprirà la finestra di dialogo di esportazione, specifica per quel formato.
![[Nota]](images/note.png)
|
Nota |
|---|---|
|
Se il nome che si ha inserito esisteva già, verrà chiesto se si vuole sovrascrivere o meno il file. Se viene selezionata una maschera di livello o un canale invece di un livello e il formato di esportazione non lo supporta, verrà richiesta conferma. |
If you have loaded a non-XCF file, the → command (followed by the file name) allows you to overwrite the original file, keeping its file format.
If you modify an image that you already have exported before, the → command (followed by the file name) allows you to export the file again in the same file format.