![[Notă]](images/note.png)
|
Notă |
|---|---|
|
Explicațiile sunt inspirate în mare parte din ghidurile lui Pat David https://patdavid.net/2011/12/getting-around-in-gimp-skin-retouching.html și https://patdavid.net/2014/07/wavelet-decompose-again.html. |
Fig. 17.54. Exemplu pentru filtrul „Descompunere Wavelet”
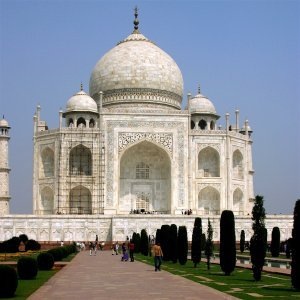
Imagine originală

„Descompunerea Wavelet” aplicată. Numai scalarea 2 este făcută vizibilă în grupul de straturi.
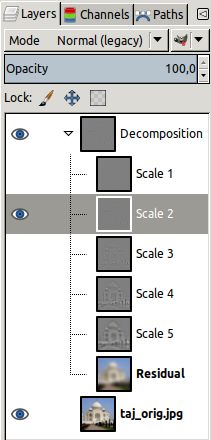
This filter decomposes the active layer or selection into several layers, named „scales”, each of them containing a particular set of details. The finest details are in the first layer, each layer below it has less details until you get to the last one, at bottom. This last layer is called „residual” and holds what is left after all detail layers have been removed; it represents the global contrast and colors of the image.
Each of the scale layers are set to be combined using the Grain Merge layer mode. This means that pixels that have a 50% value will not affect the final result. So, painting a wavelet scale with neutral gray (R:50% G:50% B:50%) will erase details.
Note that for images using integer precision, the legacy grain merge mode is used. This avoids imperfect reconstruction of the image when using integer precision. When using floating point precision, the regular grain merge mode is used.
Wavelet-decompose is a wonderful filter for skin smoothing and retouching, removing blemishes, wrinkles, or spots from your photos. It can also be used for sharpening and local contrast enhancement and for removing stains, colors, or tones. All this is well explained in the tutorials mentioned above.
|
|
Notă |
|---|---|
|
If the image is in indexed mode, this menu entry is disabled. |
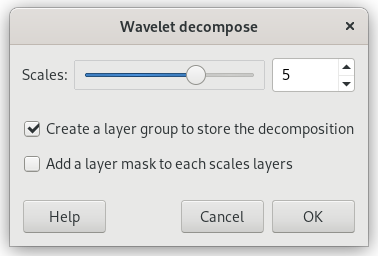
- Scales
-
Default scales number is 5. You can increase it to increase scale fineness.
- Create a layer group to store the decomposition
-
Layer groups are treated in Secțiune 5, „Grupuri de straturi”.
- Add a layer mask to each scale layer
-
Layer masks are treated in Secțiune 2.1.4, „Măști strat”.


