| 3. Инструменты рисования | ||
|---|---|---|
 |
Глава 13. Инструменты |  |
| 3. Инструменты рисования | ||
|---|---|---|
| |
Глава 13. Инструменты | |
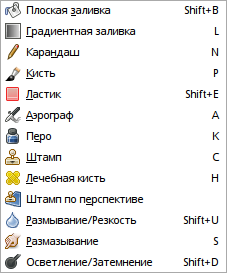
По умолчанию на панели GIMP находятся все тринадцать «рисующих» инструментов, сгруппированных в её нижней части.
Их объединяет то, что они создают мазки на изображении при перетаскивании курсора.
работают ровно так, как и должны работать инструменты, использующие кисть. Карандаш, Кисть и Аэрограф называются «основными рисующими инструментами» или же кистевыми инструментами.
Остальные инструменты вместо рисования используют кисть для изменения изображения тем или иным способом:
Плоская заливка заполняет изображение (или выделение) цветом или текстурой;
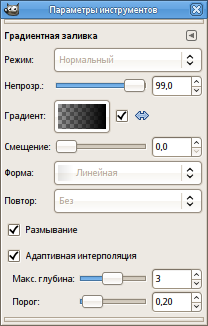
Градиентная заливка заполняет изображение градиентом;
Ластик удаляет части изображения, которых он касается;
Штамп копирует текстуру или избранные части изображения;
Штамп с перспективой копирует в изменённую перспективу;
Лечебная кисть удаляет мелкие дефекты изображения;
Размывание/Резкость усиливает или уменьшает резкость;
Палец размазывает;
а Осветление/Затемнение осветляет или затемняет.
Преимущества использования GIMP с графическим планшетом вместо мыши особенно очевидны при работе с кистевыми инструментами: получаемый полный контроль сложно переоценить. Каждый из этих инструментов может реагировать на силу нажима пером планшета.
Кроме обычного рисования вы можете применять кистевые инструменты автоматически, создав выделение или контур, и обведя его любым из кистевых инструментов, включая нестандартные, такие как Ластик, Размазывание, причем к ним будут применимы любые указанные параметры. Обратитесь к главе Обводка выделения за дополнительной информацией.
Holding down the Ctrl key has a special effect on every paint tool. For the Pencil, Paintbrush, Airbrush, Ink, and Eraser, it switches them into «color picker» mode, so that clicking on an image pixel causes GIMP's foreground to be set to the active layer's color at that point (or, for the Eraser, GIMP's background color). For the Clone tool, the Ctrl key switches it into a mode where clicking sets the reference point for copying. For the Convolve tool, the Ctrl key switches between blur and sharpen modes; for the Dodge/Burn tool, it switches between dodging and burning.
Holding down the Shift key has the same effect on most paint tools: it places the tool into straight line mode. To create a straight line with any of the paint tools, first click on the starting point, then press the Shift key. As long as you hold it down, you will see a thin line connecting the previously clicked point with the current pointer location. If you click again, while continuing to hold down the Shift key, a straight line will be rendered. You can continue this process to create a series of connected line segments.
Holding down both keys puts the tool into constrained straight line mode. This is similar to the effect of the Shift key alone, except that the orientation of the line is constrained to the nearest multiple of 15 degrees. Use this if you want to create perfect horizontal, vertical, or diagonal lines.
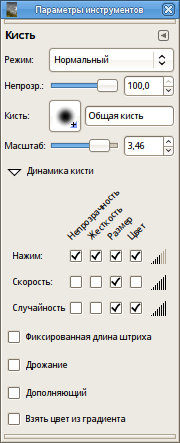
Many tool options are shared by several paint tools: these are described here. Options that apply only to one specific tool, or to a small number of tools, are described in the sections devoted to those tools.
The Mode drop-down list provides a selection of paint application modes. As with the opacity, the easiest way to understand what the Mode setting does is to imagine that the paint is actually applied to a layer above the layer you are working on, with the layer combination mode in the Layers dialog set to the selected mode. You can obtain a great variety of special effects in this way. The Mode option is only usable for tools that can be thought of as adding color to the image: the Pencil, Paintbrush, Airbrush, Ink, and Clone tools. For the other paint tools, the option appears for the sake of consistency but is always grayed out. A list of modes can be found in Раздел 2, «Режим слоя».
Некоторые из режимов подробнее описаны ниже.
The Opacity slider sets the transparency level for the brush operation. To understand how it works, imagine that instead of altering the active layer, the tool creates a transparent layer above the active layer and acts on that layer. Changing Opacity in the Tool Options has the same effect that changing opacity in the Layers dialog would have in the latter situation. It controls the «strength» of all paint tools, not just those that paint on the active layer. In the case of the Eraser, this can come across as a bit confusing: it works out that the higher the «opacity» is, the more transparency you get.
The brush determines how much of the image is affected by the tool, and how it is affected, when you trace out a brushstroke with the pointer. GIMP allows you to use several different types of brushes, which are described in the Brushes section. The same brush choices are available for all paint tools except the Ink tool, which uses a unique type of procedurally generated brush. The colors of a brush only come into play for tools where they are meaningful: the Pencil, Paintbrush, and Airbrush tools. For the other paint tools, only the intensity distribution of a brush is relevant.
Этот параметр позволяет точно указать размер кисти. Клавиши-стрелки изменяют значение на ±0,01, а клавиши PgUp/PgDown — на ±0,05. Тот же результат можно получить вращением колеса мыши, если программа настроена соответствующим образом. См. Как изменить размер кисти.
Brush dynamics let you map different brush parameters, commonly at least size and opacity, to one or more of three input dynamics: pressure, velocity and random. They are mostly used with tablets, but Velocity and Random are also usable with a mouse. The Ink tool, that supported velocity before, has been overhauled and now handles velocity-dependent painting much better.
A new option has been added in stroking paths. Stoke Path and Stroke Selection have now a check box for emulating brush dynamics when you stroke using a paint tool. That means that when you stoke, brush pressure and velocity are varying along the length of the stroke. Pressure starts with zero, ramps up to full pressure and then ramps down again to no pressure. Velocity starts from zero and ramps up to full speed by the end of the stroke.
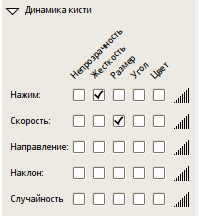
Ряд флажков напротив чуствительности к нажиму имеет смысл только при использовании графического планшета. Здесь можно указать, какие аспекты инструмента зависят от давления стилуса на планшет. Варианты таковы: непрозрачность, жёсткость, скорость, размер и цвет. Их можно использовать в любых сочетаниях. Для каждого инструмента перечисляются только те аспекты, которые имеет смысл перечислять с ним. Вот что они делают:
Эффект этого параметра описан выше.
Этот параметр влияет на кисти с нечёткими краями. При выборе этого параметра, чем сильнее нажать на кисть, тем темнее будут нечёткие части мазка.
Этот параметр влияет на инструменты Аэрограф, Размывание и Палец, у каждого из которых эффект зависит от времени. При увеличении нажима, эти инструменты работают быстрее.
This option applies to all of the pressure sensitive paint tools. If the option is checked, then pressing harder will increase the size of the area affected by the brush.
This option only applies to the brush tools: the Pencil, Paintbrush, and Airbrush; and only if you are using colors from a gradient. If these conditions are met, then pressing harder causes colors to be taken from higher in the gradient.
This option causes each stroke to fade out over the specified distance. It is easiest to visual for «real» painting tools, and applies to all of the brush tools. It is equivalent to gradually reducing the opacity along the trajectory of the stroke. Note that, if you are using a tablet, this option does not change the effects of brush pressure.
Этот параметр влияет на «растояние» между мазками: соседние мазки при близости друг к другу практически сливаются. Однако их можно разбросать на растояние, определяемое этим ползунком .
The Incremental check-box activates incremental mode for the tool. If it is deactivated, the maximum effect of a single stroke is determined by the opacity, and moving the brush repeatedly over the same spot will not increase the effect beyond this limit. If Incremental is active, each additional pass with the brush will increase the effect, but the opacity can't exceed the opacity set for the tool. This option is available for all paint tools except those which have a «rate» control, which automatically implies an incremental effect. See also Раздел 2, «Режим слоя».
Вместо использования цвета фона (показан в области цвета на панели инструментов), можно рисовать градиентом, выбрав параметр «использовать цвет из градиента». Это даст диапазон цветов, плавно меняющихся по траектории мазка. За информацией о градиентах обратитесь в раздел Градиенты.
На градиент влияют следующие параметры:
Показывает активный градиент. Щелчок по кнопке вызывает диалог со списком градиентов на выбор.
Normally a brushstroke starts with colors from the left side
of the gradient, and progresses rightward. If
the «Reverse»
 is checked, the stroke starts with colors from the right
side, and progresses leftward.
is checked, the stroke starts with colors from the right
side, and progresses leftward.
Этот параметр указывает растояние, на которое необходимо растянуть градиент один раз. Единицы измерения по умолчанию - точки, но можно выбрать другую.
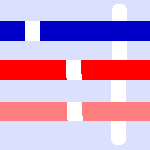
Рисунок 13.43. Illustration of the effects of the three gradient-repeat options, for the «Abstract 2» gradient.
Градиент «Абстрактный 2»
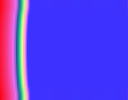
Нет
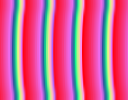
Зубцевидная волна
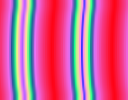
Треугольная волна
This option determines what happens if a brushstroke extends farther than the Length specified above. There are three possibilities:
None means that the color from the end of the gradient will be used throughout the remainder of the stroke;
Sawtooth wave means that the gradient will be restarted from the beginning, which will often produce a color discontinuity;
Triangular wave means that the gradient will be traversed in reverse, afterwards bouncing back and forth until the end of the brushstroke.
Следующие примеры демонстрируют некоторые режимы рисования в GIMP:
Рисунок 13.44. Пример использования режима растворения
Два мазка, сделанных аэрографом одной и той же круглой растушеванной кистью. Слева — нормальный режим, справа — режим растворения.
For any paint tool with opacity less than 100%, this very useful mode doesn't draw transparency but determines the probability of applying paint. This gives nice patterns of dots to paint-strokes or filling. При использовании любого рисующего инструмента с непрозрачностью менее 100% и этим режимом не рисуется полупрозрачность, а определяется возможность наложения краски. Это позволяет рисовать кистью узоры из точек.
Рисунок 13.45. Рисование в режиме «Растворение»
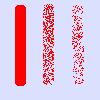
У этого изображения есть только фоновый слой и нет альфа-канала. Цвет фона — небесно-голубой. Три штриха Карандашом и различные значения непрозрачности: 100%, 50%, 25%. Пикселы цвета переднего плана разбросаны вдоль линии штриха.
Рисунок 13.46. Пример режима слоя «Позади»
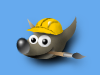
Уилбер над синим фоновым слоем

Диалог слоев
Текстурная заливка
Этот режим применим только к слоям с альфа-каналом. Он накладывает краску только на непрозрачные области слоя: чем ниже значение прозрачности, тем больше краски применится. Поэтому рисование на непрозрачной области не имеет эффекта, а на прозрачной области эффект как у нормального режима. Результат всегда повышает непрозрачность. Это не относится к изображениям без канала альфа.
В изображения примера Уилбер находится на верхнем слое, окружённый прозрачностью. Нижний слой залит синим. Использовался инструмент сплошной заливки с включенным параметром Всё выделение, и весь слой был выделен. При использовании инструмента сплошной заливки использовалась текстура.
The next image (below) has two layers. The upper layer is active. Three brushtrokes with pencil, red color at 100%, 50%, 25%: only transparent or semi-transparent pixels of the layer are painted.
Рисунок 13.47. Рисование в режиме «Позади»
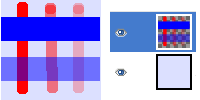
Рисование со 100%, 50% и 25% прозрачностью (слева направо)
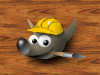
Рисунок 13.48. Пример режима слоя «Очистка цвета»
Уилбер над синим фоновым слоем

Белый цвет переднего плана стерт
Этот режим удаляет цвет переднего плана, заменяя его на частичную прозрачность. Он ведёт себя как фильтр Цвет в альфа-канал , но только на области под мазком. Режим применим к слою с альфа-каналом. Иначе режим ведёт себя как нормальный.
В изображении примера, цвет инструмента сплошной заливки был белым, поэтому белые части Уилбера были удалены и стал просвечиваться синий.
This image below has only one layer, the background layer. Background color is sky blue. Three brushtrokes with pencil:
With the exact color of the blue area: only this blue color is erased.
With the exact color of the red area. Only this red color is erased, whatever its transparency. Erased areas are made transparent.
With the sky blue color of the layer background: only this color is erased.
Advanced users may be interested to know that paint tools actually operate at a sub-pixel level, in order to avoid producing jagged-looking results. One consequence of this is that even if you work with a hard-edged brush, such as one of the Circle brushes, pixels on the edge of the brushstroke will only be partially affected. If you need to have all-or-nothing effects (which may be necessary for getting a good selection, or for cutting and pasting, or for operating pixel-by-pixel at a high zoom level), use the Pencil tool, which makes all brushes perfectly hard and disables sub-pixel anti-aliasing.