Figur 16.27. Eksempel på oprettelse af en ramme ud fra en markering
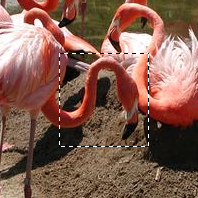
Et billede med en markering
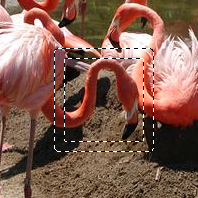
Efter “Indram”
Kommandoen opretter en ny markering langs kanten af en eksisterende markering i det aktuelle billede. Kanten af den aktuelle markering bruges som en form, og den nye markering oprettes derefter omkring den. Du indtaster bredden på kanten i pixels eller en anden enhed i dialogvinduet. Halvdelen af den nye kant ligger inden for det valgte område og halvdelen uden for det.
Du kan tilgå denne kommando i hovedmenuen via → .
Er der ikke nogen markering, er menupunktet deaktiveret.
To betingelser skal være opfyldt, for at kommandoen kan bruges:
-
Billedet skal have en alfakanal.
-
The original image must be created with the Antialiasing option checked in the selection tool that is used.
- Indram det markerede med
-
Indtast bredden på den indrammede markering i feltet. Standardenhederne er pixels, men du kan også vælge enhederne i rullemenuen.
- Kantstil
-
-
Hård: Denne indstilling bevarer ikke kantudjævning. Det kan være nyttigt i nogle tilfælde.
-
Smooth: this option keeps anti-aliasing. Note that “Smooth” does not create any anti-aliasing. That's why anti-aliasing must be added when creating the original selection. This option is the best one.
-
Udtyndet: Denne indstilling gør det samme som “Hård”, men i stedet for at den resulterende kant er fuldt markeret, fader den udad. Resultatet er ikke særlig godt; hvis du vil have en udtyndet kant, er det bedre at bruge en af de andre tilstande og så gøre resultatet mere udtyndet. Den er der af historiske årsager.
Figur 16.29. Sammenligning af indramningsstile

Indstillingen “Hård”. Markeringsredigering zoomet til 800 %

Indstillingen “Blød”. Markeringsredigering zoomet til 800 %
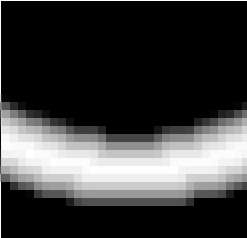
Indstillingen “Udtyndet”. Markeringsredigering zoomet til 800 %
-
- Markerede områder fortsætter uden for billedet
-
Når denne indstilling er aktiveret, forbliver en kant af en markering (normalt et rektangel) uændret, hvis den er på linje med en kant af billedet; der oprettes ikke en ny markering omkring den.
Figur 16.30. Indramningsmarkering med og uden “Markerede områder fortsætter uden for billedet”

Indramningsmarkering uden (i midten) og med (til højre) låst markering.

Samme markeringer udfyldt med rød farve.


