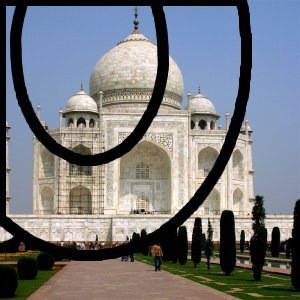
This filter is a tool: You can create geometrical figures to add them to the image.
When using this filter, elements inserted in the image will be placed in a new layer. So the image will not be modified, all modifications occurring in this layer.
![[Note]](images/note.png)
|
Note |
|---|---|
|
If the image is in indexed mode, this menu entry is disabled. |
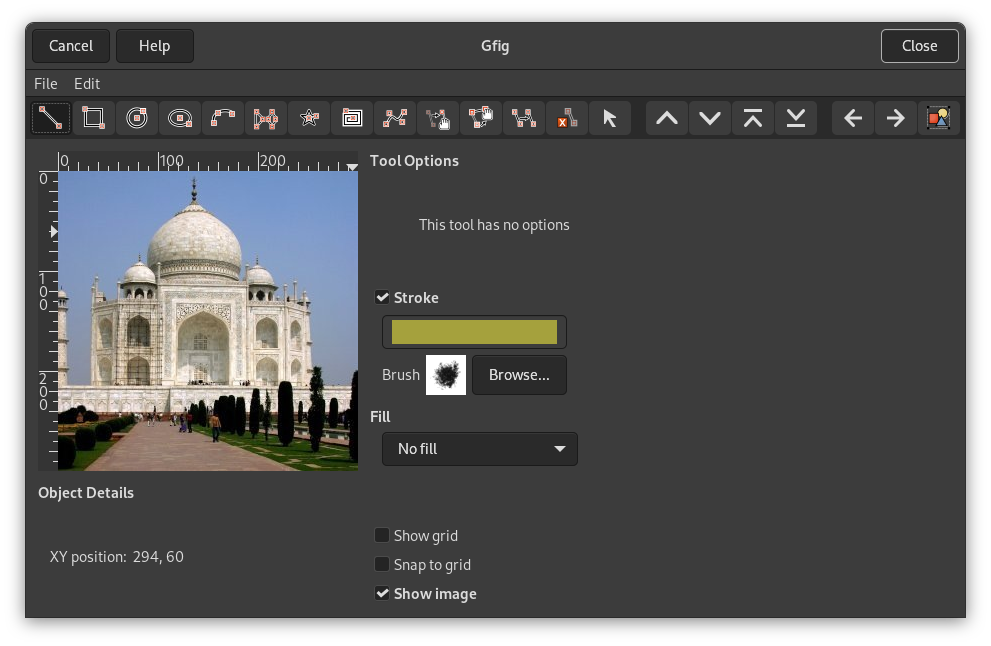
The Preview (with a horizontal and a vertical ruler) on the left of the main window actually is your working area where you are adding your figures.
You can add and modify figures using the Gfig tools (Gfig tool bar) and using the appropriate options (Gfig main window).
At the top of dialog, you can find a set of icons which represents the functions of this filter. Help pop-ups are explicit.
Functions for object drawing
On the left part of tool bar, you can find some functions for object drawing. You enable them by clicking on the corresponding icon. You can create the following objects (note that Control points are created at the same time as object):
-
Create line
-
With this tool, you can draw lines. Click on Preview to mark start point, then drag mouse pointer to the end point.
-
Create rectangle
-
With this tool, you can draw rectangles. Click on Preview to mark start point, then drag mouse pointer to create the rectangle.
-
Create circle
-
With this tool, you can draw circles. Click on Preview to mark center, then drag mouse pointer to the wanted radius.
-
Create ellipse
-
With this tool, you can draw ellipses. Click on Preview to mark center, then drag mouse pointer to get the wanted size and form.
-
Create arc
-
With this tool, you can draw circle arcs. Click on Preview to set start point. Click again to set another arc point. Without releasing mouse button, drag pointer; when you release mouse button, the arc end point is placed and an arc encompassing these three points is drawn.
-
Create regular polygon
-
With this tool, you can create a regular polygon. Start with setting side number in Tool Options at the right of Preview. Then click on Preview to place center and, without releasing mouse button, drag pointer to get the wanted size and orientation.
-
Create star
-
With this tool, you can create a star. Start with setting side number (spikes) in Tool Options at the right of Preview. Then click on Preview to place center and, without releasing mouse button, drag pointer to get the wanted size and orientation.
-
Create spiral
-
With this tool, you can create a spiral. Start with setting spire number (sides) and spire orientation in Tool Options at the right of Preview. Then click on Preview to place center and, without releasing mouse button, drag pointer to get the wanted size.
-
Create bezier curve
-
With this tool, you can create Bézier curves. Click on Preview to set start point and the other points: the curve will be created between these points. To end point creation press Shift key when creating last point.
Functions for object management
In the middle of tool bar, you can find tools to manage objects:
-
Move an object
-
With this tool, you can move the active object. To enable an object, click on a control point created at the same time as the object.
-
Move a single point
-
With this tool, you can click-and-drag one of the control points created at the same time as object. Each of these points moves the object in a different way.
-
Copy an object
-
With this tool, you can duplicate an object. Click on an object control point and drag it to the wanted place.
-
Delete an object
-
Click on an object control point to delete it.
-
Select an object
-
With this tool, you can select an object to activate it. Simply click on one of its control points.
Functions for object organisation
At the right of tool bar, you can find tools for object superimposing (you can also get them by clicking on the drop-down list button if they are not visible). You have:
-
Up (Raise selected object) ,
Down (Lower selected object)
-
With this tool, you can push the selected object one level up or down.
-
Top (Raise selected object to top) ,
Bottom (Lower selected object to bottom)
-
Self explanatory.
Functions for object display
-
Back (Show previous object) ,
Forward (Show next object)
-
These functions allow you to jump from one object to another. Only this object is displayed.
-
Show all objects
-
This function shows all objects again, after using both previous functions.
![[Note]](images/note.png)
|
Note |
|---|---|
|
If your window is too small to show all icons, the tool bar provides a drop-down list which offers you the missing functions. |
- Object Details
-
The XY position shows the position of your pointer.
- Tool Options
-
If the selected tool provides some options (like number of sides), you can change them here.
- Stroke
-
If this option is checked, the object will be drawn. Two buttons are available, to select color and brush type. Changes to color or brush apply to existing objects too.
- Fill
-
With help of this drop-down list, you can decide whether and how the object will be filled, with a color, a pattern or a gradient.
- Show grid
-
If this option is checked, a grid is applied on Preview to make object positioning easier.
- Snap to grid
-
If this option is checked, objects will align to the grid.
- Show image
-
When this option is checked, the current image is displayed in Preview (working area).


