Lo strumento aerografo funziona proprio come lo strumento tradizionale. È quindi adatto per realizzare delicate superfici di colore.
Lo strumento può essere attivato in diversi modi:
-
From the main menu: → → .
-
By clicking the tool icon
 in the Toolbox.
-
By pressing the A keyboard shortcut.
- Ctrl
-
Ctrl trasforma l'aerografo nello strumento per il Prelievo colore.
- Maiusc
-
Shift places the airbrush into straight line mode. Holding Shift while clicking the mouse will generate a straight line. Consecutive clicks will continue drawing straight lines that originate from the end of the last line.
Normally, tool options are displayed in a window attached under the Toolbox as soon as you activate a tool. If they are not, you can access them from the main menu through → → which opens the option window of the selected tool. The available tool options can also be accessed by double clicking the corresponding tool icon in the Toolbox.
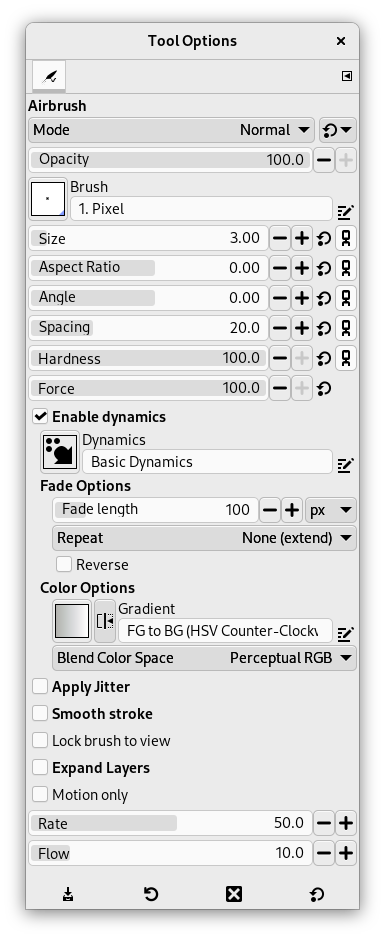
- Modalità, Opacità, Pennello, Dimensione, Rapporto dimensioni, Angolo, Spaziatura, Durezza, Forza, Dinamiche, Opzioni delle dinamiche, Applica tremolio, Sfoca delineatura, Blocca pennello alla vista, Espandi livelli
- Vedere la sezione Opzioni comuni agli strumenti di disegno per una descrizione delle opzioni che si applicano a molti se non a tutti gli strumenti di disegno.
- Motion only
-
If this option is checked, the airbrush paints only when it moves.
- Ammontare
-
La barra orizzontale Ammontare imposta la velocità di applicazione del colore da parte dell'aerografo. Un valore alto produrrà tratti scuri in un tempo minore.
- Flusso
-
Questa barra orizzontale controlla la quantità di colore che l'aeratore dipinge. Un valore alto causerà tratti maggiormente scuri.


