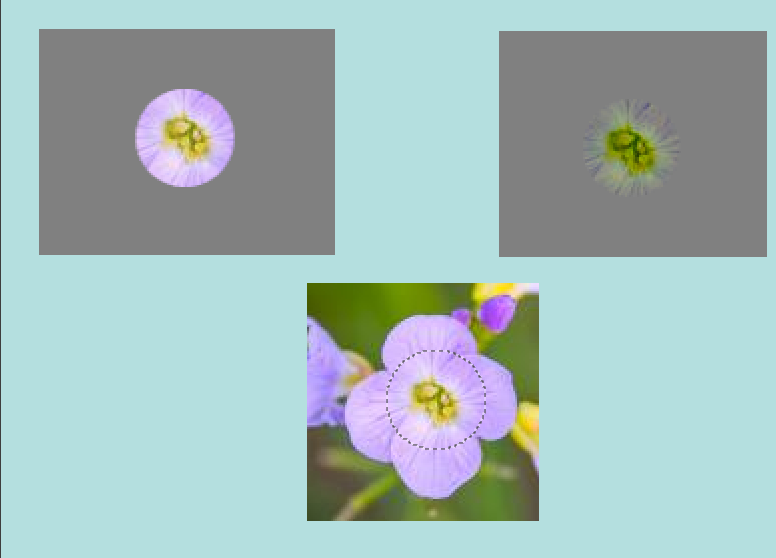
このツールについては以前、 「修復ブラシツールはまるでステロイド注入でスマートになったクローンツールみたいだ」と書かれたことがあります。 確かに「修復ブラシツール」は「スタンプで描画」ツールと近い間柄ながら、 画像の小さな汚れやきずを除去するのにはこちらの方がきびきびとこなします。 写真に写った皺をとりのぞくのはお手のものです。 その違いは、 参照元から修復箇所への単純な画素 (ピクセル) 転写ではなく、 修復箇所の周辺の画素情報までも考慮した転写にあります。 この技術は Todor Georgiev 氏の数学論文 [GEORGIEV01] に示された数式を利用しています。
To use it, first choose a brush with a size adapted to the defect. Then Ctrl-click on the area you want to reproduce. Release the Ctrl key and drag the sample to the defect. Click. If the defect is slight, not very different from its surrounding, it will be corrected as soon. Else, you can correct it with repeated clicks, but with a risk of daubing.
このツールを起用する方法はつぎのいずれかです。
-
From the main menu: → → .
-
By clicking the tool icon
 in the Toolbox.
-
By pressing the H keyboard shortcut.
- Ctrl
-
このキーは参照元を指定するのに使います。 修復にはどの画像のどんなレイヤーからでも、 活性化させてから (レイヤーダイアログで強調表示される)、 Ctrl キーを押しながら画像ウィンドウ上でクリックすれば利用できます。 もし位置合わせをツールオプション上で か に指定した場合にはクリックした位置が修復転写の参照原点となります。 その位置の画像データが修復ツールの塗りはじめに充てられます。 このキーで参照元を指定する間、 カーソルはトンボ十字の姿に変わります。
- Shift
-
参照元が決まったら、 このキーを押せば直前にクリックした位置と現在のポインターの位置との間を結ぶ細い線が現れます。 Shift キーを押しながら再びクリックするとその線上に沿って「修復」が行われます。
Normally, tool options are displayed in a window attached under the Toolbox as soon as you activate a tool. If they are not, you can access them from the main menu through → → which opens the option window of the selected tool. The available tool options can also be accessed by double clicking the corresponding tool icon in the Toolbox.
- モード, 不透明度, ブラシ, 大きさ, 縦横比, 角度, 間隔, 硬さ, 強さ, 動的特性, 動的特性のオプション, 散布, 手ブレ補正, Lock brush to view, Expand Layers
- 描画ツールの全般もしくは大多数に共通するツールオプションについての説明は 描画ツール共通のオプション をご覧ください。
- Hard edge
-
This option gives a hard contour to the healed area.
- 見えている色で
-
If you enable this option, sampling is not calculated only from the values of the active layer, but from all visible layers.
For more information, see the Glossary entry.
- 位置合わせ
-
このオプションは スタンプで描画ツール で説明してあります。