![[Примечание]](images/note.png)
|
Примечание |
|---|---|
|
Данные описания в основном основаны на руководствах Пэта Дэвида (Pat David) https://patdavid.net/2011/12/getting-around-in-gimp-skin-retouching.html и https://patdavid.net/2014/07/wavelet-decompose-again.html. |
Рисунок 17.54. Пример применения фильтра «Частотный разбор».
Исходное изображение
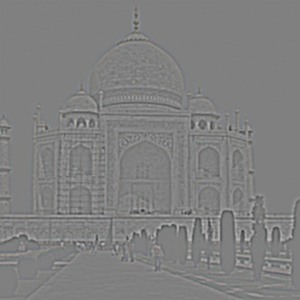
После применения «Частотный разбор». В стопке слоёв сделан видимым только слой Scale 2.
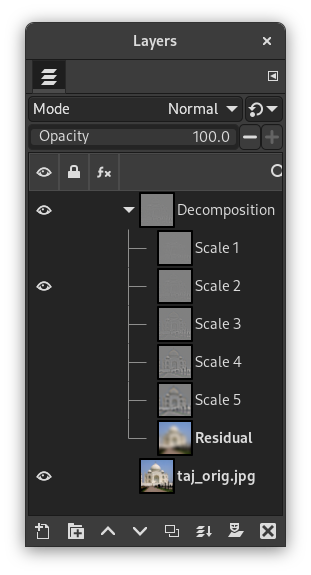
Этот фильтр разбирает активный слой или выделение на несколько слоёв, названных «scales» (уровни детализации). Каждый из слоёв содержит отдельный набор деталей. Самые мелкие детали находятся в первых слоях, и далее детали укрупняются, пока не дойдут до последней, в самом низу. Этот последний слой называется «residual» («остаточный») и содержит всё, что осталось после того, как были удалены все слои с деталями; он представляет собой глобальный контраст и цвета изображения.
Каждый из слоёв уровня детализации настроен на сочетание с помощью режима слоёв «Объединение зерна». Это означает, что пиксели со значением 50% не повлияют на окончательный результат. Таким образом, окраска нейтральным серым (R:50% G:50% B:50%) уничтожит детали.
Обратите внимание, что для изображений, использующих целочисленную точность, используется устаревший режим объединения зерна. Это позволяет избежать несовершенства восстановления изображения при использовании целочисленной точности. При использовании точности с плавающей запятой используется обычный режим объединения зерна.
«Частотный разбор» является отличным фильтром для сглаживания дефектов кожи и ретуши, который удаляет прыщи, морщины и пятна с фото. Также его можно применять для повышения резкости и локального контраста, а также для удаления пятен, цветов, тонов. Всё это очень хорошо объясняется в руководствах, упомянутых выше.
|
|
Примечание |
|---|---|
|
If the image is in indexed mode, this menu entry is disabled. |
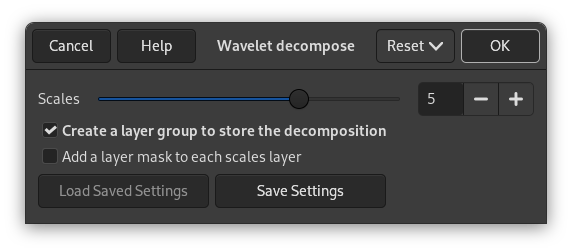
- Scales
-
Default scales number is 5. You can increase it to increase scale fineness.
- Create a layer group to store the decomposition
-
Layer groups are treated in Раздел 5, «Группы слоёв».
- Add a layer mask to each scale layer
-
Layer masks are treated in Раздел 2.1.4, «Маски слоя».


