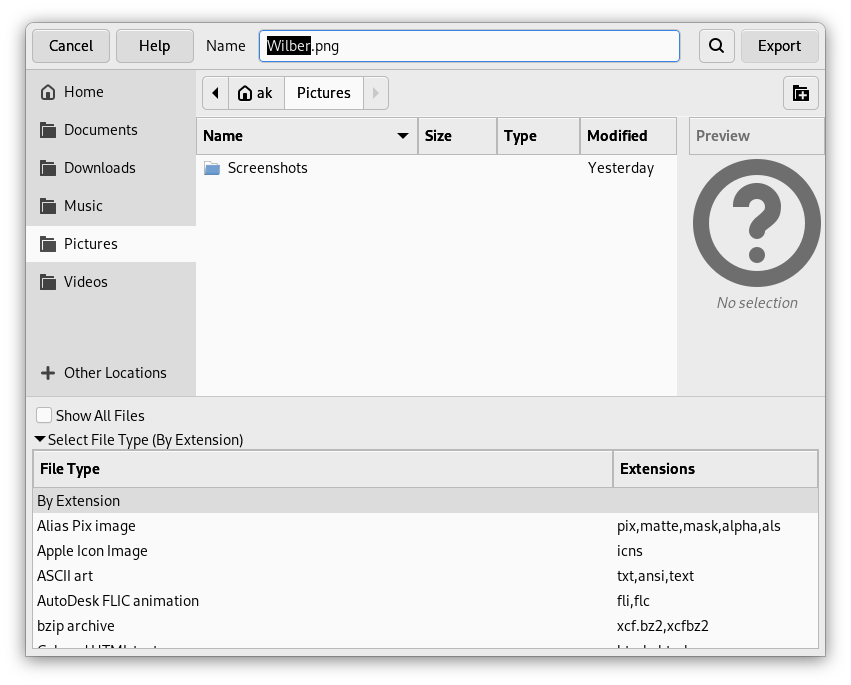
GIMP uses the Save command only for saving images in its native XCF format. When you need your image in a different file format, you can use the Export command.
-
Доступ до цієї команди можна отримати за допомогою пункту головного меню →
-
або за допомогою клавіатури, скориставшись комбінацією клавіш Ctrl+Shift+E.
In the file browser, you can edit filename and extension directly in the Name field (default is «Untitled.png») or by selecting an existing file to override in name list. Navigate the folders if you prefer a different image destination. You can also create a new folder if necessary.
Вибір типу файла. Якщо ви розгорнете цей пункт, ви зможете вибрати формат файлів і пов'язаний із ним суфікс назви файла зі списку.
Вікна форматів файлів описано у розділі Розділ 1, «Фаайли».
When file name and destination are set, click on . This opens the export dialog for the specified file format.
![[Примітка]](images/note.png)
|
Примітка |
|---|---|
|
If the name you entered already existed, you will be asked if you want to overwrite that file or not. If a layer mask or channel is selected instead of a layer, and the export format does not support this, you will be asked for confirmation. |
If you have loaded a non-XCF file, the → command (followed by the file name) allows you to overwrite the original file, keeping its file format.
If you modify an image that you already have exported before, the → command (followed by the file name) allows you to export the file again in the same file format.


