Cet outil sert à découper une image. Il agit sur tous les calques de l’image, visibles et invisibles. Il est surtout utilisé pour éliminer les bordures et pour supprimer des surfaces non désirées, de façon à vous fournir une surface de travail mieux ciblée. C’est l’outil de Recadrage par excellence.
To define the crop area click and drag with the mouse. A highlighted area will appear that shows the crop boundaries. To move the whole crop area, click in the middle and drag the rectangle. Resizing can be done by moving close to the borders. The mouse cursor will change and you can drag either one side, if you are in the middle, or two sides, if you are in a corner. While you are changing the drag area, the size of the cropped area and the aspect ratio will be shown in the status bar.
Quand le pointeur de la souris a la forme de la croix de déplacement, vous pouvez utiliser les touches fléchées du clavier pour déplacer le rectangle de découpage. En appuyant en même temps sur la touche Maj (Shift), le déplacement se fait par pas de 25 pixels.
To finalize cropping, click inside the crop rectangle or press the Enter key.
![[Note]](images/note.png)
|
Note |
|---|---|
|
By default the image canvas size isn't changed after cropping. The Tool Options of the Crop Tool have a setting Delete cropped pixels that can be checked to make sure the canvas size is also adjusted to the cropped area. |
![[Astuce]](images/tip.png)
|
Astuce |
|---|---|
|
You can use Guides to position the crop area. Make sure that the → option is checked. |
Il existe plusieurs possibilités pour accéder à l’outil :
-
From the main menu: → → .
-
By clicking the tool icon
in the Toolbox.
-
By pressing the Shift+C keyboard shortcut.
Quand vous maintenez le clic sur le rectangle de découpage, les poignées disparaissent et
-
l’appui sur la touche Ctrl bascule sur l’option Étendre depuis le centre,
-
l’appui sur la touche Maj bascule sur l’option Fixé qui permet de rendre fixes certaines dimensions.
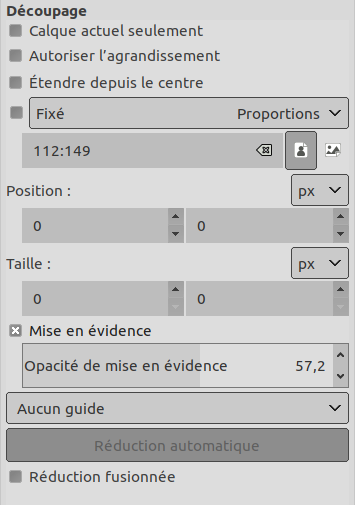
Normally, tool options are displayed in a window attached under the Toolbox as soon as you activate a tool. If they are not, you can access them from the main menu through → → which opens the option window of the selected tool. The available tool options can also be accessed by double clicking the corresponding tool icon in the Toolbox.
- Selected layers only
-
This option will make crop affect only the selected layers.
- Delete cropped pixels
-
When checked, the canvas size is adjusted to the cropped area. By default this is not checked, which means that after cropping the layers have been adjusted, but the canvas size is still the same. This is to make sure you don't remove anything by accident.
- Autoriser l’agrandissement
-
Cette option permet au découpage de dépasser les limites de l’image (ou du calque), et même du canevas. Vous pouvez ainsi donner la taille que vous voulez à l’image résultante. La transparence sera utilisée s’il n’y a pas de matériel à découper.
Figure 14.100. Exemple pour « Autoriser l’agrandissement »
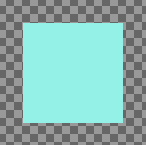
Une image sur un grand canevas
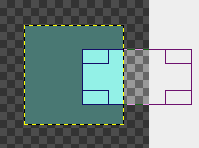
L’option est cochée : vous pouvez tracer le rectangle de découpage au-delà des limites du canevas.

Le résultat
- Étendre depuis le centre
-
Quand cette option est cochée, le rectangle de découpage s’étendra à partir du premier pixel cliqué pris pour centre. Vous pouvez basculer cette option en cours de tracé en appuyant sur Ctrl.
- Fixé (tailles contraintes)
-
Vous pouvez aussi accéder à cette option en appuyant sur Ctrl lors du tracé du rectangle de découpage. Cette option vous offre plusieurs possibilités pour que certaines dimensions, ou leur rapport, restent fixes lors du tracé du rectangle de découpage :
-
Proportions : c’est la possibilité par défaut. La largeur et la hauteur conservent le rapport qu’elles ont dans l’image initiale, lors du tracé du rectangle de découpage.
-
Largeur / Hauteur : seule la largeur ou la hauteur restera fixe. La valeur de cette dimension peut être fixée dans la boîte de texte située en-dessous. Elle est de 100 pixels par défaut.
-
Size: Both Width and Height will be fixed. Their values can be set in the text box below, in the form « 150×100 » for example. The crop rectangle will adopt these values as soon as you click the image. On the right, two buttons let you choose a (widthwise) or (upright) format for the crop rectangle.
-
- Position
-
These two text fields contain the current horizontal and vertical coordinates of the upper left corner of the selection. You can use these fields to adjust the selection position precisely.
- Taille
-
These two text fields contain the current width and height of the selection. You can use these fields to adjust the selection size precisely.
- Mise en évidence
-
If you enable this option, the selected area is emphasized by a surrounding mask to make visual selection much easier.
L’opacité de la zone d’assombrissement peut être réglée avec le curseur Opacité de mise en évidence.
- Guides de sélection
-
With this menu you can select the type of guides that is shown within the selection to make the creation of a selection easier, respecting Photo composition rules.
Six options are available:
-
No Guides
-
Lignes de centre
-
Règle des tiers
-
Règle des cinquièmes
-
Sections d’or
-
Lignes diagonales
-
- Auto Shrink
-
Une fois tracé le rectangle de découpage, le clic sur ce bouton adapte ce rectangle pour qu’il épouse au plus près l’objet à limite franche contenu dans le calque actif… s’il en trouve un. Ça ne marche bien qu’avec les objets isolés tranchant nettement sur le fond.
Figure 14.101. Auto Shrink example
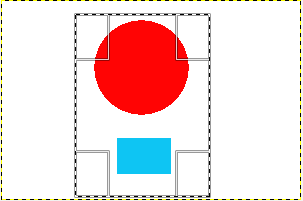
Une image contenant une limite bien nette et un rectangle de découpage.
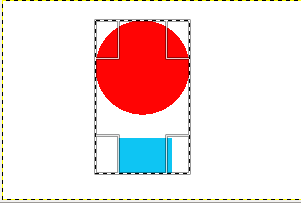
Après avoir cliqué sur le bouton Réduction automatique, le rectangle de découpage a été réduit pour s’adapter aux limites nettes.
- Shrink merged
-
Cette option marche de la même façon, avec Réduction automatique ou non. Elle prend en compte tous les calques visibles , et pas seulement le calque actif.
