Apkirpimo įrankis naudojamas apkarpyti arba iškarpyti paveikslėlį arba sluoksnį. Šis įrankis dažnai naudojamas norint pašalinti rėmelius arba nepageidaujamas sritis. Jis taip pat naudingas jeigu jums reikia specifinio paveikslėlio dydžio, neatitinkančio originalių jūsų paveikslėlio matmenų.
To define the crop area click and drag with the mouse. A highlighted area will appear that shows the crop boundaries. To move the whole crop area, click in the middle and drag the rectangle. Resizing can be done by moving close to the borders. The mouse cursor will change and you can drag either one side, if you are in the middle, or two sides, if you are in a corner. While you are changing the drag area, the size of the cropped area and the aspect ratio will be shown in the status bar.
When the mouse becomes the moving cross-hair, you can use the keyboard arrow keys to move the crop rectangle. Holding the Shift key down allows to move by increments of 25 pixels.
To finalize cropping, click inside the crop rectangle or press the Enter key.
![[Pastaba]](images/note.png)
|
Pastaba |
|---|---|
|
By default the image canvas size isn't changed after cropping. The Tool Options of the Crop Tool have a setting Delete cropped pixels that can be checked to make sure the canvas size is also adjusted to the cropped area. |
![[Patarimas]](images/tip.png)
|
Patarimas |
|---|---|
|
You can use Guides to position the crop area. Make sure that the → option is checked. |
There are different possibilities to activate the tool:
-
From the main menu: → → .
-
By clicking the tool icon
in the Toolbox.
-
By pressing the Shift+C keyboard shortcut.
Spustelėjus apkirpimo stačiakampyje, išnyksta rankenėlės ir
-
laikant paspaudus klavišą Ctrl, perjungiama parinktis Išplėsti nuo centro,
-
laikant paspaudus klavišąShift, perjungiama parinktis Fiksuota, fiksuojanti kai kuriuos matmenis.
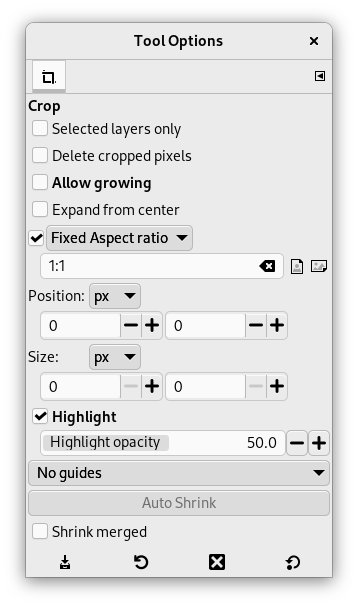
Normally, tool options are displayed in a window attached under the Toolbox as soon as you activate a tool. If they are not, you can access them from the main menu through → → which opens the option window of the selected tool. The available tool options can also be accessed by double clicking the corresponding tool icon in the Toolbox.
- Selected layers only
-
This option will make crop affect only the selected layers.
- Delete cropped pixels
-
When checked, the canvas size is adjusted to the cropped area. By default this is not checked, which means that after cropping the layers have been adjusted, but the canvas size is still the same. This is to make sure you don't remove anything by accident.
- Leisti didinimą
-
This option allows the crop or resize to take place outside the image (or layer), and even the canvas. So, you can give the size you want to the resulting image. Transparency will be used if there is no material to crop.
Pav. 14.100. „Leisti didinimą“ pavyzdys
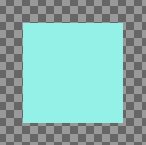
An image on a big canvas
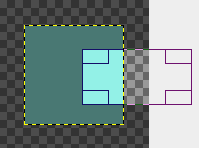
The option is checked. The crop rectangle extends outside the canvas.

The resulting image.
- Išplėsti nuo centro
-
Pažymėjus šią parinktį apkirpimo stačiakampis plečiamas nuo pirmojo spustelėto pikselio kaip centro. Šią parinktį galite perjungti brėžiant apkirpimo stačiakampį nuspausdami klavišą Ctrl.
- Fixed
-
Šią parinktį galite įjungti brėžiant apkirpimo stačiakampį nuspaudę klavišą Ctrl. Taip galite suvaržyti apkirpimo stačiakampio matmenis arba jų santykį:
-
Proporcija: tai – numatytoji parinktis. Brėžiant apkirpimo stačikampį išsaugoma ta pati originalaus paveikslėlio aukščio ir pločio proporcija
-
Width / Height: Only Width or Height will remain fixed. The value of this dimension can be set in the text box below; it defaults to 100 pixels.
-
Size: Both Width and Height will be fixed. Their values can be set in the text box below, in the form „150×100“ for example. The crop rectangle will adopt these values as soon as you click the image. On the right, two buttons let you choose a (widthwise) or (upright) format for the crop rectangle.
-
- Padėtis
-
These two text fields contain the current horizontal and vertical coordinates of the upper left corner of the selection. You can use these fields to adjust the selection position precisely.
- Dydis
-
These two text fields contain the current width and height of the selection. You can use these fields to adjust the selection size precisely.
- Paryškinti
-
If you enable this option, the selected area is emphasized by a surrounding mask to make visual selection much easier.
The dark area opacity can be set using the Highlight opacity cursor.
- Gairės
-
With this menu you can select the type of guides that is shown within the selection to make the creation of a selection easier, respecting Photo composition rules.
Six options are available:
-
No Guides
-
Center lines
-
Rule of thirds
-
Rule of fifths
-
Golden sections
-
Diagonal lines
-
- Auto Shrink
-
Spustelėjus mygtuką Automatiškai sumažinti, aktyviame sluoksnyje bandoma rasti ribą, nuo kurios brėžti stačiakampio pažymėjimo matmenis. Ši funkcija gerai veikia tik apkerpant izoliuotus objektus, gerai išsiskiriančius iš fono.
Pav. 14.101. Auto Shrink example
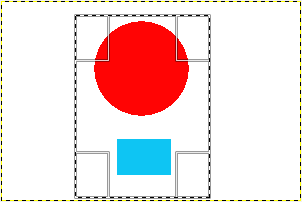
Paveikslėlis, kuriame yra aiški riba ir apkirpimo stačiakampis.
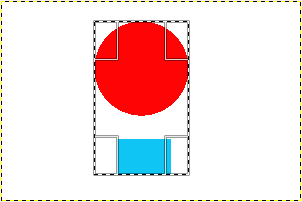
Spustelėjus mygtuką Automatiškai sumažinti, apkirpimo stačiakampis buvo sumažintas tiek, kad atitiktų aiškiai matomas ribas.
- Shrink merged
-
Ši parinktis veikia vienodai tiek naudojant „automatinį sumažinimą“, tiek jo nenaudojant. Ji naudoja visų matomų sluoksnių pikselio informaciją, ne tik aktyviojo sluoksnio.
