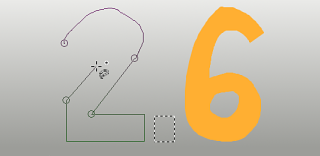
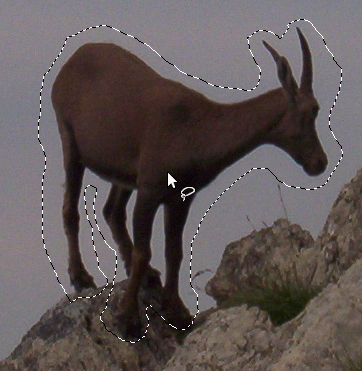
Инструмент свободного выделения или «Лассо» даёт возможность создавать выделения, рисуя их курсором мыши.
Этот инструмент можно использовать двумя способами. Сначала щелчком по изображению создайте начальную точку. Затем
-
Удерживая нажатой кнопку мыши (т. е. «нажать и перетащить»), тащите, чтобы от руки нарисовать свободное выделение. Когда конечная точка окажется над начальной точкой, отпустите кнопку мыши, чтобы завершить выделение.
Если нажать на конечную точку, то рядом с ней появится перемещаемый крестик. Если его затем потащить, область увеличится.
-
Или отпустите кнопку мыши и тащите, чтобы нарисовать многоугольное выделение. Когда конечная точка будет находиться над начальной, щёлкните для завершения выделения.
Удерживайте клавишу Ctrl и нажмите на конечную точку; перемещение указателя мыши будет принудительно создавать углы в 15°; таким способом можно легко рисовать горизонтальные или вертикальные линии.
В обоих случаях двойной щелчок по конечной точке закрывает выделение прямой линией.
В режиме многоугольника выделение является предварительным; бегущий пунктир присутствует, но маленький жёлтый кружок ещё не исчез: выделение можно скопировать, а также, нажав клавишу Backspace, можно вернуться к предыдущему шагу создания выделения (снова разомкнуть выделение) и редактировать его.
Нажмите Ввод или сделайте двойной щелчок внутри объекта для подтверждения выделения.
Если нажать и отпустить курсор мыши, то можно смешивать сегменты свободного выделения и многоугольные сегменты. При желании можно выходить за пределы показываемого изображения и возвращаться обратно.
Лассо очень часто является хорошим выбором для «черновой намётки» выделения; для точного обозначения оно не очень подходит. Опытные пользователи часто начинают с лассо, а затем переключаются в режим Быстрой маски для работы с деталями.
За справкой о том, как выделения используются в GIMP, обращайтесь к выделениям; обращайтесь к инструментам выделения за информацией об их общих свойствах.
![[Примечание]](images/note.png)
|
Примечание |
|---|---|
|
Этот инструмент намного легче использовать с помощью графического планшета, нежели мыши. |
Есть несколько способов активации инструмента:
-
через главное меню → →
-
щелчком по значку инструмента
на панели инструментов;
-
или с помощью клавиши быстрого доступа F.
У инструмента «Свободное выделение» есть клавиши-модификаторы, одинаково влияющие на все инструменты выделения. Справку по этим клавишам см. в разделе Инструменты выделения.
Клавиша Backspace возвращает к предыдущему шагу создания выделения (удаляет последний нарисованный сегмент), а клавиша Escape отменяет все сегменты выделения.
За описанием перемещения выделения обратитесь к главе Перемещение выделений.
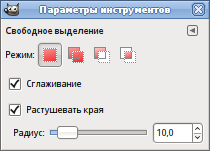
Обычно параметры инструмента отображаются в окне, прикреплённом под панелью инструментов, как только вы активируете инструмент. Если это не так, вы можете получить к ним доступ с помощью пункта главного меню → → , что откроет окно параметров выбранного инструмента. Доступ к параметрам инструмента также можно получить, дважды щёлкнув по соответствующему значку инструмента на панели инструментов.
- Режим, Сглаживание, Растушевать края
-
![[Примечание]](images/note.png)
Примечание Обратитесь к параметрам инструментов выделения за справкой об параметрах, общих для всех инструментов выделения. Здесь описаны только параметры, присущие этому инструменту выделения.
Муравьиная дорожка сопровождается непрерывной линией, что означает, что выделение ещё не подтверждено и всё ещё можно изменить форму выделения (указатель мыши сопровождается значком «Переместить»). Но вы ещё не можете использовать (удерживая нажатой) клавиши Shift и Ctrl. Нужно нажать клавишу Enter. Затем можно использовать (удерживая их нажатыми) клавишу Shift для добавления выделения, клавишу Ctrl для вычитания выделения, клавиши Shift + Ctrl для пересечения двух выделений. Когда вы будете удовлетворены изменениями, нажмите клавишу Enter для подтверждения выделения.


