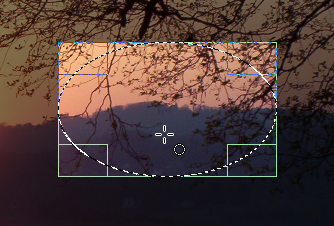
A ferramenta de seleção elíptica foi projetada para selecionar regiões circulares e elípticas de uma imagem, com alta qualidade de anti-serrilhado, se você desejar. Para obter informações sobre as seleções e como elas são usadas no GIMP veja Seleções; para obter informações sobre as características comuns a todas as ferramentas de seleção veja Ferramentas de seleção.
This tool is also used for rendering a circle or ellipse on an image. To render a filled ellipse, create an elliptical selection, and then fill it using the Bucket Fill tool. To create an elliptical outline, the simplest and most flexible approach is to create an elliptical selection and then stroke it. However, the quality of anti-aliasing with this approach is rather crude. A higher quality outline can be obtained by creating two elliptical selections with different sizes, subtracting the inner one from the outer one; however this is not always easy to get right. The command → makes it easy.
There are different possibilities to activate the tool:
-
From the main menu: → → .
-
By clicking the tool icon
in the Toolbox.
-
By pressing the E keyboard shortcut.
![[Nota]](images/note.png)
|
Nota |
|---|---|
|
Veja Ferramentas de Seleção para obter ajuda com teclas modificadoras que afetam todas essas ferramentas da mesma forma. Apenas as opções que são específicas para esta ferramenta são explicadas aqui. |
- Ctrl
-
Pressionar a tecla Ctrl após o início da sua seleção, e segurando-a até terminar, faz com que o ponto de partida seja usado como o centro da elipse selecionada, em vez de um canto do retângulo que a contém. Note que se você pressionar a tecla Ctrl antes de começar a fazer a seleção, a seleção resultante será subtraída da seleção existente.
- Shift
-
Pressionar a tecla Shift depois de começar sua seleção, e segura-la até você terminar, restringe a seleção a um círculo. Note que, se você pressionar a tecla Shift antes de começar a fazer a seleção, a seleção resultante será adicionada à seleção existente.
- Ctrl+Shift
-
Pressionar ambas as teclas combina os dois efeitos, fornecendo uma seleção circular centralizada no seu ponto de partida.
When this tool is selected the mouse pointer comes with a circle icon as soon as it is over the image. A drag-and-drop allows you to get an ellipse (or a circle) within a rectangular box. When the mouse button is relaxed, a dotted line (“marching ants”) outlines the elliptic selection. It's not necessary to adjust the selection with care; you can resize it easily later.
Quando o ponteiro está se movendo na tela, os aspectos de ponteiro e seleção mudam. É possível alterar o tamanho da seleção usando as alças. Veja a seção Manipulando a ferramenta dentro do capítulo sobre seleção retangular.
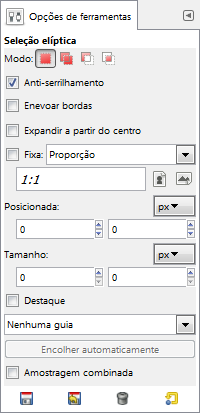
Normally, tool options are displayed in a window attached under the Toolbox as soon as you activate a tool. If they are not, you can access them from the main menu through → → which opens the option window of the selected tool. The available tool options can also be accessed by double clicking the corresponding tool icon in the Toolbox.
- Modo, Anti-serrilhamento, Feather edges
-
![[Nota]](images/note.png)
Nota See Selection Tools Options for help with options that are common to all these tools. Only options that are specific to this tool are explained here.
- Expandir a partir do centro, Fixa, Posição, Tamanho, Destaque, Guias, Auto Shrink, Amostragem combinada
-
These options work exactly the same way they are described for the Rectangle Selection tool. See Seção 2.2.4, “Opções” for details.


