Buffers are a kind of temporary storage for image data, created when you cut or copy part of a drawable (a layer, layer mask, etc.). The following commands are available from the menu to save an image to a buffer:
- Cut Named…
-
→ → This command cuts the selected part from the current drawable (usually a layer) and places it in a buffer. If there is no selection the whole drawable will be used. You will be asked to give the buffer a name. The image will be removed from the selection after this is done.
- Copy Named…
-
→ → This command copies the selected part from the current drawable (usually a layer) and places it in a buffer. If there is no selection the whole drawable will be used. You will be asked to give the buffer a name.
- Copy Visible Named…
-
→ → This command copies the selected part from all the visible drawables and places it in a buffer. If there is no selection the whole image will be used. You will be asked to give the buffer a name.
- Paste Named…
-
→ → This menu command opens the Buffers Dialog. To actually paste a buffer, choose one of the buttons from this dialog, or the context menu. Both of which will be explained below.
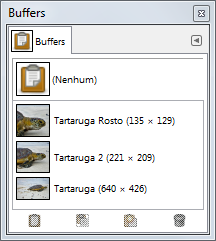
The “Buffers” dialog shows you the contents of all existing named buffers, and allows you to operate on them in several ways. It also shows you, at the top, the contents of the Global Buffer (the contents of the clipboard). This Global Buffer is merely a display: you can't do anything with it. There is no hard limit on the number of named buffers you can create, except that it will consume a share of your available computer memory.
![[Cuidado]](images/caution.png)
|
Cuidado |
|---|---|
|
Named buffers are not saved across sessions: they will be gone when you close GIMP. The only way to save their contents is to paste them into images. |
O diálogo de “Buffers” é um diálogo de encaixe;veja a seção Seção 2.3, “Caixas de diálogo e de encaixe” para mais informações sobre como gerenciá-lo.
Você pode acessa-lo:
-
from the main menu: → → ;
-
from the main menu: → → ;
-
from the Tab menu in any dockable dialog by clicking the tab menu button
 and selecting
→ .
and selecting
→ .
In the menu, there is a list of detached windows which exists only if at least one dialog remains open. In this case, you can raise the “Buffers” dialog from the main menu: → .
Clicking on a buffer in the display area makes it the active buffer, i.e., the one that will be used for paste commands executed from the Buffers context menu, or the buttons at the bottom of the dialog. Double-clicking on a buffer causes its contents to be pasted to the active image as a floating selection; this is a quick way of executing the “Paste Buffer” command.
At the bottom of the dialog are five buttons. The operations they perform can also be accessed from the Buffers Menu that you get by right clicking on the active buffer.
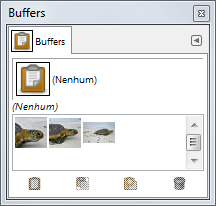
No menu de Guia para o diálogo de “Buffers”, você pode escolher entre e . No modode grade, as miniaturas dos buffers aparecem em um arranjo regularde ícones. Apenas o nome do buffer selecionado é exibido. No modo de Lista, eles são alinhados um abaixo do outro,e o nome e tamanho em pixels de cada buffer são exibidos.
![[Dica]](images/tip.png)
|
Dica |
|---|---|
|
Ctrl+F abre uma caixa para pesquisas por nome. Para maiores informações sobre o modo de lista, veja View as List. |
Você pode alterar o tamanho das pré-visualizações dos buffers, usando o submenu “Tamanho da pré-visualização” no menu de guia do diálogo.
The button bar at the bottom offers the following functionality:
-
 Colar buffer
,
Paste Buffer In Place
Colar buffer
,
Paste Buffer In Place
-
Este comando cola o conteúdo do buffer selecionado na imagem ativa, como uma seleção flutuante. A única diferença entre esse comando e o Colar normal é que ele usa o buffer selecionado em vez do buffer global da área de transferência.
With the Shift key pressed, it pastes the buffer at its original location.
-
 Paste Buffer Into The Selection
,
Paste Buffer Into The Selection In Place
Paste Buffer Into The Selection
,
Paste Buffer Into The Selection In Place
-
This command pastes the contents of the selected buffer into the active image's selection, as a floating selection. The only difference between this and the ordinary Paste Into Selection command is that it uses the selected buffer rather than the global clipboard buffer.
With the Shift key pressed, it pastes the buffer into the active selection at its original location.
-
 Paste Buffer as New Layer
,
Paste Buffer as New Layer in Place
Paste Buffer as New Layer
,
Paste Buffer as New Layer in Place
-
This command creates a new layer in the active image out of the contents of the selected buffer. The only difference between this and the ordinary Paste as New Image command is that it uses the selected buffer rather than the content of the global clipboard buffer.
With the Shift key pressed, it creates the layer at the original location of the buffer.
-
Paste Buffer as New Image
-
This command creates a new single-layer image out of the contents of the selected buffer. The only difference between this and the ordinary Paste as New Image command is that it uses the selected buffer rather than the content of the global clipboard buffer.
-
 Remover buffer
-
Este comando apaga o buffer selecionado, sem perguntar nada. Você não pode apagar o Buffer global.


