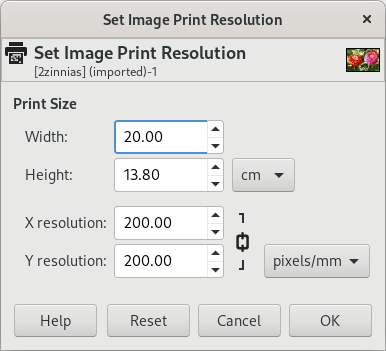
This command opens the “Set Image Print Resolution” dialog that allows you to change the dimensions of a printed image and its resolution. This command does not change the number of pixels in the image and it does not resample the image. (If you want to change the size of an image by resampling it, use the Scale Image command.)
The output resolution determines the number of pixels used per unit length for the printed image. Do not confuse the output resolution with the printer's resolution, which is a printer feature and expressed in dpi (dots per inch); several dots are used to print a pixel.
When the dialog is displayed, the resolution shown in the boxes is the resolution of the original image. If you increase the output resolution, the printed page will be smaller, since more pixels are used per unit of length. Conversely, and for the same reason, resizing the image modifies the resolution.
Increasing the resolution results in increasing the sharpness of the printed page. This is quite different from simply reducing the image size by scaling it, since no pixels (and no image information) are removed.
- Width, Height
-
You can set the printing Width and Height by using the text boxes. You can also choose the units for these values from the drop-down list.
As soon as you change the Width or the Height, the X and/or Y resolution values automatically change accordingly. If the two resolution values remain linked, the relationship of the width to the height of the image is also automatically maintained. If you would like to set these values independently of each other, click on the
chain symbol to break the link.
- X resolution, Y resolution
-
You can set the resolution used to calculate the printed width and height from the physical size of the image, that is, the number of pixels in it.
Use the text boxes to change these resolution values. They can be linked to keep their relationship constant. The
closed chain symbol between the two boxes indicates that the values are linked together. If you break the link by clicking on the chain symbol, you will be able to set the values independently of each other.
![[Note]](images/note.png)
Note The default resolution unit used for the X and Y resolution may depend on the type of image you imported. PNG images that have a resolution set, are known to be imported with the unit set to metric, meaning you will see pixels/mm here in that case.
GIMP currently does not have a preference that overrides the unit set in the image. However, if you change it here (and press OK to exit the dialog), it will be remembered for the current session.


