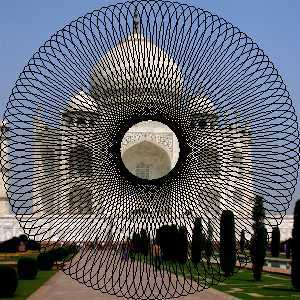
Este filtro dibuja espirógrafos, epitrocoides y curvas de Lissajous. Se proporciona retroalimentación inmediata dibujando en una capa temporal.
It reproduces curves drawn by Spirograph© toys. Here is an example from Wikimedia Commons showing what gears and holes are:
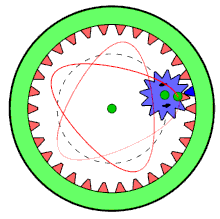
El engranaje en movimiento está dentro del engranaje fijo y sólo se usa un agujero.
Much of the behavior of the plug-in is determined by options set outside of the plug-in, such as the current selection, or the settings of GIMP's tools. These settings can be changed while the plug-in is running.
![[Nota]](images/note.png)
|
Nota |
|---|---|
|
In contrast to options within the plug-in, changing the current selection or tool settings will not redraw the pattern. To show the changes, click the button at the bottom of the plug-in. |
As in most plug-ins, the current selection determines the area where the pattern will be rendered. Typically, this would be a rectangular selection. There is however, an additional way the selection can be used.
The selection can be used as the shape of the fixed gear (under the Fixed Gear tab). The plug-in will attempt to extract shapes from the selection, and draw a pattern inside of each shape. This is more interesting if you select a non-rectangular selection.
Para que el patrón abrace los límites de las formas, use porcentaje del agujero=100.
Spyrogimp uses GIMP's tools to perform the drawing. All the settings with which the drawings are done are taken from the chosen tool. For example, if you want to use the Pencil tool (by choosing it from the Tool menu), then all the settings of this tool will be used for drawing. You can change any of the tool settings while the plug-in is running, and press the button to see how the pattern looks.
La mayoría de las opciones están organizadas en tres pestañas: Patrón de curva, Engranaje fijo y Tamaño.
- Tipo de curva
-
The available curve types are: Spyrograph, Epitrochoid, Sine, and Lissajous. These correspond to physical models for drawing them, using either gears or springs. Spyrograph and Epitrochoid curves are obtained by using two gears - a fixed gear, and a moving gear. A Spyrograph pattern is obtained when the moving gear is rotated inside the fixed gear. When the moving gear is outside the fixed gear, an Epitrochoid pattern is generated. The Sine curve uses the fixed gear, but instead of a moving gear, there is a spring that moves perpendicular to the fixed gear's edge. The Lissajous curve is generated by two springs, which move on the x and y axis. It does not use the fixed ring at all, and thus is not affected by changing it.
Figura 17.412. Tipos de curvas de “Espirogimp”

Tipos de curvas de izquierda a derecha: Espirógrafo, Epitrocoide, Sinusoide y Lissajous.
- Herramienta
-
The GIMP tool with which to draw the pattern. The first tool is named Preview and its purpose is to draw quickly, rather than beautifully - so the pattern can be previewed. The other available tools are: PaintBrush, Pencil, AirBrush, Stroke, Ink, and MyPaintBrush.
- Degradado largo
-
When unchecked, the current tool settings will be used - this can either produce a gradient or not, depending on the tool settings. When checked, the plug-in will produce a long gradient to match the length of the pattern, based on the current gradient, the "Reverse" setting, and the Repeat mode from the gradient tool settings. Setting the Repeat mode to Triangle Wave will produce a pattern that changes continuously, with no abrupt breaks. This is done by using the gradient followed by its reverse. Any other Repeat mode will simply use the gradient from start to finish.
Figura 17.413. Ejemplos de gradiente largo de “Espirogimp”

The left image, without Long Gradient, used the paintbrush tool with a gradient. The two right images were generated with the same gradient, but with Long Gradient checked. The right image used the Triangle Wave Repeat mode.
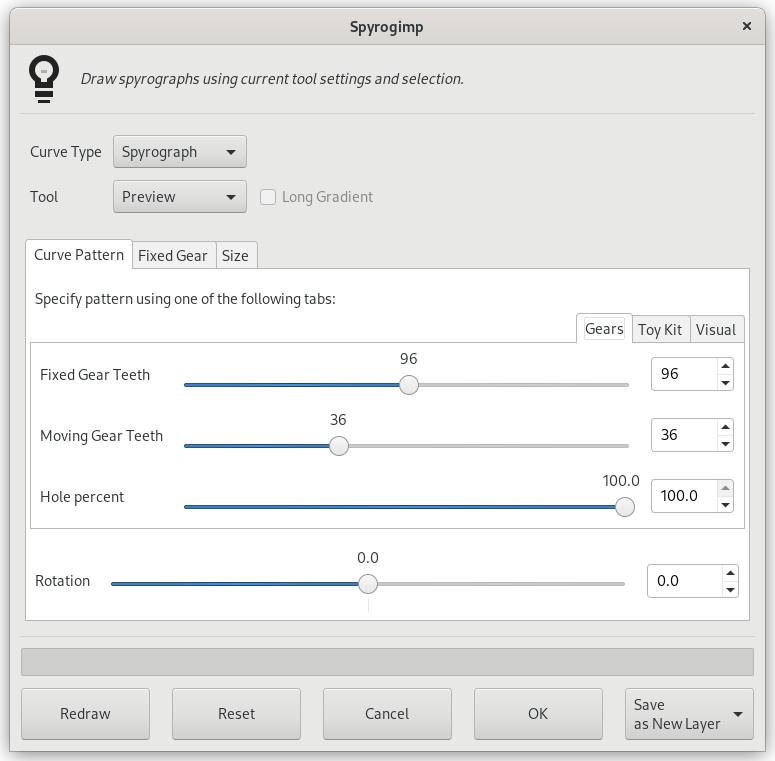
Figura 17.414. Opciones del filtro “Espirogimp” (Patrón de curva)
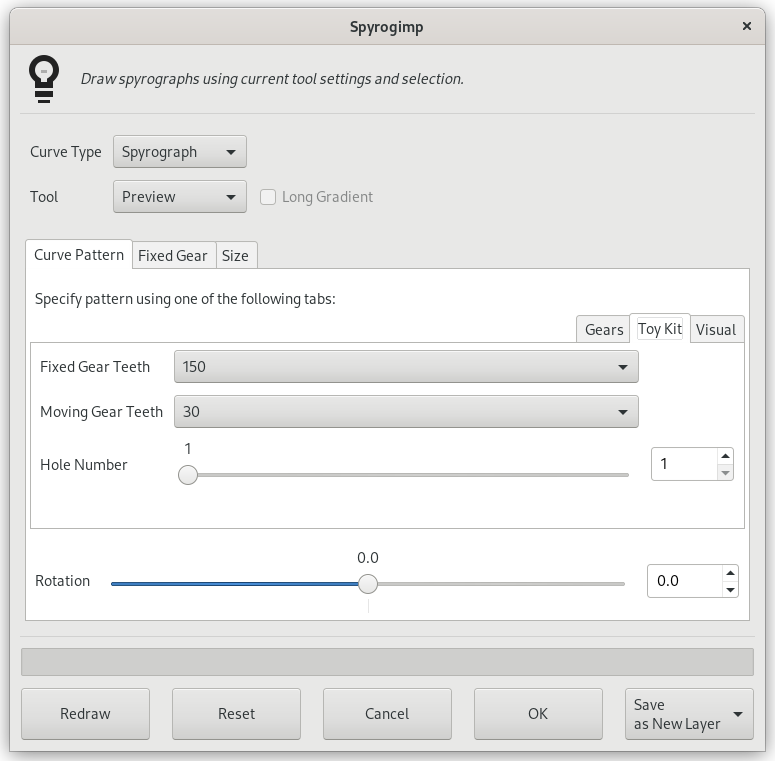
La pestaña interna Kit de juguetes se muestra a la derecha.
Specify a pattern using the Gears, Toy Kit or Visual tabs. The pattern is based only on the settings of the active tab. Toy Kit is similar to Gears, but it uses gears and hole numbers which are found in toy kits. If you follow the instructions from the toy kit manuals, you should obtain similar results.
- Dientes del engranaje fijo
-
Número de dientes del engranaje fijo. El tamaño del engranaje fijo es proporcional al número de dientes.
- Dientes del engranaje en movimiento
-
Número de dientes del engranaje en movimiento. El tamaño del engranaje en movimiento es proporcional al número de dientes.
- Porcentaje del agujero
-
Indica qué tan lejos está el agujero del centro del engranaje en movimiento. 100% significa que el agujero está en el borde del engranaje.
The Toy Kit tab also has Fixed Gear Teeth and Moving Gear Teeth options. In this case, however, they are limited to gear sizes that are provided with toy kits for drawing Spyrographs.
- Número del agujero
-
El agujero n.° 1 está en el borde del engranaje. El número máximo de agujeros está cerca del centro. El número máximo de agujeros es diferente para cada engranaje.
Figura 17.415. Ejemplos del Kit de juguetes de “Espirogimp”
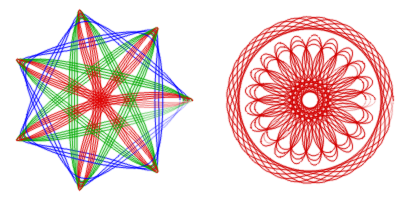
El Kit de juguetes ayuda a recrear los diseños del kit de juguetes. La imagen de la izquierda usa un engranaje fijo 105 y un engranaje móvil 30 (azul), 45 (verde) y 60 (rojo), donde cada engranaje en movimiento se usó varias veces con un Número de orificio que varía de 3 a 7. La imagen de la derecha también usa el anillo fijo 105, con el anillo móvil 24 (agujero número 4) y el anillo móvil 80 (agujeros números 16, 18, 20).
Figura 17.416. Opciones del filtro “Espirogimp” (Patrón de curva)
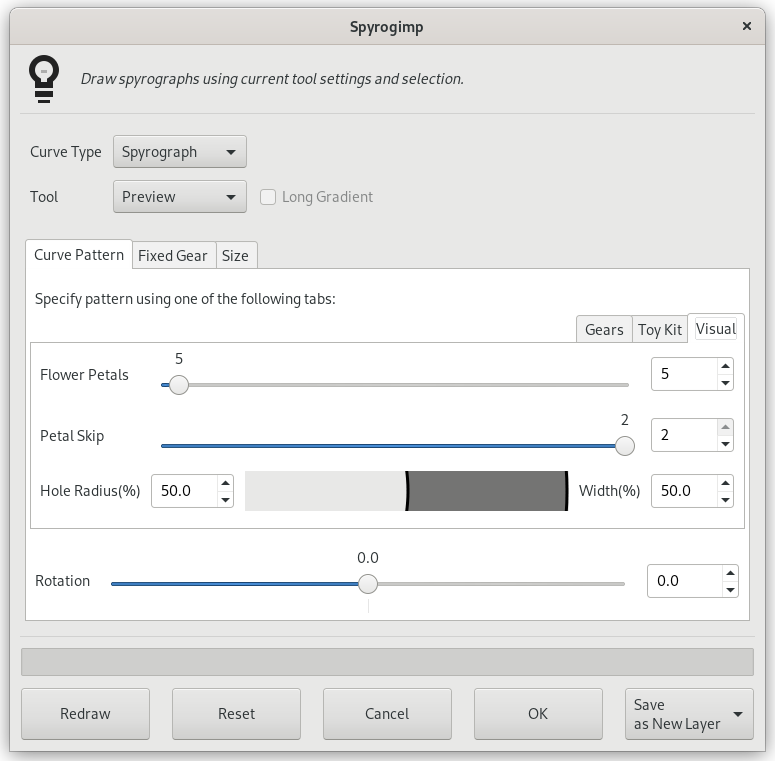
The Visual tab is shown in the middle on the right side.
The Visual tab creates more rounded, flower petal like patterns. It has the following settings:
- Flower Petals
-
The number of flower petals to draw.
- Petal Skip
-
The number of petals to skip.
- Hole radius (%)
-
The size of the hole.
- Width (%)
-
The width of the drawing.
Debajo de las pestañas hay una opción adicional.
- Rotación
-
Rotación del patrón, en grados. La posición inicial del engranaje en movimiento en el engranaje fijo. Tenga en cuenta que esto también cambia el patrón al dibujar curvas de Lissajous.
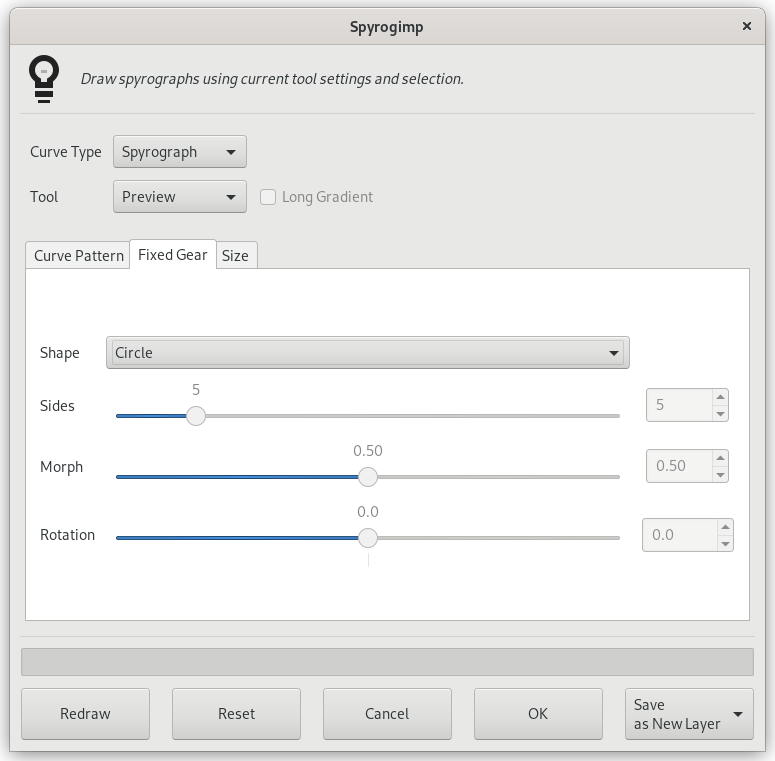
- Forma
-
La forma del engranaje fijo que se usará dentro de la selección actual.
-
Circulo
-
Rack is a long round-edged shape provided in the toy kits.
-
Frame hugs the boundaries of the rectangular selection, use hole=100 in Gear notation to touch boundary. To generate a narrow frame width, use a small number of teeth for the moving gear.
-
Selection will hug boundaries of current selection - try something non-rectangular.
-
Polygon-Star morphs from an n-sided polygon (morph=0) to an n-sided star (morph=0.3) to a crazy flower (morph=1).
-
Sine with morph=0, it is just like a circle, but becomes more wavy as morph increases.
-
Bumps morphs from a polygon (morph=0) to a scalloped circle.
Figura 17.418. Ejemplos de formas de “Espirogimp”

From left to right, Circle, Rack, Frame, and Selection shapes of the fixed gear. The selection in the right image was generated by selecting a large letter "T" that was produced by the text tool.
Figura 17.419. Ejemplos de la forma polígono estrellado de “Espirogimp”

De izquierda a derecha, Transformar = 0, 0.3, 0.6, 1
Figura 17.420. Ejemplos de la forma sinusoidal de “Espirogimp”

De izquierda a derecha, Transformar = 0.1, 0.3, 0.5
Figura 17.421. Ejemplos de la forma de bultos de “Espirogimp”

De izquierda a derecha, Transformar = 0, 0.5, 1
-
- Lados
-
Number of sides of the shape.
This applies only to the Polygon-Star, Sine, and Bumps shapes. Otherwise this option is disabled.
- Transformar
-
Morph fixed gear shape.
This applies only to the Polygon-Star, Sine, and Bumps shapes. Otherwise this option is disabled.
- Rotación
-
Rotación del engranaje fijo, en grados.
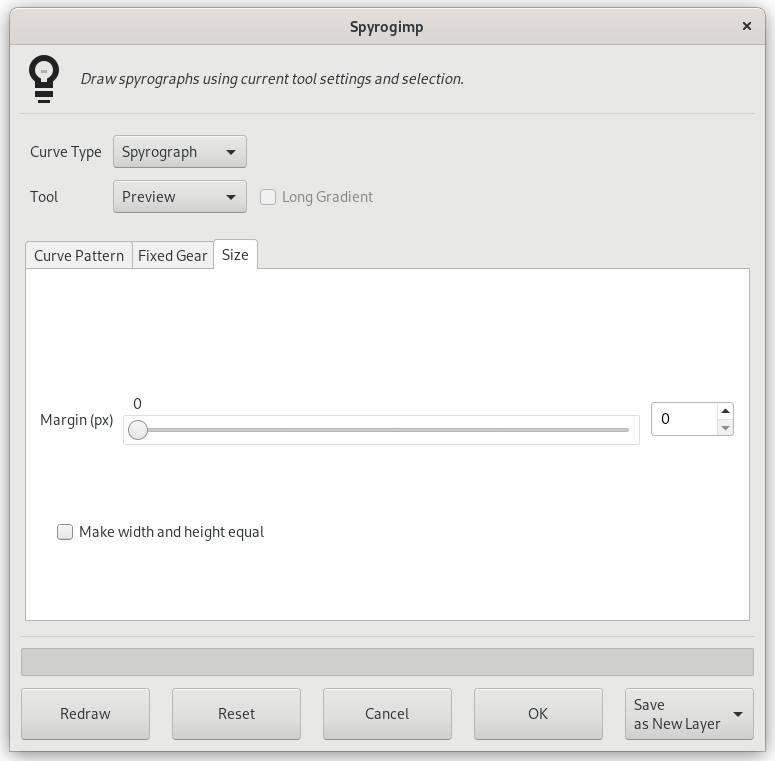
- Margen (px)
-
Margen desde el borde de la selección. Esto controla el tamaño del patrón.
- Hacer que el ancho y la altura sean iguales
-
Cuando no está marcado, el patrón llenará la imagen o selección actual. Cuando se marca, el patrón tendrá el mismo ancho y alto, y estará centrado. La diferencia entre marcado y no marcado solo se notará si el tamaño del ancho y el alto de la selección difieren.
- Guardar
-
The Save dropdown determines what will happen to the temporary layer once is pressed. Available options are: As New Layer, Redraw on last active layer, and As Path.
- Redibujar
-
If you change the settings of a tool, change color, or change the selection (i.e., any settings outside of the plug-in that affect the pattern), press this to update the preview to see how the pattern looks.
- Reiniciar
-
Resets the dialog to its default settings.
- Cancelar
-
Delete the temporary layer, and exit the plug-in.
- Aceptar
-
Render pattern to image.
