Door het gebruiken van de opdracht , kunt u alle kleuren op de actieve laag converteren naar de corresponderende tinten grijs. Dat verschilt in twee aspecten van het converteren van de afbeelding naar grijswaarden. Ten eerste, het werkt alleen op de actieve laag en ten tweede, de kleuren op de laag zijn nog steeds waarden RGB met drie componenten, met R=G=B, dat grijs maakt. Dat betekent dat u dan op de laag kunt tekenen, of individuele delen ervan, met niet-grijze kleuren.
![[Opmerking]](images/note.png)
|
Opmerking |
|---|---|
|
Deze opdracht werkt alleen met lagen van afbeeldingen RGB. Als de afbeelding van de modi Grijswaarden of Geïndexeerd, kan het niets doen. |
Modus: Vijf opties zijn beschikbaar voor het converteren van kleur naar zwart/wit:
- Voorinstellingen, Mengopties, Voorbeeld, Filter samenvoegen, Voor/na
-
![[Opmerking]](images/note.png)
Opmerking These options are described in Paragraaf 8.1.2, “Algemene mogelijkheden voor kleuren”.
- Helderheid
-
De tinten grijs zullen worden berekend met gelineariseerde sRGB als
Luminance = (0.22 × R) + (0.72 × G) + (0.06 × B) - Luma
-
De tinten grijs zullen worden berekend met niet-gelineariseerde sRGB als
Luma = (0.22 × R) + (0.72 × G) + (0.06 × B) - Lichtheid (HSL)
-
De tinten grijs zullen worden berekend als
Lightness (HSL) = ½ × (max(R,G,B) + min(R,G,B)) - Gemiddelde (HSI-intensiteit)
-
De tinten grijs zullen worden berekend als
Average (HSI Intensity) = (R + G + B) ÷ 3 - Waarde (HSV)
-
De tinten grijs zullen worden berekend als
Waarde (HSV) = max(R,G,B)
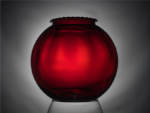
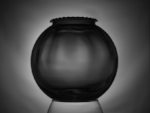
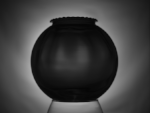
Afbeelding 16.181. De vijf modi gebruiken om twee hele verschillende kleurenafbeeldingen te converteren naar zwart/wit

Originele afbeelding
Originele afbeelding

“Helderheid” toegepast
“Helderheid” toegepast

“Luma” toegepast.
“Luma” toegepast.

“Lichtheid (HSL)” toegepast.
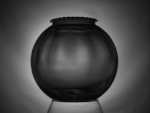
“Lichtheid (HSL)” toegepast.

“Gemiddelde (HSI-intensiteit)” toegepast.
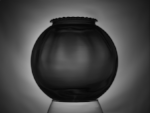
“Gemiddelde (HSI-intensiteit)” toegepast.

“Waarde (HSV)” toegepast.
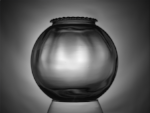
“Waarde (HSV)” toegepast.
-
De mate en richting, van waaruit de verscheidene manieren om een afbeelding te converteren naar zwart/wit verschillen van een rechte conversie Helderheid naar zwart/wit, is afhankelijk van:
-
De door u gekozen methode voor de conversie.
-
De kleurruimte RGB waarin de conversie wordt uitgevoerd.
-
Hoe verzadigd de kleuren in de originele afbeelding zijn, met meer verzadigde startkleuren (zoals de rode vaas en de helder gele zonnebloem) produceren grotere hoeveelheden afwijking van een rechte conversie met Helderheid.
-
De tinten (bijvoorbeeld gelen vs roden), van de verscheidene verzadigde kleuren in een afbeelding, maken ook een verschil.
-
Zijnde het maximum van de waarden voor het RGB-kanaal voor elk beeldpunt, is een conversie van HSV Waarde naar zwart/wit altijd lichter dan de originele kleurenafbeelding en ook lichter dan alle andere manieren om naar zwart/wit te converteren.
-
-
Vergelijken van de rode vaas met de gele zonnebloem:
-
Voor de rode vaas produceert Lichtheid (HSL) een resultaat dat heel veel lijkt op Helderheid en Luma produceert een conversie die veel donkerder is.
-
Voor de zonnebloem produceert Luma een resultaat dat heel veel lijkt op Helderheid en Lichtheid (HSL) produceert een conversie die veel donkerder is.
-
Onthoud dat de minder verzadigde delen van elke afbeelding er min of meer hetzelfde uitzien, ongeacht welke methode werd gekozen voor het converteren van kleur naar zwart/wit.
-
-
Meer informatie over Helderheid:
-
"Helderheid" is de enige fysiek betekenisvolle manier om een kleurenafbeelding te converteren naar zwart/wit, omdat de resulterende zwart/wit-afbeelding dezelfde relatieve helderheid heeft (reflecteert hetzelfde percentage licht uit de verschillende tinten grijs) als de kleuren in de originele kleurenafbeelding.
-
Helderheid moet worden berekend met gelineariseerde waarden RGB.
-
Voor het gemak zeggen we "Helderheid", maar wat we feitelijk bedoelen is "Relatieve helderheid". Voor meer informatie, bekijk Relative Luminance en CIE 1931 [XYZ] color space.
-
GIMP gebruikt hard gecodeerde waarden sRGB om conversies Helderheid naar zwart/wit uit te voeren. "GIMP in de toekomst" zal correcte conversies voor afbeeldingen in andere kleurruimten ondersteunen.
-
-
-
"Luma" is wat u krijgt als u de formule voor helderheid gebruikt op waarden RGB die niet op de juiste wijze zijn gelineariseerd.
-
De vermenigvuldigingsfactoren zijn op de juiste wijze aangepast voor Bradford naar D50, wat is vereist om te gebruiken in een ICC-profiel kleurbeheerde toepassing (ten minste totdat de volgende versie van de specificaties van ICC zijn uitgegeven en mensen hebben uitgevogeld hoe om te gaan met de nieuwe vrijheid voor het gebruiken van niet-D50 verwezen witpunten).
-
GIMP gebruikt hard gecodeerde waarden sRGB om conversies Luma naar zwart/wit uit te voeren. "GIMP in de toekomst" zal correcte conversies voor afbeeldingen in andere kleurruimten ondersteunen.
-
-
Meer informatie over Lichtheid, Gemiddelde en Waarde:
De manieren "Lichtheid (HSL)", "Gemiddelde (HSI-intensiteit)" en "Waarde (HSV)" om een kleurenafbeelding te converteren naar zwart/wit gebruiken modellen van kleurruimten die werden uitgevonden voor het snel verwerken op computers voor consumenten uit de jaren rondom 1990. Bekijk voor details HSL and HSV, en let dan in het bijzonder op het gedeelte over Disadvantages.
-
Voor het geval u zich afvraagt waarom LAB Lichtheid niet bij de opties staat voor het converteren van een afbeelding RGB naar zwart/wit, een juist berekende conversie van RGB naar LAB Lichtheid, en dan weer terug naar RGB, produceert exact dezelfde resultaten als de conversie Helderheid naar zwart/wit. Hier is de reden waarom:
-
In de kleurruimte XYZ, is Y Helderheid. Als u dus een kleurenafbeelding RGB converteert naar XYZ, is de "Y" van XYZ hetzelfde getal als de waarden R=G=B die u krijgt als u RGB Helderheid berekend.
-
LAB is een perceptueel uniforme transformatie van XYZ. Als u converteert van RGB naar XYZ en dan naar LAB, en instelt A=B=0,0 (of 0,5 voor bewerkers van afbeeldingen die het middelpunt van de assen A en B op 0,5 instellen, in plaats van op 0,0), en dan terug converteert naar XYZ, zullen de waarden X en Z wijzigen, maar Y zal niet wijzigen.
Handleidingen die iets anders produceren dan Relatieve helderheid bij het converteren van een afbeelding RGB naar zwart/wit met LAB Lichtheid, handelen, zeer teleurstellend, met verscheidene wiskundige fouten in de routines voor de conversie.
-
