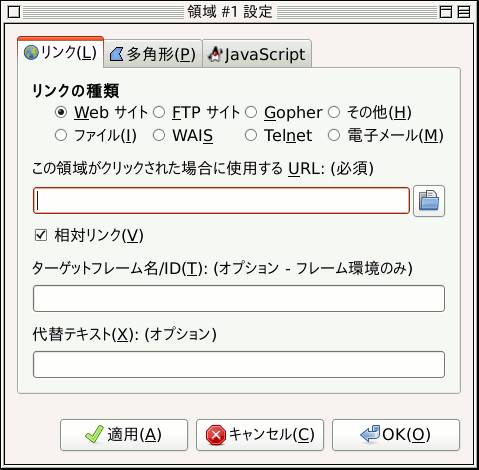
In Web sensitive images are frequently used to get some effects when defined areas are enabled by the pointer. Obviously the most used effect is a dynamic link to another web page when one of the sensitive areas is clicked on. This 「filter」 allows you to design easily sensitive areas within an image. Applications for website design have this as a standard function. In GIMP, you can do this in a similar way.
プラグインは画像を思いのままに区切る創造的な作業を視覚的に判り易く親切にお手伝いします。 こうして設定した領域の情報を反映した、 HTML コードにすぐ埋め込める適切な HTML のタグを書き出してくれます。 さらにリンク部分をマウスオーバーなどに反応させるいろいろな動作設定も可能です。
This is a complex tool which is not completely described here (it works about like Web page makers offering this function). However we want to describe here some of the most current handlings. If you want, you can find a more complete description in Grokking the GIMP with the link [GROKKING02].
The menu bar is similar to the main menu, only a few menus or menu entries are different:
- メニュー
-
- Save, Save As
-
他のフィルターは画像を生成するのにこのプラグインだけは画像を加工せずテキストファイルを生成します。 つまりこのダイアログで行なった操作の成果はテキストファイル形式で保存することになります。
![[ヒント]](images/tip.png)
ヒント ダイアログのメニューより → と進むとプレビューウィンドウが現れ、 現在の設定を反映したテキスト形式のタグ情報が表示されます。
- Open, Open recent
-
このプラグインは保存されているテキストファイルを開いて使えます。 そのファイルで定義されている領域が読み込まれ元の画像と領域に重ねて表示されます。 ファイル作成時とは異なる画像が開かれていたり、 画像の寸法が変わっていた場合にはサイズを合わせるかどうか GIMP が質問します。
- メニュー
- メニュー
-
このメニューの内容は独特なので詳しく説明します。
- Area List
-
Here you can hide or show the selection area.
- Source…
-
現れ出るウィンドウでファイルに保存もしくはファイルから読み込まれる生データが見られます。
- Color, Gray
-
ここで画像表示モードを切り替えるとプレビュー区画の表示が白黒グレースケールにも変えられます。
- Mappings
-
めったに使わないメニューかもしれません。 というのもツールを呼び出すなら作業区画の左隣のアイコンをクリックした方が手早く簡単だからです。
-
ここでの矢印とは移動ツールのことです。 このツールを呼び出したら領域を選択したりその領域を移動したりできます。
多角形の領域ではその角を示す赤いコントロールポイントを矢印ツールで移動できます。 またポイント間の線分を でクリックすると現れるメニューには、 線分上に新たなポイントを追加するコマンドなどがあります。 またポイントは でクリックすると削除できます。
- Rectangle, Circle, Polygon
-
ここらのツールは皆いろいろな形の領域を作成するのに使います。 ツールを呼び出したらプレビュー画面でクリックし、 他の位置でさらにクリックという操作です。 多角形はクリックするたびにポイントが増えてゆきますが、 ダブルクリックすれば領域作成が終わり属性情報のダイアログが開きます。
- Edit Map Info…
-
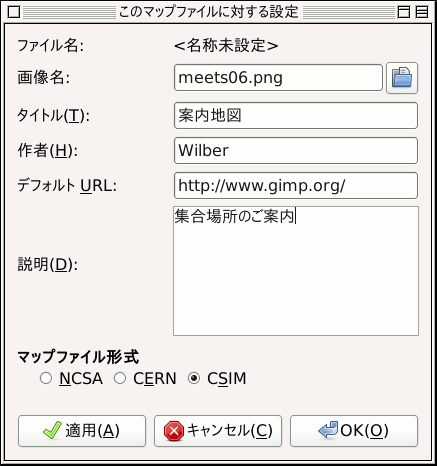
これは生成されるテキストファイルに書き込まれる僅かな項目を満たすための単純なダイアログです。 作者 と 説明 でコメントが付記できます。 HTML タグの属性情報は 画像名 と タイトル と デフォルトURL にそれぞれ指定してください。 マップファイル形式はウェブページを置くウェブサーバーの一部の機能に依存する NCSA や CERN よりも、 ほぼどんなウェブサーバーでも利用可能な CSIM をお勧めします。
- メニュー
-
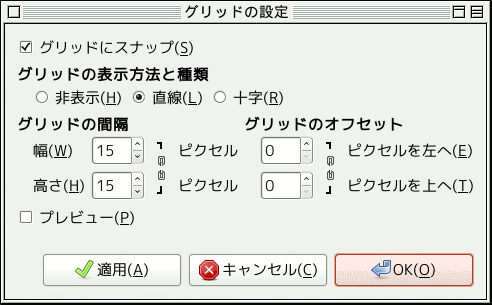
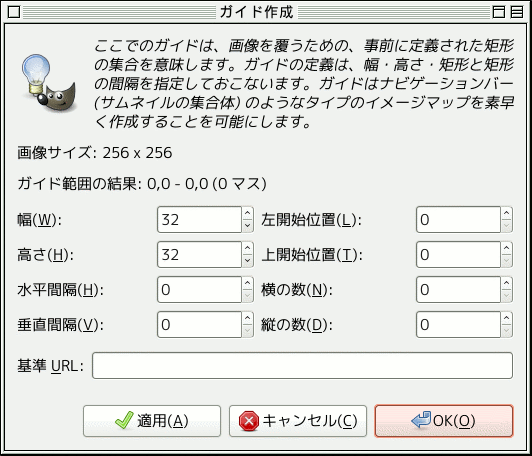
メニューを使えばガイドの表示ができ、 きっちり大きさや間隔を整えて矩形領域を描けます。
- Grid, Grid Settings…
-
ここではグリッドを表示するかしないかを選びその姿の種類を選べるほか、 間隔やオフセットが設定できます。 [なおこれらの項目はどういうわけか グリッドにスナップ を有効にしなければ定義できません。]
- Use GIMP Guides…, Create Guides…
-
ガイドは画像の辺境に作成されますが GIMP のガイドに少し似てそれぞれの線の赤い正方形ポイントをクリックしてドラッグすれば移動できます。 ガイドを使えば画像上に活性化した矩形を作成できます。
-
Instead of creating geometrical shapes to select the active areas you may use an array of rectangles, each representing an active area, by clicking on the 「Create guides」. In the menu popping up you set the width and height of the rectangles, the space between them, the number of rows and columns, and the upper and left startpoint for the array. All measures are in pixels. If you are not satisfied with the result you may adjust each rectangle by moving the red squares as usual.
ここに並ぶ機能はほとんどが既に上述したものばかりですが、 2 つだけ残っています。
- Move Area to Front, Move Area to Bottom
-
Here you can move an area entry to the bottom or top of the area list.
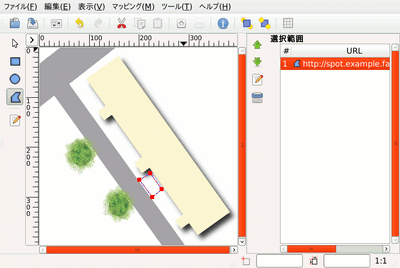
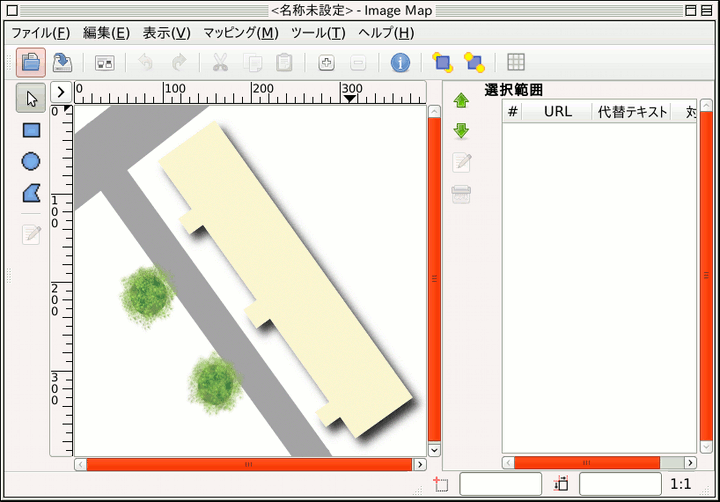
In the main area of the image map window, on the left side, you will find your working area where you can draw all the shapes areas you want with the relevant tools.
Beside the working area there are vertically displayed icons, one for pointing, three for calling tools to generate various shape areas, one to edit zone properties, and finally one to erase a selected zone; you can call these functions from the Mappings menu too.
![[注意]](images/caution.png)
|
注意 |
|---|---|
|
領域が重なり合ってはいけません。 |
作業区画の右側には作成された領域のそれぞれの属性情報を示す一覧表があります。 ここで項目をクリックして選択すると連動して作業区画上の領域が選択され、 加工ができます。
Beside the display is an icon vertical set; its use is obvious but a help pop-up gives you some information about each function.
上下のボタンは一覧表で項目を移動するためのものですが、 残念ながらどちらも機能しません。 しかし当然ながら領域は重なり合わないよう慎重に作図されたはずですので、 結局のところこの機能はいらないでしょう。


