In this section, you will learn how to create simple objects in GIMP.
Commençons par dessiner une ligne droite. Le plus simple est d’utiliser votre outil de peinture favori, la souris et le clavier.
-
Create a New Image
Figure 7.31. Une nouvelle image

Cette fenêtre montre une nouvelle image, remplie avec un arrière-plan blanc.
Create a new image.
-
Choose a Tool
Select a brush tool from the Toolbox, for example the
 Pencil tool or the
 Paintbrush tool.
-
Select a Color
Select a foreground color, but be sure that the foreground and background colors are different.
-
Create a Starting Point
Figure 7.32. Début de la ligne droite
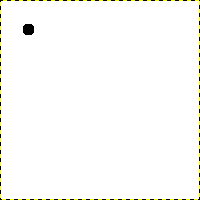
Cette fenêtre montre une nouvelle image, avec le premier point marquant le départ de la ligne. Le point a une couleur de premier-plan noire.
The size of this dot represents the current brush size, which you can change in the Brush Dialog.
Créez un point de départ en cliquant sur l’aire d’affichage de l’image avec le bouton gauche de la souris. Votre canevas doit ressembler à Figure 7.32, « Début de la ligne droite ».
-
Draw the Line
Figure 7.33. La ligne-support
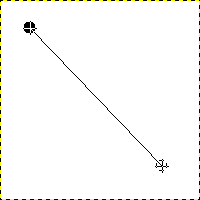
Cette capture d’écran montre la ligne-support, qui indique à quoi ressemblera la ligne une fois terminée.
Now, hold down the
 Shift key on your
keyboard and move the mouse away from the starting point you
created. You'll see a thin line indicating how the line will
look.
Shift key on your
keyboard and move the mouse away from the starting point you
created. You'll see a thin line indicating how the line will
look.
-
Finish the Line
Figure 7.34. La ligne après le second clic
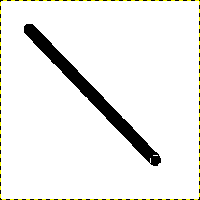
La ligne créée apparaît dans la fenêtre d’image après avoir inscrit le deuxième point, ou point final, tout en maintenant appuyée la touche Maj.
If you're satisfied with the direction and length of the line, click the left mouse button again to finish the line. The last step is to let go of the Shift key. GIMP displays a straight line now.
Figure 7.35. Example I
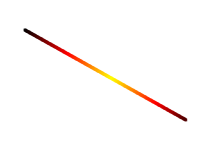
Set Dynamics to « Color From Gradient » and set Color Options to « Incandescent ». Under Fade Options, set Repeat to « Truncate ». Depending on the size of your underlying image, you might want to change the Fade length as well.
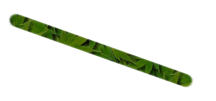
Select the Clone tool and set the source to « Maple Leaves » pattern.
Figure 7.36. Example II
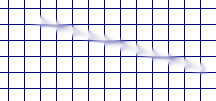
Use → → → to create a grid. Use the Smudge Tool to draw a line with a slightly larger brush.
Use → → → to create the cool plasma cloud. Use the Erase Tool with a square brush to draw a line.
Figure 7.37. Example III

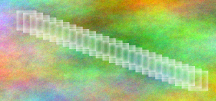
Use the rectangle select tool to select a rectangle, and then fill the selection with a light blue color. Select the Dodge/Burn tool. Set the type to Dodge and paint along the top and left side using an appropriately sized brush. Set the type to Burn and paint along the right and bottom.


