Table des matières
- 1. La boîte à Outils
- 2. Outils de sélection
- 3. Outils de peinture
-
- 3.1. Fonctions communes
- 3.2. Dynamique de la brosse
- 3.3. Outils de peinture (Crayon, Pinceau, Aérographe)
- 3.4. Remplissage
- 3.5. Dégradé
- 3.6. Crayon
- 3.7. Pinceau
- 3.8. Gomme
- 3.9. Aérographe
- 3.10. Calligraphie
- 3.11. Brosses MyPaint
- 3.12. Clonage
- 3.13. Correcteur
- 3.14. Cloner en perspective
- 3.15. Flou / Netteté
- 3.16. Barbouiller
- 3.17. Éclaircir/Assombrir
- 4. Outils de transformation
- 5. Other Tools
GIMP vous offre une boîte à outils complète pour exécuter rapidement des tâches de base telles que des sélections ou des chemins. Tous ces outils sont détaillés dans ce chapitre.
Un outil est un moyen de modifier une image (la majorité agissent en fait sur le calque actif) à l’aide du pointeur de la souris ou d’une tablette graphique, ou en réglant des options dans la fenêtre des options de l’outil.
![[Note]](images/note.png)
|
Note |
|---|---|
|
Reportez-vous à Fenêtre principale : la Boîte à outils pour un aperçu général sur la boîte à outils et ses composants. |
GIMP has a diverse assortment of tools that let you perform a large variety of tasks. The tools can be thought of as falling into the following categories:
-
Les outils de sélection, qui déterminent ou modifient la partie de l’image qui sera affectée par les opérations réalisées.
-
Les outils de peinture, qui modifient les couleurs quelque part dans l’image.
-
Les outils de transformation, qui modifient la géométrie de l’image.
-
Color tools, which alter the colors in the image as a whole;
-
Other tools, which don't fall into the other categories.
Most tools can be activated by clicking on an icon in the Toolbox. By default, some tools are accessible only via the menus. Every tool can be activated from the menu (or the menu for some color tools). Most tools can also be activated from the keyboard using an accelerator key.
In the default setup, created when GIMP is first installed, not all tools show icons in the Toolbox: some tools are omitted. You can customize the set of tools that are shown in the Toolbox in the Toolbox Preferences.
There are two reasons you might want to do this: first, if you only rarely use a tool, it might be easier to find the tools you want if the distracting icon is removed; second, if you use tools that are not found in the toolbox by default, you might find it convenient to have icons for them easily available. In any case, you can always access any tool at any time using the or menu from the main menu.
Tool icons are grouped by default. Tool groups are marked with a small dark triangle at the bottom right corner of the icon. The group icon displayed is the last used tool in the group. Right click on the group icon to display the list of tools in the group.
You can get all tools displayed by unchecking the Use tool groups option in Section 6.13, « Boîte à Outils ».
By default, the shape of the pointer changes when it is inside an image, to a shape that indicates which tool is active. You can change this behavior in the Pointers section of the Input Devices settings.
Figure 14.2. Foreground/Background Colors Area in the Toolbox

The Foreground/Background Colors area, marked with (3)
- Aire des couleurs
-
The color area shows GIMP's current foreground and background colors, which are used for painting, filling, and many other operations. Clicking on either one of them brings up a color selector dialog that allows you to change to a different color.
- Couleurs par défaut
-
Clicking on the small symbol in the lower left corner resets the foreground and background colors to black and white. Pressing the D key has the same effect.
- Swap Foreground/Background colors
-
Clicking on the double-headed arrow symbol swaps the foreground and background colors. Pressing the X key has the same effect.
![[Astuce]](images/tip.png)
Astuce Vous pouvez cliquer-glisser une de ces couleurs directement dans un calque : elle remplira tout le calque.
Figure 14.3. Active Brush, Pattern and Gradient Area in the Toolbox
The Active Brush, Pattern and Gradient area, marked with (4)
By default, this area is not displayed. You can add this area through → → : Section 6.13, « Boîte à Outils ».
En bas de la Boîte à outils, l’aire des indicateurs offre trois boutons, respectivement pour la Brosse, le Motif et le Dégradé actifs. Un simple clic sur un de ces boutons ouvre la fenêtre de dialogue correspondante vous permettant de changer l’objet.
By default, this area is not displayed. You can add this area through → → : Section 6.13, « Boîte à Outils ».
A thumbnail of the active image is displayed in this area. If you click on this thumbnail, the Images dialog is opened. This can be useful if you have many images on your screen.
If you use GIMP on a Unix-like operating system with the X Window System, you can also drag and drop the thumbnail to an enabled XDS file manager to directly save the corresponding image.
Figure 14.5. La fenêtre de dialogue Options de l’outil
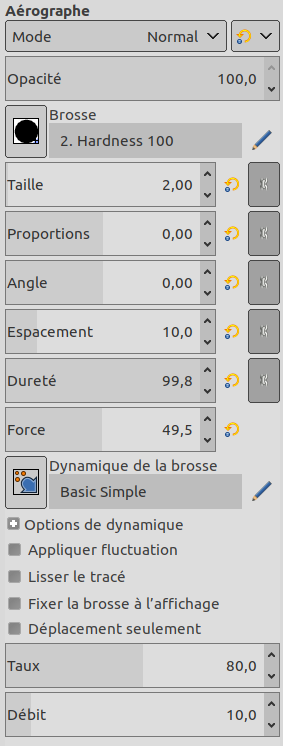
La boîte de dialogue des options de l’outil pour l’outil Aérographe.
Si votre GIMP est bien réglé, le fait d’activer un outil doit normalement ouvrir la fenêtre de dialogue Options de l’outil sous la Boîte à outils. Sinon, vous devriez corriger cela, car il est difficile d’utiliser un outil sans pouvoir changer ses options :
|
|
Astuce |
|---|---|
|
The Tool Options appear beneath the Toolbox in the default setup. If you lose it somehow, you can get it back by creating a new Tool Options dialog using → → and then docking it below the Toolbox. Alternatively you can double-click any tool button in the Toolbox as a quick way to open the Tool Options. If it appears in a different dock than the one you want, you can drag it to your preferred dock. See the section on Dialogs and Docking if you need help moving the Tool Options. |
Chaque outil possède sa propre liste d’options. Vos choix sont conservés non seulement au cours de la session actuelle, mais aussi pour les sessions suivantes. La persistance des choix peut poser problème : un outil peut se comporter de façon étrange sans que vous compreniez pourquoi jusqu’à ce que vous vous rappeliez avoir utilisé une option inhabituelle quelque temps auparavant.
En bas du dialogue Options de l’outil se trouvent quatre boutons :
-
 Save Tool Preset…
-
This button allows you to save the settings for the current tool, so that you can restore them later. It brings up the Section 7.2, « Dialogue Préréglages d’outil » allowing you to give a name for the new preset. When you Restore options, only saved presets for the active tool are shown, so you need not worry about including the name of the tool when you assign a name here.
-
 Restore Tool Preset…
-
This button allows you to restore a previously saved preset of options for the active tool. If no presets have ever been saved for the active tool, the button will be disabled. Otherwise, clicking it will bring up a menu showing the names of all saved option sets: choosing a menu entry will apply those settings.
-
 Delete Tool Preset
-
Ce bouton vous permet de supprimer un lot d’options préalablement enregistré concernant l’outil actif. Si rien n’a été enregistré, le bouton répétera simplement le nom de l’outil. Sinon, cliquer dessus ouvre un menu donnant la liste des noms des différents pré-réglages enregistrés parmi lesquels vous pouvez choisir celui à supprimer.
-
 Reset to default values
-
This button resets the options for the active tool to their default values. If you hold the Shift key while pressing the Reset button, the options for all tools will be reset to their default values.
In addition to the commands for the above buttons, the Tool Options tab menu has an extra submenu:
- Edit Tool Preset
-
This submenu shows a list of presets for the active tool that you can edit. Selecting one of them will open the Tool Presets Editor with that tool preset loaded. From there you can edit the preset, unless it is one of the default presets that come with GIMP.
Below we will explain the interaction with sliders and the mouse scroll-wheel.
- Les nouveaux curseurs
-
You can use multiple modifiers with either left-click or mouse wheel scrolling:
Tableau 14.1. Interaction with the Slider Widget
Mouse / key combination
Action 
Change the value to what's under the pointer 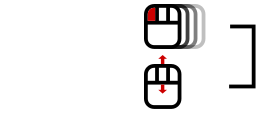
Change the value using the default increment 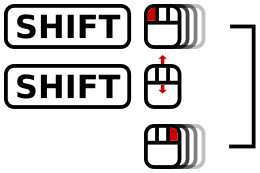
Shift + or
Change the value using smaller increment 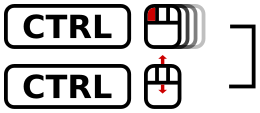
Ctrl +
Change the value using larger increment 
Enter numeric input mode, do not select the value 
Enter numeric input mode, select the value Hint: Any left-click interaction enables numeric input mode.
Une fois que vous avez la valeur approximativement, vous pouvez la régler plus finement avec les petits boutons flèches situés à droite du curseur.
La zone de valeur dans la surface de curseurs fonctionne comme un éditeur de teste : vous pouvez y modifier la valeur ou saisir une nouvelle valeur directement.
For some options, you can drag the pointer outside the tool dialog. For example with the size slider, you can get the maximum value (10000) so.
- Mouse Scroll-Wheel actions on canvas
-
Lors de l’utilisation des outils, vous pouvez utiliser la molette de la souris, en combinaison avec divers modificateurs de touche pour effectuer des choses utiles :
-
Alt + Mouse-wheel: augmenter/diminuer l’opacité
-
Shift+Primary + Mouse-wheel: augmenter/diminuer les proportions
-
Shift+Alt + Mouse-wheel: augmenter/diminuer l’angle
-
Primary+Alt + Mouse-wheel: augmente/diminue la taille
-
Shift+Primary+Alt + Mouse-wheel: augmente/diminue l’espacement
Note: the Primary modifier is usually Ctrl or Cmd, depending on your platform.
-


