The following pages document the dialogs for opening, saving and exporting your images.
The dialog lets you select an image to be loaded from your hard-drive or an external device.
-
You can access the dialog from the menu through: → .
-
You can also open this dialog by using the keyboard shortcut Ctrl+O.
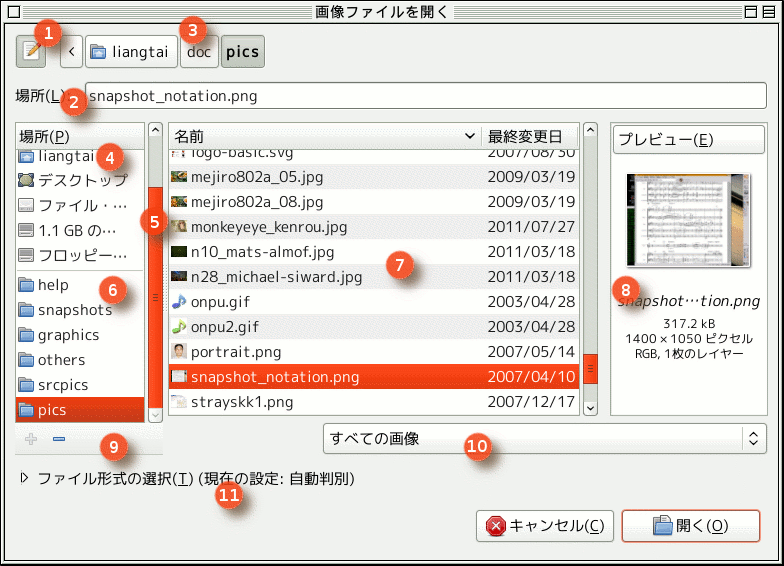
This file selection dialog should look familiar when you have worked with files before. Note that depending on your Operating System there may be some differences in the way this dialog looks. We will explain the details of this dialog based on the numbers in the red circles.
-
This area gives you access to your main folders and your storage devices. The first time you open this dialog after starting GIMP, Recent will be selected here. This is a special folder that shows the images (see 3) that you have recently opened in GIMP.
Besides the Recent folder, you can find here your Home folder, folders to you documents, pictures and other special locations, as well as your hard drives, external drives and network shares. Left clicking on one of these folders will select that one as the current folder and update the list of images in the image list area (3).
By right-clicking on a folder in this list, a context menu will open. Not all commands will always be available, or enabled. The same context menu is also shown in the bookmark folders list, see (5).
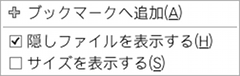 The folder and bookmark list context menu
- Open
-
This opens the contents of the selected folder in the image list window (3).
- Add Bookmark
-
This allows you to add the selected folder as a bookmark. Bookmarks are shown in the area marked (5).
- Remove
-
This allows you to remove a bookmark. It is disabled for other folders and devices.
- Rename…
-
This allows you to rename a bookmark or certain special folders. Note that it only renames the bookmark or special folder as shown inside the file dialog, not the actual folder it points to.
-
By default, this shows the path to the current folder. You can navigate to one of the parent folders by clicking on the desired part.
Alternatively, you can enter the name of an image. As soon as you start typing, the list of files (3) changes to show only the one containing the letter combination you entered.
If you need to navigate to another location not available by clicking, you can open a text field where you can type or paste the desired location. To access this use Ctrl+L, then after you have entered the location, press Enter.
![[注記]](images/note.png)
注記 You can use this location entry field to show the contents of a different folder, by entering the location of a folder; or open a specific image by entering the complete path to the image.
-
選ばれたフォルダーの内容がここに表示されます。 フォルダーやファイルが並んでおり、 フォルダーの項目をダブルクリックするとそのフォルダーに移動できます。 ファイルの項目はクリックで選択してから
 開く ボタンをクリックするか、 そのファイル項目をダブルクリックすれば開けます。 ただし画像ファイルしか開けません。
By default, the list of image files is sorted alphabetically based on the image filenames. The column names above the image list can be used to select how you want the list sorted. Clicking on a column will use that column to sort the list. A small triangle in the column name shows that it is currently being used to sort the list. If the triangle is pointing up, sorting is done ascending. Clicking again on the same column, will changing the sort order to descending and the triangle will be pointing down.
Right-clicking an image or a folder in this list opens a context menu:
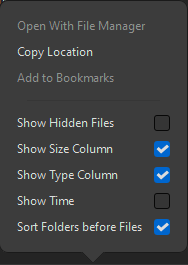 The image list context menu
- Open With File Manager
-
This is only enabled for folders. If enabled, you can open the selected folder in the default file browser on your computer. Note: this command currently does not work on Windows.
- Copy Location
-
This copies the location of the selected file to the clipboard.
- Add to Bookmarks
-
This allows you to add the selected folder as a bookmark. Bookmarks are shown in the area marked (5). This is disabled if you have selected a file instead of an image.
- Show Hidden Files
-
When enabled, hidden files will be shown in the list of image files (3).
- Show Size Column
-
When enabled, the size of each image will be shown in the list of image files (3).
- Show Type Column
-
When enabled, the file type of each image will be shown in the list of image files (3).
- Show Time
-
When enabled, the modified time will be shown for each image in the list of image files (3) in addition to the modified date.
- Sort Folders before Files
-
When enabled, any folders present in the currently selected folder, will be shown at the top of the list of image files (3). When disabled, the folders will be mixed together with the image files based on the selected sorting column.
-
A thumbnail version of the selected image in the image list (3) is displayed in the Preview window on the right. If it is an image format recognized by GIMP, file size, dimensions and image composition are displayed below the preview window.
![[ヒント]](images/tip.png)
ヒント If your image has been modified, but the thumbnail didn't update, you can click on the Preview image to update the thumbnail. To force updating the thumbnail even if it hasn't changed, use Ctrl + click.
-
This part of the list shows the folders that you have bookmarked. You can add bookmarks by using the Add to Bookmarks option that is shown when you right-click a folder in the image list panel (3).
You can remove a bookmark by using the Remove command that is shown when you right click on a bookmark. This right click menu can also be used to Rename the bookmark. Renaming the bookmark does not rename the folder it points to.
-
By clicking the Other Locations label, a list of other known locations and devices on your computer will open in the image list pane. You can use this for easier access to certain locations on your computer that may not be directly available in the folders list on the left.
-
The Show All Files option, is usually unchecked. If you check this option, all files in the selected folder will be shown, instead of only the image files that GIMP recognizes.
-
Select File Type can be used to explicitly set the image file format. It is a drop-down list that shows all image file formats that GIMP recognizes. In general you don't need to worry about this, because in most cases GIMP can determine the file type automatically.
The default is Automatically Detected, which causes GIMP to try to automatically detect the correct format.
In the rare cases where neither the file extension nor internal information in the file are enough to tell GIMP the file type, you can set it by selecting it from this list.
ヒント Explicitly selecting the file type can be useful in certain cases. You can e.g. do this to explicitly load the merged Photoshop image as saved in a PSD image (if present). Since Photoshop images can't always be correctly loaded in GIMP, this allows you to view the image as it was intended by Photoshop.
When the Open Image dialog is active, you can type the name of a file or subfolder to perform a search. A search field appears and the contents of the location are filtered as you type. Any file or subfolder that fully or partially matches your search text will be displayed.
You can search in Recent or any folder that you navigate to. Only the contents of the selected location are included in the search. The search will not check within subfolders of the selected location.
If the Open Image dialog includes a search button (magnifying glass icon), you can click it to toggle searching on and off. The search button appears only when client-side decorations (CSD) are turned on, such as in some versions of the Xfce desktop environment.

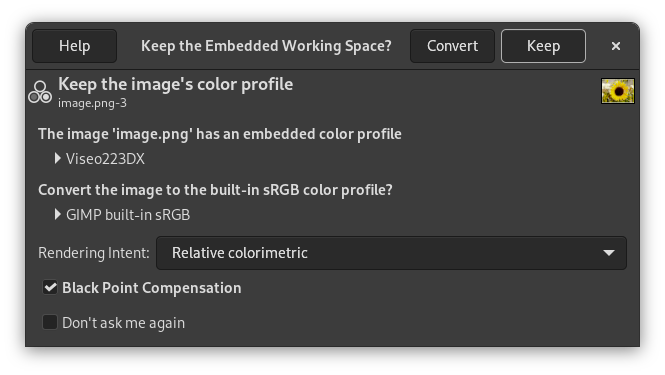
When you open a non XCF image that has a color profile attached to it, GIMP will open a dialog asking you whether you want to keep the original profile, or convert it to GIMP's built-in sRGB color profile.
Although we generally recommend to keep the color profile, using either choice is fine, since GIMP will do profile conversion in the background when needed.
|
|
ヒント |
|---|---|
|
If you want GIMP to stop asking you this question then check the Don't ask me again option. If you change your mind, you can always restore the question by going into Preferences, Color Management, Policies, File Open behavior. |


