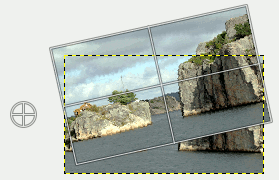
This tool is used to rotate the active layer, a selection or a path. When you click on the image or the selection with this tool a Rotation adjustment dialog is opened. There, you can set the rotation axis, marked with a point, and the rotation angle. You can do the same by dragging the mouse pointer on the image or the rotation point.
There are different possibilities to activate the tool:
-
From the main menu: → → .
-
By clicking the tool icon
 in the Toolbox.
-
By pressing the Shift+R keyboard shortcut.
Normally, tool options are displayed in a window attached under the Toolbox as soon as you activate a tool. If they are not, you can access them from the main menu through → → which opens the option window of the selected tool. The available tool options can also be accessed by double clicking the corresponding tool icon in the Toolbox.
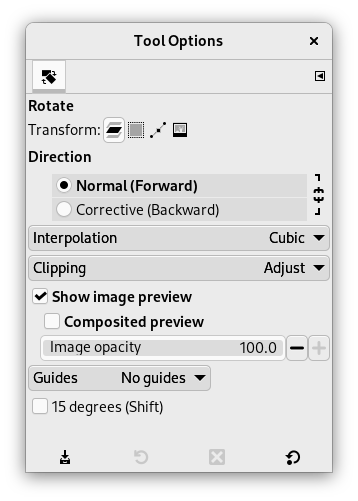
- 変形対象, 方向, 補間アルゴリズム, クリッピング, Show image preview, ガイド
-
![[注記]](images/note.png)
注記 これらのオプションについては 変形ツールの共通オプション に説明があります。
- 変形の方向について
-
The Transform Direction sets which way or direction a layer is rotated. The Normal mode will rotate the layer as one might expect. If a layer is rotated 10 degrees to the right, then the layer will be rendered as such. This behavior is contrary to Corrective rotation.
逆向きの回転が一番よく使われるのは傾いて写っているディジタル写真を直す用途です。 仮に画像の傾きが 13 度という微妙な角度になっていても、 その角度ぴったりに回転させるためにがんばらずにすみます。 代わりに 逆変換 の回転を使えば画像を見ながらその傾きにレイヤーの回転方向を合わせる方法がとれるのです。 実際は逆に回転するので、 ぴったりの角度で画像の修正ができるというわけです。
- 15 Degrees (Shift)
-
15 Degrees (Shift) will constrain the rotation to angles divisible by 15 degrees.
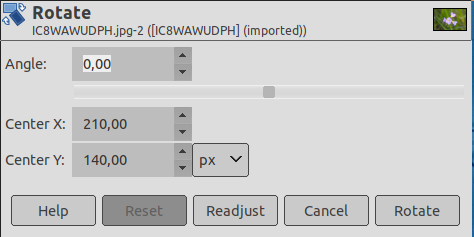
- 角度
-
ここで回転の角度を -180 度から +180 度までの値で定められます。
- 中心の x 座標; 中心の y 座標
-
回転の中心点は画像上で丸に十字の印で表されており、 このオプションはその位置を数値で指定できます。 中心点はこの的をマウスで直にクリックしてドラッグしても移動でき、 画像の外にも置けます。 座標の数値は初期設定ではピクセル単位ですが、 引き出しリストで別の単位も選べます。
- Readjust button
-
With this button you can reset the transform handles back to the original square shape, while keeping the current transformation and zoom level. This enables you to create more complex transformations by making the transformation in several steps.
|
|
注記 |
|---|---|
|
You can also rotate layers with → → . See 「任意の回転...」. |


