The command opens the «Create a New Layer» dialog that allows you to add one or more new, empty layers to the layer stack of the image, just above the selected layer(s).
If multiple layers are selected, a new layer will be created above each of them.
![[Примечание]](images/note.png)
|
Примечание |
|---|---|
|
При наличии плавающего выделения эта команда будет отображаться как . С её помощью плавающее выделение превратится в обычный слой без открытия диалога создания слоя. |
-
You can access this command from the main menu through → .
-
You can also use the keyboard shortcut Shift+Ctrl+N.
-
Эту команду можно также вызвать из контекстного меню диалога слоёв, пункт , или нажатием кнопки со значком
 внизу этого диалога.
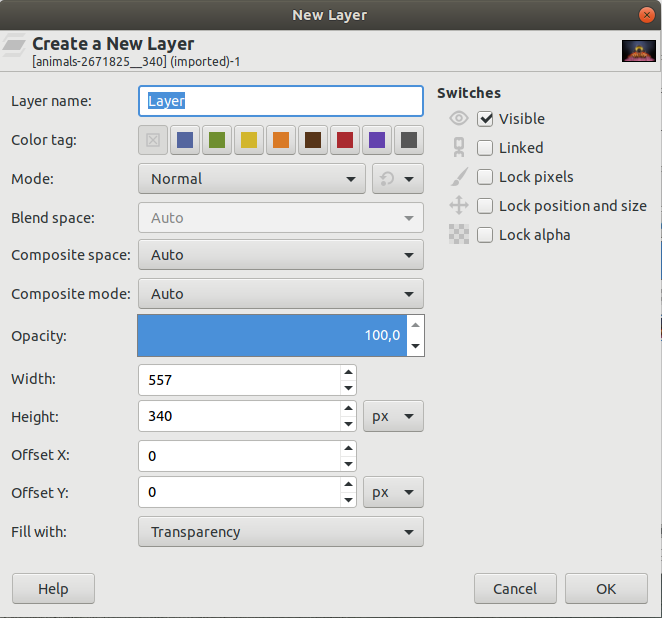
Под заголовком диалога «Создать новый слой» показано название изображения, к которому будет добавлен слой, и возле него — миниатюра изображения. Эта информация полезна при работе над несколькими изображениями сразу.
- Имя слоя
-
Имя нового слоя. Оно не имеет функционального значения; это просто удобный способ запомнить назначение слоя. Имя по умолчанию — «Слой», но запоминается последнее имя, которое вы использовали. Если слой с выбранным именем уже существует, к нему автоматически добавляется номер, чтобы сделать имя уникальным (например, «Слой #1»), когда вы нажимаете для создания слоя.
- Цветовая метка
-
Если нажать одну из этих кнопок цвета, поле значка «Глаз» создаваемого слоя будет иметь этот цвет. Это может помочь идентифицировать или сгруппировать слои, чтобы их было легче заметить при наличии большого количества слоёв на изображении.
- Режим
-
Режим слоя определяет, как этот слой будет сочетаться со слоями ниже. По умолчанию используется «Нормальный» режим. Выпадающий список предлагает широкий выбор режимов слоя, также известных как режимы смешивания. Справа есть ещё один выпадающий список, в котором можно выбрать режим слоя «По умолчанию» или «Устаревший».
Режимы смешивания слоёв описываются в разделе Режимы слоёв и Устаревшие режимы слоёв.
- Пространство смешивания, Пространство совмещения
-
Цветовое пространство, используемое для смешения или совмещения слоя со слоями под ним. «Смешивание» определяет, как смешиваются цвета верхнего и нижнего слоя, а «совмещение» — как верхний и нижний слой объединяются с учётом прозрачности каждого пикселя.
В зависимости от режима слоя (см. выше) одна или обе эти настройки могут быть отключены. Они включены только для режимов слоёв, в которых эти настройки имеют какой-либо эффект. Если включено, по умолчанию используется Авто. Другие варианты — RGB (линейно) и RGB (нелинейно). Обратите внимание, что значение Авто зависит от выбранного режима слоя. Оно не одинаково для всех режимов. Одни используют линейный режим, другие — перцептивный.
Линейное и воспринимаемое (нелинейное) кодирование описано в разделе выбора точности и кодирования и в глоссарии..
Примечание При изменении режима слоя Пространство смешивания и Пространство совмещения всегда сбрасываются до значения Авто, чтобы убедиться, что настройки подходят именно для этого режима слоя.
- Режим совмещения
-
Режим слоя, иногда называемый «режимом смешивания» (нормальный, умножение и т. д.), определяет, как комбинируются значения цвета слоя и его фона (вместе с параметром Пространство смешивания). Режим совмещения слоя определяет, как комбинируются альфа-значения слоя и его фона. (вместе с параметром Пространство совмещения). Фон слоя — это содержимое, на фоне которого происходит совмещение слоя; а именно, комбинация слоёв, расположенных под ним.
Есть две области, на которые нужно обратить внимание во время совмещения слоя с его фоном: непрозрачная область задника и непрозрачная область слоя. Режим смешивания слоя определяет то, как нужно комбинировать цвета на пересечении этих двух областей: то есть общая непрозрачная область задника и слоя (пиксели, принадлежащие только одной из этих областей, не нужно комбинировать ни с чем, и они сохраняют свой изначальный цвет). Режим совмещения слоя определяет, какую часть этих областей сохранить, а какую отбросить.
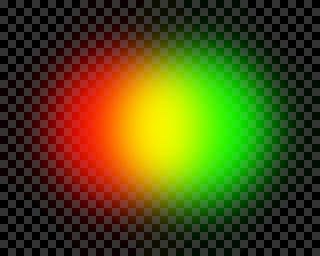
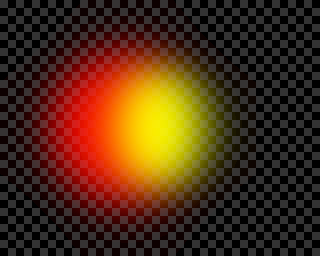
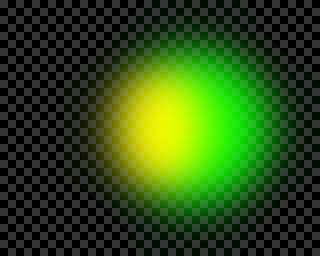
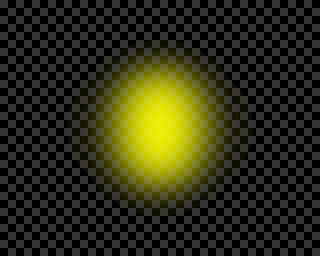
The example images below show the composition of two layers — the bottom layer containing a red feathered circle, and the top layer containing a green feathered circle — using «Addition» mode, and different composite modes (applied to the top layer).
-
Объединение: сохраняет непрозрачные области и слоя и его задника, т. е. объединяет их.
-
Обрезка до фона: сохраняет непрозрачные области только задника (и таким образом включает общую непрозрачную область и в задник и в слой, то есть их пересечение).
-
Обрезка до слоя: сохраняет непрозрачные области только слоя (включая, таким образом, общую непрозрачную область и в задник и в слой, то есть их пересечение).
-
Пересечение: сохраняет непрозрачные области и задника и слоя, т. е. их пересечения.
-
Авто: режим «Авто» не является отдельным режимом совмещения, но скорее соответствует одному или другому режиму совмещения,в зависимости от режима смешивания: для режимов «Нормальный», «Растворение» и «Объединение» он соответствует «Объединению», а для других режимов (поддерживающих различные режимы совмещения) он соответствует режиму «Обрезка до фона».
-
- Непрозрачность
-
Настраивает непрозрачность картины на холсте. Значение по умолчанию — 100%.
- Ширина, Высота
-
Размер нового слоя. При вызове диалога эти параметры принимают значения размера изображения. Их можно изменить с помощью двух полей ввода. Единицы измерения размера можно указать из предлагаемого списка.
- Смещение по X, Смещение по Y
-
По умолчанию исходной точкой нового слоя является левый верхний угол изображения. Здесь можно задать точное положение слоя. Выбрав отрицательное смещение, вы можете установить слой так, чтобы он частично выходил за пределы холста изображения.
- Заливка
-
Существует множество вариантов заливки нового слоя: текущий Цвет переднего плана, текущий Цвет фона, Нейтрально-серая (CIELAB), Белая, Прозрачность и текущая Текстура.
- Переключатели
-
Переключатели Видимый, Запретить изменение пикселей, Запретить изменение положения и размера, Запретить изменение видимости и Запретить изменение альфа-канала с правой стороны этого диалога описаны в справке по диалогу слоёв. См. раздел Атрибуты слоя.