Nástroj Tužka slouží ke kreslení čar s tvrdým okrajem od ruky. Tužka je velmi podobná nástroji Štětec. Hlavní rozdíl mezi nimi je ten, že i když oba nástroje používají stejnou stopu, Tužka netvoří neostré okraje ani při použití velmi neostré stopy s mlhavými okraji. Nástroj tužka nepoužívá ani vyhlazování (antialiasing).
Proč ale pracovat s takovým hrubým nástrojem? Asi nejčastější použití najde při práci s velmi malými obrázky, například ikonami, s kterými se obvykle pracuje při velkém zvětšení a je potřeba každý pixel upravovat zvlášť. S Tužkou si můžete být jisti, že každý pixel v rozsahu stopy bude ovlivněn přesně podle vašeho přání.
![[Tip]](images/tip.png)
|
Tip |
|---|---|
|
Pokud chcete Tužkou kreslit rovné čáry (nebo kterýmkoliv jiným kreslícím nástrojem), klikněte na počáteční bod, podržte klávesu Shift a klikněte na koncový bod. |
There are different possibilities to activate the tool:
-
From the main menu: → → .
-
By clicking the tool icon
in the Toolbox.
-
By pressing the N keyboard shortcut.
- Ctrl
-
Podržení klávesy Ctrl změní dočasně Tužku na Barevnou pipetu.
- Shift
-
This key places the pencil tool into straight line mode. Holding Shift while clicking the mouse will generate a straight line. Consecutive clicks will continue drawing straight lines that originate from the end of the last line.
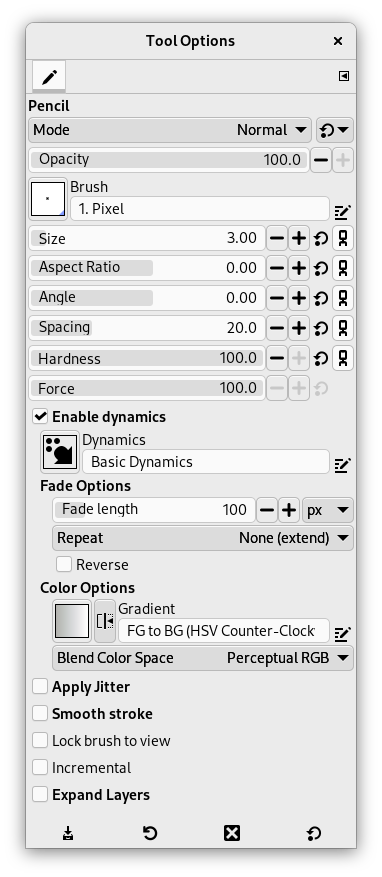
Normally, tool options are displayed in a window attached under the Toolbox as soon as you activate a tool. If they are not, you can access them from the main menu through → → which opens the option window of the selected tool. The available tool options can also be accessed by double clicking the corresponding tool icon in the Toolbox.
- Mode, Krytí, Brush, Velikost, Aspect Ratio, Úhel, Spacing, Hardness, Dynamics, Dynamics Options, Aplikovat chvění, Smooth Stroke, Lock brush to view, Incremental mode is a tool option that is shared by several brush tools, except those which have a „rate“ control, which automatically implies an incremental effect. You can set it by checking the Incremental checkbox in the toolbox for the tool (Paintbrush, Pencil and Eraser)., Expand Layers
- See the Common Paint Tool Options for a description of tool options that apply to many or all paint tools.


