Содержание
- 1. Операция GIMP «Цвета → Экспозиция» с высоким значением глубины цвета на базе чисел с плавающей запятой гораздо лучше подходит для осветления теней и полутонов изображения без пересвета бликов, чем операция «Кривые».
- 2. Пошаговый пример восстановления данных теней с использованием операции GIMP → , работающей с числами с плавающей запятой и высоким значением глубины цвета.
- 3. Замечания по применению
- 4. Заключение
Это руководство взято с сайта www.gimp.org/tutorials, оно было создано автором Элль Стоун (Elle Stone) и представлено здесь для перевода.
Одной из часто встречающихся проблем редактирования изображений является вопрос, как осветлить тени и полутона, оставив при этом нетронутыми самые светлые участки и блики. Эту задачу иногда называют «восстановление теней», а в более общем смысле это называется «тональная проекция». Данное пошаговое руководство описывает добавление одной или более опорных точек положительной компенсации экспозиции с помощью операции GIMP «Цвета → Экспозиция», использующей высокое значение глубины цвета и числа с плавающей запятой. Опорные точки добавляются к теням и полутонам и не затрагивают данные самых светлых частей изображения.
Достаточно часто встречающая задача при редактировании изображений — осветление теней и полутонов без пересвета бликов. Эта проблема часто встречается при работе с фотографиями пейзажей и трёхмерных пространств, освещённых прямыми солнечными лучами. Готовые алгоритмы для выполнения этих задач часто называются алгоритмами «восстановления теней», но на самом деле это узкоспециализированные алгоритмы тональной проекции, и работают они иногда очень хорошо, а иногда не очень, в зависимости от алгоритма, конкретного изображения и стоящих перед художником целей.
Данное пошаговое руководство объясняет, как восстановить данные теней изображения с помощью операции GIMP «Цвета → Экспозиция» на базе операций с числами с плавающей запятой и неограниченной точности. Операция добавляет одну или более опорных точек положительной компенсации экспозиции для теней и полутонов изображения без пересвета или чрезмерного сжатия данных бликов и световых пятен изображения. Параметры операции полностью настраиваются вручную с помощью масок и слоёв, и операция настолько приближена к неразрушающему редактированию, насколько это возможно в GIMP, предоставляющему высокие значения глубины цвета.
Рисунок 1: линии передач в полдень
До и после применения тональной проекции (она же «восстановление теней») с помощью алгоритма GIMP «Цвета → Экспозиция», где применяются операции с числами с плавающей запятой и высоким значением глубины цвета.
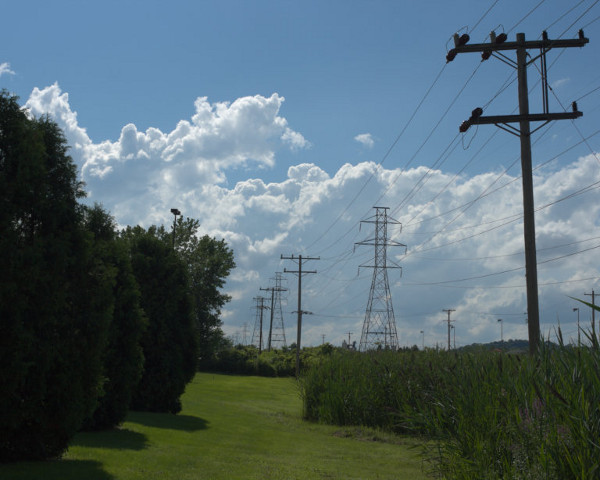
Ориентированный на отображаемые объекты файл в формате raw с интерполяцией.
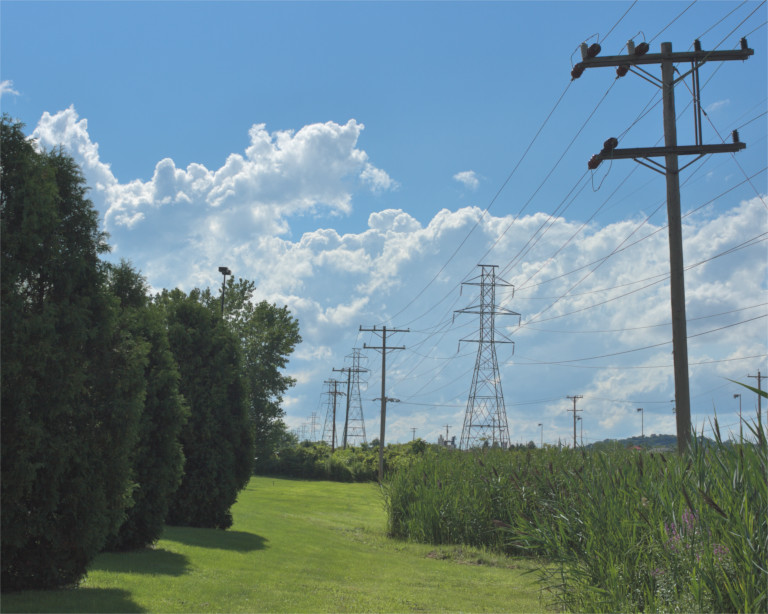
После применения тональной проекции/восстановления теней с использованием инструмента GIMP «Уровни» с неограниченной точностью.
Я использую GIMP с высокими значениями глубины цвета в качестве моего основного редактора изображений, а описываемую ниже процедуру я использую в течение последних двух лет как «дежурный» способ для изменения тональности изображения. Ту же саму базовую операцию можно использовать также и для затемнения областей изображения, а не только для осветления, опять же настраивая эффект с помощью масок слоёв. Это не совсем неразрушающее редактирование, так как на каком-то этапе необходимо создать слой «из видимого». Но, в отличие от использования «Кривых», операция «Цвета → Экспозиция», работающая с числами с плавающей запятой и высоким значением глубины цвета, не обрезает значения каналов RGB и даёт возможность тонкой настройки результатов, снова и снова настраивая маску слоя до тех пор, пока результат вас полностью не будет удовлетворять.


