To access these tools, select → from the main menu.
Inside the Transformation tool dialog, you will find tools to modify the presentation of the image or the presentation of an element of the image, selection, layer or path. Each transform tool has an Option dialog and an Information dialog to set parameters.
This category includes the following tools:
Certaines options sont communes à plusieurs outils de transformation. Elles seront décrites ici. Les options plus spécifiques seront décrites avec chaque outil.
- Transformer
-
GIMP offers four buttons in the Tool Options which let you select which image element the transform tool will work on.
![[Note]](images/note.png)
Note The Transform option for a tool persists after changing tools.
-
Calque
-
When you activate the first button, the tool works on the active layer. If no selection exists in this layer, the whole layer will be transformed.
-
Sélection
-
When you activate the second button, the tool works on the selection only, or the whole layer if there is no selection.
-
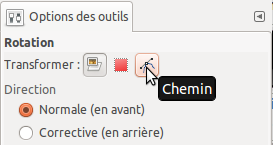
Chemin
-
When you activate the third button, the tool works on the active path only.
-
Image
-
When you activate the fourth button, the transformation is applied to all layers.
Figure 14.86. Exemple avec Rotation
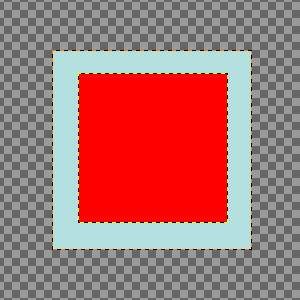
Two layers, the red one being smaller. → option checked.
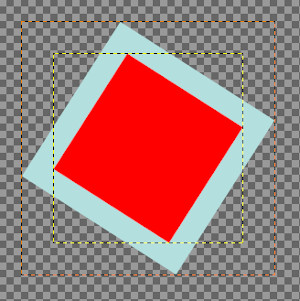
Quatrième bouton enfoncé, outil Rotation appliqué. Notez l’adaptation des tailles des calques.
-
- Direction
-
Cette option fixe le sens dans lequel un calque est transformé :
Le mode « Normale (En avant) » transformera l’image de la façon attendue. Il vous suffit d’utiliser les poignées pour effectuer la transformation que vous désirez. Si vous utilisez une grille (voir plus bas), l’image ou le calque sera transformé selon la forme et la position que vous aurez données à la grille.
« Corrective (Backward) » inverts the direction. Primarily used with the Rotation tool to repair digital images that have some geometric errors (a horizon not horizontal, a wall not vertical, etc). See Section 4.5, « Rotation ».
You can link these two options in Rotate, Scale, Perspective, Unified transform and Handle transform tools. This allows moving handles without affecting the transformation, letting you manually readjust their position.
- Interpolation
-
This drop-down list lets you choose the method of the transformation. The chosen method influences the speed and quality, though it also depends on the image and the type of transformation what will work best in each case.
- Aucun
-
La couleur de chaque pixel est établie à partir des pixels voisins dans l’image d’origine. Cela entraîne souvent un effet de crénelage et d’image grossière, mais il s’agit de la méthode la plus rapide. Elle est parfois appelée « Méthode du plus proche voisin ».
- Linéaire
-
La couleur de chaque pixel est calculée comme la couleur moyenne des quatre pixels les plus proches dans l’image d’origine. Le résultat est satisfaisant dans la plupart des cas et est un bon compromis entre la vitesse et la qualité.Cette méthode est parfois appelée « Bilinéaire ».
- Cubique
-
The color of each pixel is computed as the average color of the eight closest pixels in the original image. This usually gives a good result, although there are some cases where it can actually look worse than Linear and it is also slower. Sometimes this method is called « Bicubic ».
- LoHalo, NoHalo
-
These methods perform a high quality interpolation. Use the NoHalo method when you downscale an image to less than a half of the original size and the LoHalo method when you do not reduce the size much (rotate, shear).
A « Halo » is an artifact that can be created by interpolation. It reminds of the halo you can get when using Section 4.8, « Renforcer la netteté ». Here is a note from Nicolas Robidoux, the creator of these quality samplers for GEGL and GIMP:
"If haloing is not an issue with your content and use case,
which of the two should you try first?
(Clearly, if you want to minimize haloing, NoHalo is the
ticket.)
If you are reducing an image, LoHalo is generally better.
If your transformation is not an all around reduction, for
example if you enlarge, rotate or apply a perspective
transformation that keeps portions of the image at the same or
higher resolution, I generally prefer NoHalo. This preference,
however, changes depending on the image content. If, for
example, the image contains text or text-like objects or has
significant areas with only a handful of different colours,
like old school pixel art, I’d switch to LoHalo. Likewise if
the image is quite noisy or marred by compression artifacts
(as are most JPEGs found on the web). Conversely, if the
image is noise free, very slightly blurry (meaning that when
pixel peeking, the lines and interfaces are smeared over two
or more pixels), and there are delicate skin tones to be
preserved, I’d try NoHalo first. Actually, if I find that
colours have not been preserved nicely after transforming an
image with LoHalo, I’d immediately switch to NoHalo, even if
reducing.
In any case, these recommendations should not be taken as
gospel. I still have much to learn and figure out. For
example, how best to deal with transparency and different
colour spaces is something I’m likely to be thinking about
for a while."
![[Note]](images/note.png)
Note You can set the default interpolation method in the Tool Options Preferences.
- Rognage
-
Il se peut qu’après transformation, l’image résultante soit plus grande. Dans ce cas, cette option la découpe aux dimensions de l’image d’origine.
Plusieurs façons de rogner sont à votre disposition :
- Ajuster
-
Figure 14.87. Image originale pour les exemples
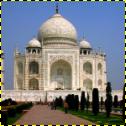
Image d’origine
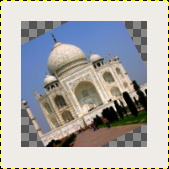
Rotation appliquée avec « Ajuster »
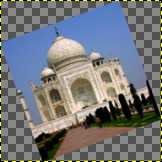
Rotation appliquée avec « Ajuster » et canevas agrandi à la taille du calque
Avec Ajuster : le calque est agrandi pour contenir tout le calque tourné. La nouvelle bordure du calque est visible ; l’ensemble du calque devient visible en utilisant la commande →
- Rogner
-
Avec Rogner : tout ce qui dépasse l’image est supprimé.
- Rogner selon le résultat
-
Figure 14.89. Exemple pour Rogner selon le résultat
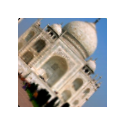
Rotation de 45° avec Rogner selon le résultat
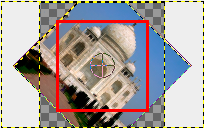
La limite de rognage est marquée de rouge. Aucune zone transparente n’est englobée dans le résultat.
Si cette option est sélectionnée,l’image est rognée de telle sorte que les zones transparentes créées dans les coins par l’opération de transformation ne sont pas englobées dans l’image résultante.
- Rogner selon les mêmes proportions
-
Figure 14.90. Exemple pour Rogner selon les mêmes proportions
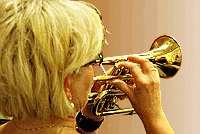
Image d’origine
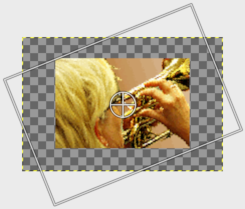
Rotation -22°
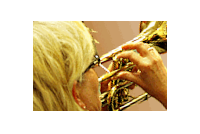
Le résultat
Cette option fonctionne comme la précédente, mais s’assure que les proportions de l’image sont maintenues.
- Afficher l’aperçu d’image
-
Cette option est cochée par défaut : l’image transformée sera visible en cours de transformation par dessus l’image d’origine ou le calque. On trouve aussi un curseur pour régler la visibilité de l’aperçu.
- Aperçu composé
-
Inspired from https://librearts.org/2020/02/gimp-2-10-18-full-review
Affiche l’aperçu comme partie de la composition de l’image : quand vous avez de nombreux calques, chacun avec son propre mode de fusion et sa propre opacité, la transformation fait passer le calque actif au-dessus de tous les autres calques dans l’aperçu. Dans une composition complexe, il peut ainsi être difficile d’aligner ce calque sans de nombreux essais et erreurs.
The Composited Preview option removes this problem in favor of rendering the preview of the transformed layer exactly where it is in the layers stack, exactly with the opacity and blending mode of choice.

Original image with four layers.

The red layer opacity is 80%.
Figure 14.91. Exemple pour Aperçu composé
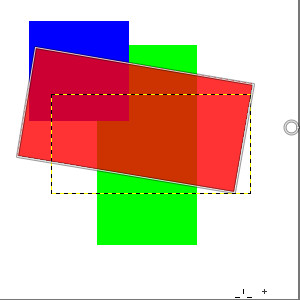
L’option Aperçu composé n’est pas cochée : dans l’aperçu, le calque rouge est au-dessus de tous les autres calques.
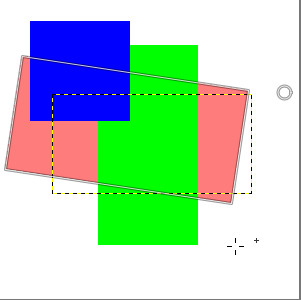
Option Aperçu composé cochée : dans l’aperçu, le calque rouge est à la même place qu’il occupe dans la pile des calques.
One sub option is available:
-
Aperçu synchrone : cette option est expérimentale. L’idée est de produire l’aperçu dès que vous modifiez la transformation. Au lieu d’attendre la fin du mouvement de la souris, la transformation est affichée dès sa production. Si GIMP peut tout produire instantanément, cela signifie un rendu plus doux.
Mais cette option bloque aussi toute chose jusqu’à ce que le rendu soit effectif. Cela signifie que GIMP peut devenir moins réactif, particulièrement quand le calque est très grand. C’est pourquoi cette option est désactivée par défaut.
-
- Guides de sélection
-
This is a drop-down list where you select the type of guide lines which suits your transforming. All the guides use a frame to mark the image's outline in addition to the lines used by the different selections.
- Aucun guide
-
Comme l’indique le nom, aucun guide n’est utilisé.
- Lignes de centre
-
Utilise une ligne verticale et une ligne horizontale se croisant au centre de l’image ou du calque.
- Règle des tiers
-
Divise la surface de transformation en neuf parties égales en ajoutant deux lignes horizontales et deux lignes verticales également espacées. Selon cette règle,les parties les plus intéressantes de l’image doivent être placées aux points d’intersection.
- Règle des cinquièmes
-
Comme la règle des tiers, mais divise la surface en cinq parties.
- Sections d’or
-
Divise la surface en neuf parties en utilisant une formule mathématique qui fait que les petit et moyen segments sont dans le même rapport que les moyen et grand segments.
- Lignes diagonales
-
Divise la surface de tranformation avec des lignes diagonales. Pour plus d’informations, consultez Méthodediagonale.
- Nombre de lignes
-
Dispose une grille avec un nombre égal de lignes horizontales et verticales. Le nombre de ligne est défini par le curseur qui apparaît quand cette option est sélectionnée.
- Espacement des lignes
-
Met en place une grille rectangulaire en utilisant l’espacement des lignes défini par le curseur.
Si vous désirez transformer des chemins, il est possible de le faire en utilisant les outils de transformation.
When the path is drawn go to the Paths dialog and click on the first field before the path outline in the dialog window to get the eye icon visible. Then choose the transformation tool and in the upper part of the option dialog click on the path icon to tell the tool to act on the path.
Effectuez la transformation de la façon habituelle et confirmez. Il est judicieux de régler les guides sur « Aucun guide » pour rendre le chemin plus reconnaissable.
Quand la transformation est terminée, sélectionnez l’outil chemin et cliquez sur le chemin modifié pour l’activer afin de continuer à travailler dessus.
