To access these tools, select → from the main menu.
Inside the Transformation tool dialog, you will find tools to modify the presentation of the image or the presentation of an element of the image, selection, layer or path. Each transform tool has an Option dialog and an Information dialog to set parameters.
This category includes the following tools:
Alcune opzioni sono condivise tra vari strumenti di trasformazione che in questa sezione descriveremo. Le opzioni più specifiche verranno invece analizzate insieme allo strumento corrispondente nelle sezioni più avanti.
- Trasforma
-
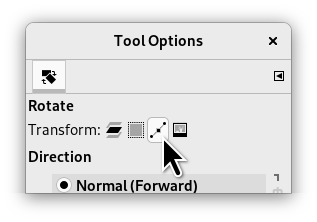
GIMP offers four buttons in the Tool Options which let you select which image element the transform tool will work on.
![[Nota]](images/note.png)
Nota The Transform option for a tool persists after changing tools.
-
Livello
-
When you activate the first button, the tool works on the active layer. If no selection exists in this layer, the whole layer will be transformed.
-
Selezione
-
When you activate the second button, the tool works on the selection only, or the whole layer if there is no selection.
-
Tracciato
-
When you activate the third button, the tool works on the active path only.
-
Imagine
-
When you activate the fourth button, the transformation is applied to all layers.
Figura 14.86. Esempio di Ruota
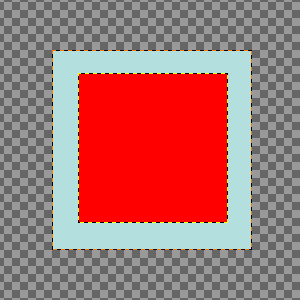
Two layers, the red one being smaller. → option checked.
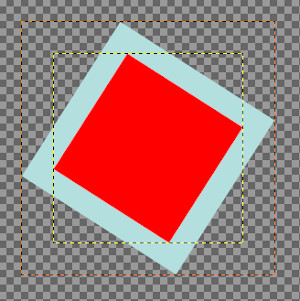
Quarto pulsante premuto, strumento ruota applicato. Si noti l'adattamento delle dimensioni del livello.
-
- Direzione
-
Questa opzione imposta in che verso o direzione un livello viene trasformato:
La modalità «Normale (in avanti)» trasformerà l'immagine o il livello come ci si aspetta. Basta usare le maniglie per fare la trasformazione che si desidererebbe veder accadere. Se si usa la griglia (vedere sotto) l'immagine o il livello vengono trasformati nella forma e nella posizione in cui si imposta la griglia.
«Corrective (Backward)» inverts the direction. Primarily used with the Rotation tool to repair digital images that have some geometric errors (a horizon not horizontal, a wall not vertical, etc). See Sezione 4.5, «Ruota».
You can link these two options in Rotate, Scale, Perspective, Unified transform and Handle transform tools. This allows moving handles without affecting the transformation, letting you manually readjust their position.
- Interpolazione
-
This drop-down list lets you choose the method of the transformation. The chosen method influences the speed and quality, though it also depends on the image and the type of transformation what will work best in each case.
- Nessuno
-
Il colore di ogni pixel viene copiato dal pixel contiguo nell'immagine originale. Ciò spesso provoca dei difetti di aliasing sul risultato (l'«effetto gradini») ed un'immagine grezza, ma è il metodo più veloce. Questo metodo viene chiamato anche «Nearest Neighbor».
- Lineare
-
Il colore di ogni pixel viene calcolato come colore medio dei quattro pixel contigui nell'immagine originale. Ciò dà un risultato soddisfacente per una buona parte delle immagini ed è un buon compromesso tra velocità e qualità. Questo metodo viene chiamato anche «bilineare».
- Cubica
-
The color of each pixel is computed as the average color of the eight closest pixels in the original image. This usually gives a good result, although there are some cases where it can actually look worse than Linear and it is also slower. Sometimes this method is called «Bicubic».
- LoHalo, NoHalo
-
These methods perform a high quality interpolation. Use the NoHalo method when you downscale an image to less than a half of the original size and the LoHalo method when you do not reduce the size much (rotate, shear).
A «Halo» is an artifact that can be created by interpolation. It reminds of the halo you can get when using Sezione 4.8, «Nitidizza (Maschera di contrasto)». Here is a note from Nicolas Robidoux, the creator of these quality samplers for GEGL and GIMP:
"If haloing is not an issue with your content and use case,
which of the two should you try first?
(Clearly, if you want to minimize haloing, NoHalo is the
ticket.)
If you are reducing an image, LoHalo is generally better.
If your transformation is not an all around reduction, for
example if you enlarge, rotate or apply a perspective
transformation that keeps portions of the image at the same or
higher resolution, I generally prefer NoHalo. This preference,
however, changes depending on the image content. If, for
example, the image contains text or text-like objects or has
significant areas with only a handful of different colours,
like old school pixel art, I’d switch to LoHalo. Likewise if
the image is quite noisy or marred by compression artifacts
(as are most JPEGs found on the web). Conversely, if the
image is noise free, very slightly blurry (meaning that when
pixel peeking, the lines and interfaces are smeared over two
or more pixels), and there are delicate skin tones to be
preserved, I’d try NoHalo first. Actually, if I find that
colours have not been preserved nicely after transforming an
image with LoHalo, I’d immediately switch to NoHalo, even if
reducing.
In any case, these recommendations should not be taken as
gospel. I still have much to learn and figure out. For
example, how best to deal with transparency and different
colour spaces is something I’m likely to be thinking about
for a while."
![[Nota]](images/note.png)
Nota You can set the default interpolation method in the Tool Options Preferences.
- Ritaglio
-
Dopo la trasformazione, l'immagine può risultare più grande. Quest'opzione permette di ritagliare l'immagine trasformata all'interno delle dimensioni originali dell'immagine di partenza.
Si può scegliere tra diversi metodi per ritagliare:
- Regola
-
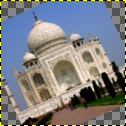
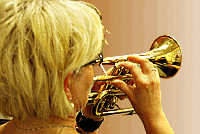
Figura 14.87. Immagine originale usata per gli esempi
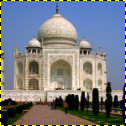
Immagine originale
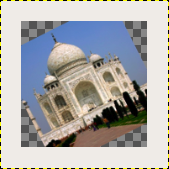
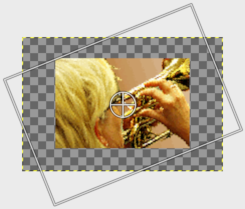
Rotazione applicata con «Regola»
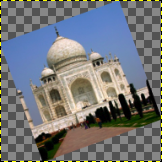
Rotazione applicata con «Regola» e la superficie allargata alla dimensione del livello
Con Regola: il livello viene allargato per contenere tutto il livello ruotato. Il bordo del nuovo livello è visibile; l'intero livello diviene visibile usando il comando → .
- Taglia
-
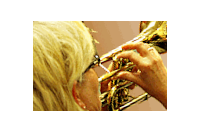
Con Taglia: tutto ciò che eccede i limiti dell'immagine viene cancellato.
- Ritaglia al risultato
-
Figura 14.89. Esempio di Ritaglia al risultato
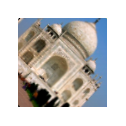
Rotazione di 45° con ritaglio al risultato
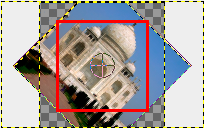
Il limite di ritaglio viene marcato con il rosso. Nessuna area trasparente viene inclusa.
Se quest'opzione viene selezionata, l'immagine viene ritagliata in modo tale che l'area trasparente, creata agli angoli dall'operazione di trasformazione, non sarà inclusa nell'immagine risultante.
- Ritaglia all'aspetto
-
Quest'opzione lavora come la precedente, ma mantiene il rapporto delle proporzioni di aspetto.
- Mostra anteprima immagine
-
Se selezionata, che è l'impostazione predefinita, l'immagine trasformata sarà visibile sopra l'immagine o il livello originali. Ci sarà anche un cursore tramite il quale è possibile impostare la visibilità dell'anteprima.
- Anteprima composita
-
Inspired from https://librearts.org/2020/02/gimp-2-10-18-full-review
Mostra anteprima come parte della composizione immagine: quando si hanno più livelli, ognuno con la propria modalità di fusione e opacità, trasformarlo significa che questo passa sopra ad ogni altro. Perciò in una disposizione complessa di livelli non è possibile allineare questo livello rispetto agli altri senza un bel po' di prove.
The Composited Preview option removes this problem in favor of rendering the preview of the transformed layer exactly where it is in the layers stack, exactly with the opacity and blending mode of choice.

Original image with four layers.

The red layer opacity is 80%.
Figura 14.91. Esempio di anteprima composita
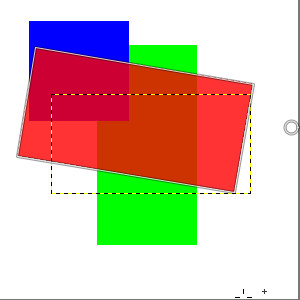
Opzione composita non selezionata: nell'anteprima, il livello rosso è sopra tutti gli altri livelli.
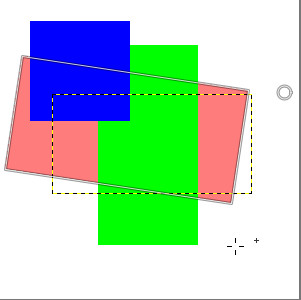
Opzione composita selezionata: nell'anteprima, il livello rosso è al suo posto giusto, come in una pila di livelli.
One sub option is available:
-
Anteprima sincrona: questa opzione è sperimentale. L'idea è di renderizzare l'anteprima non appena si cambia la trasformazione. Così, invece che attendere che il mouse si fermi, vengono renderizzati i risultati immediatamente. Se GIMP può renderizzare tutto abbastanza velocemente, ciò significa un feedback più fluido e istantaneo.
Ma quest'opzione blocca però tutto fino a quando l'anteprima non ha finito. Ciò significa, GIMP può diventare molto meno responsivo, tipicamente quando il livello è molto grande. Ecco perché l'opzione è disabilitata per impostazione predefinita.
-
- Guide
-
This is a drop-down list where you select the type of guide lines which suits your transforming. All the guides use a frame to mark the image's outline in addition to the lines used by the different selections.
- Nessuna guida
-
Come suggerisce l'etichetta, non vengono usate guide.
- Righe centrali
-
Usa una riga verticale e una orizzontale incrociate nel centro dell'immagine o del livello.
- Regola dei terzi
-
Divide l'area da trasformare in nove parti uguali aggiungendo due righe orizzontali e due verticali equidistanti. Secondo questa regola le parti più interessanti dell'immagine devono essere poste nei punti di intersezione.
- Regola dei quinti
-
Uguale alla «Regola dei terzi» ma divide l'area in cinque parti.
- Sezioni auree
-
Anche chiamata «Rapporto aureo». Divide l'area da trasformare in nove parti usando una formula matematica per ottenere le dimensioni relative delle parti dell'area da trasformare.
- Righe diagonali
-
Divide l'area da trasformare usando righe diagonali.
- Numero di righe
-
Pone una griglia rettangolare con lo stesso numero di righe verticali e orizzontali. Il numero delle righe viene impostato con il cursore che salta in primo piano quando questa guida viene selezionata.
- Spaziatura righe
-
Pone una griglia rettangolare sull'area da trasformare usando la spaziatura tra le righe impostata dal cursore.
Per trasformare dei tracciati, basta usare gli strumenti di trasformazione.
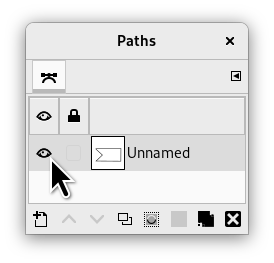
When the path is drawn go to the Paths dialog and click on the first field before the path outline in the dialog window to get the eye icon visible. Then choose the transformation tool and in the upper part of the option dialog click on the path icon to tell the tool to act on the path.
Eseguire la trasformazione al solito modo e confermarla quando si è concluso. Può tornare utile impostare le opzioni delle guide a «Nessuna guida» per rendere il tracciato più riconoscibile.
Quando la trasformazione è conclusa, scegliere lo strumento tracciati e fare clic sul tracciato modificato per attivarlo ancora e poterlo modificare ulteriormente.
