Voor toegang tot deze gereedschappen, selecteer → in het hoofdmenu.
Binnen het dialoogvenster Transformeren zult u gereedschappen vinden om de weergave van de afbeelding of de weergave van een element van de afbeelding, selectie, laag of pad aan te passen. Elk gereedschap voor transformeren heeft een dialoogvenster Gereedschapsopties en een dialoogvenster Informatie om parameters in te stellen.
Deze categorie bevat de volgende gereedschappen:
Sommige opties worden gedeeld door verscheidene gereedschappen voor transformeren. We zullen ze hier beschrijven. Meer specifieke opties zullen worden beschreven met hun gereedschap.
- Transformeren
-
GIMP biedt vier knoppen in de Gereedschapsopties, die u laten selecteren op welk element van de afbeelding het gereedschap voor transformeren zal werken.
![[Opmerking]](images/note.png)
Opmerking De optie Transformeren voor een gereedschap blijft staan na het wijzigen van gereedschap.
-
Laag
-
Wanneer u de eerste knop activeert, werkt het gereedschap op de actieve laag. Als er in de laag geen selectie bestaat, zal de gehele laag worden getransformeerd.
-
Selecteren
-
Wanneer u de tweede knop activeert, werkt het gereedschap alleen op de selectie, of de gehele laag als er geen selectie is.
-
Pad
-
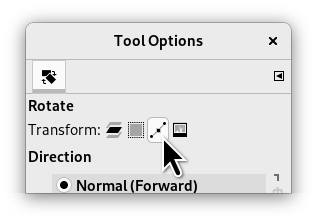
Wanneer u de derde knop activeert, werkt het gereedschap alleen op het actieve pad.
-
Afbeelding
-
Wanneer u de vierde knop activeert, wordt de transformatie op alle lagen uitgevoerd.
Afbeelding 14.86. Voorbeeld met draaien
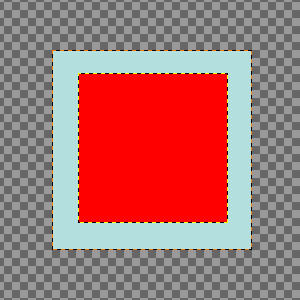
Twee lagen, waarvan de rode kleiner is. Optie → is geselecteerd.
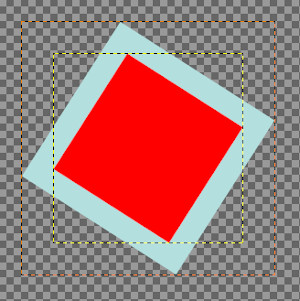
Op de vierde knop gedrukt, gereedschap Draaien toegepast. Let op de aangepaste grootten van de lagen.
-
- Richting
-
Met deze optie bepaalt u in welke richting of richting een laag wordt getransformeerd:
De modus “Normaal (Vooruit)” transformeert de afbeelding of laag zoals men zou verwachten. U gebruikt alleen de handgrepen om de gewenste transformatie uit te voeren. Als u een raster gebruikt (zie hieronder), wordt de afbeelding of laag getransformeerd op basis van de vorm en positie waarin u het raster plaatst.
“Corrigerend (Achterwaarts)” draait de richting om. Primair gebruikt met het gereedschap Draaien om digitale afbeeldingen te repareren die enkele geometrische fouten hebben (een horizon die niet horizontaal is, een wand die niet verticaal is, etc.). Bekijk Paragraaf 4.5, “Draaien”.
U kunt deze twee opties koppelen in de gereedschappen Draaien, Schalen, Perspectief, Geïntegreerd transformeren en Hendeltransformatie. Dat maakt het mogelijk handvatten te verplaatsen zonder de transformatie te beïnvloeden, wat u handmatig hun positie laat aanpassen.
- Interpolatie
-
Deze keuzelijst laat u de methode voor de transformatie kiezen. De gekozen methode beïnvloedt de snelheid en kwaliteit, hoewel het ook afhankelijk is van de afbeelding en het type transformatie, dat in elk geval het beste zal werken.
- Geen
-
De kleur van elke pixel wordt gekopieerd van de dichtstbijzijnde aangrenzende pixel in de oorspronkelijke afbeelding. Dit resulteert vaak in aliasing (het “traptrede-effect”) en een grof beeld, maar het is de snelste methode. Soms wordt deze methode “Dichtstbijzijnde buur”genoemd.
- Lineair
-
De kleur van elke pixel wordt berekend als de gemiddelde kleur van de vier dichtstbijzijnde pixels in de oorspronkelijke afbeelding. Dit geeft een bevredigend resultaat voor de meeste afbeeldingen en is een goed compromis tussen snelheid en kwaliteit. Soms wordt deze methode “Bilineair”genoemd .
- Kubisch
-
De kleur van elk beeldpunt wordt berekend als de gemiddelde kleur van de acht dichtstbij gelegen beeldpunten in de originele afbeelding. Dit geeft gewoonlijk een goed resultaat, hoewel er enkele gevallen zijn waar het er in feite slechter uit kan zien dan Lineair en het is ook langzamer. Soms wordt deze methode “Bicubic” genoemd.
- LoHalo, NoHalo
-
Deze methoden voeren een interpolatie met hoge kwaliteit uit. Gebruik de methode Geen halo als u een afbeelding terugbrengt naar minder dan de helft van zijn originele grootte en de methode Weinig halo als u de grootte niet veel verkleind (Draaien, Hellen).
Een “Halo” is een artefact dat kan worden gemaakt door interpolatie. Het doet ons denken aan de halo die u kunt krijgen bij het gebruiken van Paragraaf 4.8, “Verscherpen (Onscherp masker)”. Hier is een opmerking van Nicolas Robidoux, de maker van deze kwaliteitsamplers voor GEGL en GIMP:
"Als halo's geen probleem zijn voor uw inhoud en gebruiksgeval,
welke van de twee zou u dan het eerste proberen?
(Duidelijk, als u zo weinig mogelijk halo wilt, is Geen halo de
oplossing.)
Als u een afbeelding verkleint, is Weinig halo over het algemeen beter.
Als uw transformatie geen algehele vermindering is,
bijvoorbeeld als u vergroot, draait of een transformatie perspectief
toepast die delen van de afbeelding hetzelfde houdt of
met hogere resolutie, heb ik een voorkeur voor Geen halo. Deze voorkeur,
echter, wijzigt, afhankelijk van de inhoud van de afbeelding. Als, bijvoorbeeld,
de afbeelding tekst of op tekst lijkende objecten bevat of
significante gebieden met slechts een handjevol verschillende kleuren heeft,
zoals Old School-pixelkunst, zou ik overschakelen naar Weinig halo. Op dezelfde manier, als
de afbeelding nogal luid is of verstoord door artefacten van de transformatie
(zoals de meeste JPEG's die op het web te vinden zijn). tegengesteld daaraan, als de
afbeelding zonder ruis is, slechts licht vervaagd (wat betekent dat bij
het bekijken van de beeldpunten, de lijnen en interface zijn uitgesmeerd over twee
of meer beeldpunten), en er delicate huidtonen moeten worden
behouden, zou ik eerst Geen halo proberen. In feite, als ik vind dat
kleuren niet netjes hoeven te worden behouden na het transformeren van
een afbeelding met Weinig halo, zou ik onmiddellijk schakelen naar Geen halo, zelfs bij
verkleinen.
In elk geval zouden deze aanbevelingen niet moeten worden beschouwd als
wet. Ik heb nog steeds veel te leren en uit te vogelen. Bijvoorbeeld,
hoe het beste om te gaan met transparantie en verschillende
kleurruimten is iets waar ik al een tijdje
aan zit te denken."
![[Opmerking]](images/note.png)
Opmerking U kunt de standaard methode voor interpolatie instellen in het dialoogvenster Voorkeuren.
- Snijden
-
Na transformatie kan het beeld groter zijn. Met deze optie wordt de getransformeerde afbeelding geknipt naar de oorspronkelijke afbeeldingsgrootte.
U kunt kiezen uit verschillende manieren om te knippen:
- Aanpassen
-
Afbeelding 14.87. Originele afbeelding voor voorbeelden
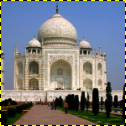
Originele afbeelding
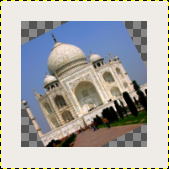
Draaien toegepast met “Aanpassen”
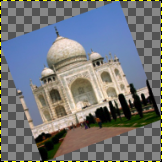
Draaien toegepast met “Aanpassen” en canvas vergroot tot laaggrootte
Met Aanpassen: de laag wordt vergroot om alles van de gedraaide laag te bevatten. De rand van de nieuwe laag is zichtbaar; de gehele laag wordt zichtbaar met de opdracht → .
- Knippen
-
Met knippen: alles wat buiten de afbeelding valt is verwijderd.
- Bijsnijden tot resultaat
-
Afbeelding 14.89. Voorbeeld voor Bijsnijden tot resultaat
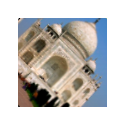
Draaien 45° met Bijsnijden tot resultaat
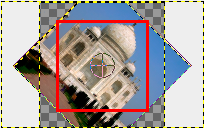
De grens voor het bijsnijden is rood gemarkeerd. Geen transparant gebied opgenomen.
Als deze optie is geselecteerd, wordt de afbeelding zover bijgesneden dat het transparante gebied, dat in hoeken is gemaakt door de bewerking van de transformatie, niet wordt opgenomen in de resulterende afbeelding.
- Bijsnijden volgens verhouding
-
Afbeelding 14.90. Voorbeeld van Bijsnijden volgens verhouding
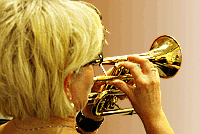
Originele afbeelding
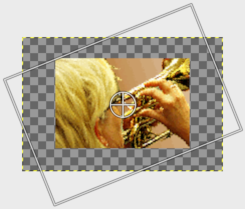
Rotatie -22°
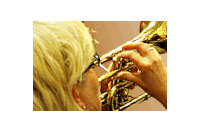
De gedraaide afbeelding
Deze optie werkt zoals eerder beschreven, maar zorgt ervoor dat de verhouding behouden blijft.
- Afbeeldingsvoorbeeld tonen
-
Als dit is gemarkeerd, wat de standaard instelling is, zal de getransformeerde afbeelding zichtbaar zijn bovenop de originele afbeelding of laag. Er zal ook een schuifbalk zijn waarmee u de dekking van het voorbeeld kunt selecteren.
- Composietvoorbeeld
-
Geïnspireerd op https://librearts.org/2020/02/gimp-2-10-18-full-review
Voorbeeld tonen als deel van de beeldcompositie: wanneer u meerdere lagen hebt, elk met zijn eigen modus voor samenvoegen en dekking, zal transformeren ervan betekenen dat het bovenop elke andere laag terecht komt. Dus in een compositie met complexe lagen kunt u deze laag niet uitlijnen ten opzichte van andere lagen, zonder veel proberen en fouten.
De nieuwe optie Composietvoorbeeld verwijdert dit probleem ten faveure van het renderen van het voorbeeld van de getransformeerde laag, exact waar het is in de stapel lagen, met de exacte gekozen dekking en modus voor samenvoegen.

Original image with four layers.

The red layer opacity is 80%.
Afbeelding 14.91. Composietvoorbeeld
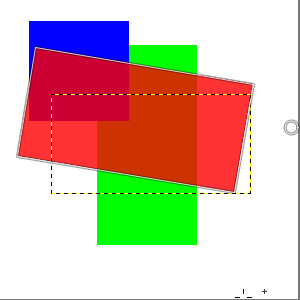
Optie Composietvoorbeeld niet geselecteerd: in voorbeeld, rode laag staat boven alle andere lagen.
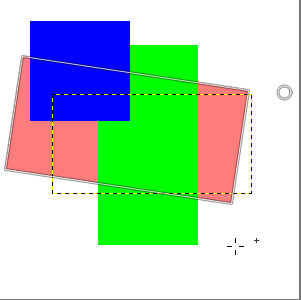
Optie Composietvoorbeeld geselecteerd: in voorbeeld, rode laag staat op zijn juiste plaats, zoals in de stapel lagen.
Een suboptie is beschikbaar:
-
Synchroon voorbeeld: deze optie is experimenteel. Het idee is om het voorbeeld weer te geven zodra u de transformatie wijzigt. Dus in plaats van te wachten tot de muis stopt met bewegen, geeft deze het resultaat onmiddellijk weer. Als GIMP alles snel genoeg kan weergeven, betekent dit een veel soepelere en directere feedback.
Maar deze optie blokkeert ook alles totdat het voorbeeld klaar is. Dat betekent dat GIMP veel minder responsief (traag) kan worden, vooral wanneer de laag erg groot is. Daarom is dit standaard uitgeschakeld.
-
- Hulplijnen
-
Dit is een keuzelijst waar u het type hulplijnen selecteert die passen bij uw transformeren. Alle hulplijnen gebruiken een frame om de omtrek van de afbeelding te markeren, in aanvulling op hoe de lijnen worden gebruikt in de verschillende selecties.
- Geen hulplijnen
-
Zoals de naam al zegt, worden er geen hulplijnen getoond.
- Middellijnen
-
Hiermee gebruikt u één verticale lijn en één horizontale lijn die elkaar kruisen in het midden van de afbeelding of laag.
- Regel van derden
-
Deelt het te transformeren gebied op in negen gelijke delen, door twee horizontale lijnen en twee verticale lijnen toe te voegen, die gelijkmatig zijn verdeeld. Overeenkomstig deze regel zouden de meest interessante delen van de afbeelding moeten zijn geplaatst op de kruispunten.
- Regel van vijfden
-
Net als de “Regel van derden” maar deelt het gebied op in vijf bij vijf delen.
- Gulden snede
-
Ook wel “The Golden Ratio” genoemd. Deelt het te transformeren gebied op in negen delen met een wiskundige formule die de delen proportioneert ten opzichte van elkaar en tot het gebied dat moet worden getransformeerd.
- Diagonalen
-
Deelt het gebied voor de transformatie op met diagonale lijnen.
- Aantal lijnen
-
Plaatst een rechthoekig raster op het gebied voor de transformatie met gelijke aantallen verticale en horizontale lijnen. Het aantal lijnen wordt ingesteld in de schuifbalk die naar voren komt als deze hulplijn wordt geselecteerd.
- Lijn afstand
-
Plaatst een rechthoekig raster op het gebied voor de transformatie met lijnen op de afstand die u in de schuifregelaar instelt.
Als u om wat voor reden dan ook paden wilt transformeren, is het mogelijk om dit te doen met behulp van de gereedschappen voor transformeren.
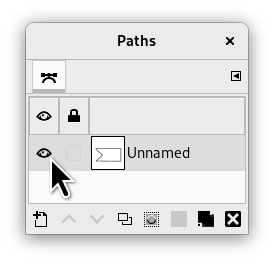
Als het pad is getekend, ga naar het dialoogvenster Paden en klik op het eerste veld voor de omtrek van het pad in het dialoogvenster om het pictogram Oog te kunnen zien. Kies dan het gereedschap voor transformeren en, in het bovenste gedeelte van de dialoogvenster Gereedschapsopties, klik op het pictogram Pad om het gereedschap te laten weten om op het pad te acteren.
Doe de transformatie op de gewone manier en bevestig als het voltooid is. Het zou een goed idee kunnen zijn om de Hulplijnen in te stellen op “Geen hulplijnen” om het pad beter herkenbaar te maken.
Wanneer de transformatie is voltooid, kiest u het gereedschap Paden en klikt u op het gewijzigde pad, om het opnieuw te activeren om er verder aan te werken.
