The Fuzzy Select tool is designed to select areas of the current layer or image based on color similarity.
Při používání kouzelné hůlky je velmi důležité dobře zvolit správný počáteční bod. Pokud zvolíte špatně, může být výsledek úplně jiný, než si představujete.
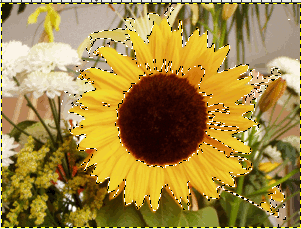
Fuzzy Select is a good tool for selecting objects with sharp edges. It is fun to use, so beginners often start out using it a lot. You will probably find, however, that the more you use it, the more frustrated you become with the difficulty of selecting exactly what you want, no more, no less. More experienced users find that the Path and Color Select tools are often more efficient, and use the Fuzzy Select tool less. Still, it is useful for selecting an area within a contour, or touching up imperfect selections. It often works very well for selecting a solid-colored (or nearly solid-colored) background area.
Povšimněte si, že jak se vybraná oblast rozšiřuje směrem od počátku, nešíří se jen po pixelech, které se skutečně dotýkají, ale je schopna překonávat malé mezery. Vzdálenost, kterou může výběr přeskočit, lze nastavit dialogu Předvolby v části Volby nástrojů : Implicitní práh. Zvýšením hodnoty můžete hůlku učinit agresivnější. (Nastavení se projeví i u Plechovky.)
There are different possibilities to activate the tool:
-
From the main menu: → → .
-
By clicking the tool icon
 in the Toolbox.
-
By pressing the U keyboard shortcut.
Kouzelná hůlka nemá žádné zvláštní modifikační klávesy, pouze ty, které ovlivňují všechny nástroje pro výběr stejným způsobem. Více se o nich dozvíte v kapitole Nástroje pro výběr.
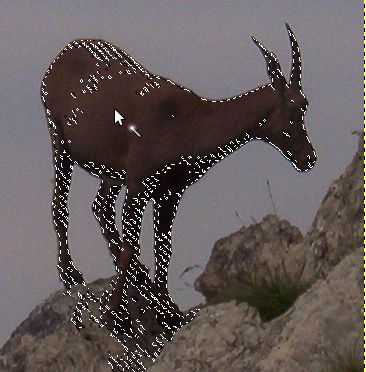
It starts selecting when you click at a spot in the image, and expands outwards like water flooding low-lying areas, selecting contiguous pixels whose colors are similar to the starting pixel. You can control the threshold of similarity by dragging the mouse downward or to the right: the farther you drag it, the larger you get the selected region. And you can reduce the selection by dragging upwards or to the left.
You can move the selection outline using Alt + arrow keys.
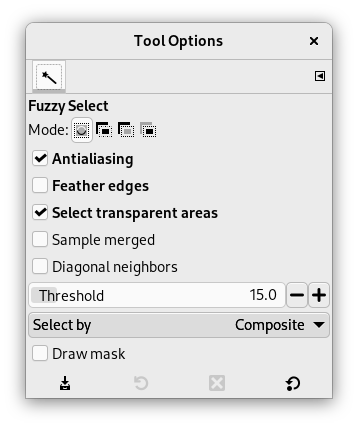
Normally, tool options are displayed in a window attached under the Toolbox as soon as you activate a tool. If they are not, you can access them from the main menu through → → which opens the option window of the selected tool. The available tool options can also be accessed by double clicking the corresponding tool icon in the Toolbox.
- Mode, Vyhlazování, Feather edges
-
![[Poznámka]](images/note.png)
Poznámka See Selection Tools Options for help with options that are common to all these tools. Only options that are specific to this tool are explained here.
- Hledání podobných barev
-
These options affect the way Fuzzy Select expands the selection out from the initial point.
- Zvolit průhledné oblasti
-
This option gives Fuzzy Select the ability to select areas that are completely transparent. If this option is not checked, transparent areas will never be included in the selection.
- Ukázka sloučení
-
If you enable this option, sampling is not calculated only from the values of the active layer, but from all visible layers.
For more information, see the Glossary entry.
- Diagonal Neighbors
-
When activated, the tool considers diagonally neighboring pixels as connected when calculating the affected area. In other words, instead of looking at the four orthogonal neighbors of each pixel, it looks at all eight pixels
Obrázek 14.20. Example for Diagonal Neighbors
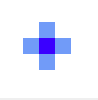
A pixel with 4 orthogonal neighbors
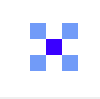
A pixel with 4 diagonal neighbors

A pixel with 8 neighbors
Obrázek 14.21. Example for Diagonal Neighbors option applied
Diagonal Neighbors option unchecked
Diagonal Neighbors option checked
- Práh
-
Tento posuvník určuje rozsah barev, které budou vybrány, v momentě, kdy kliknete na počáteční bod a ještě netáhnete myší. Čím vyšší práh, tím větší výběr. Po prvním stisknutí tlačítka myši se tažením dolů nebo doprava dá velikost výběru zvyšovat. Tažením doleva nebo nahoru pak zmenšovat. Proto, bez ohledu na nastavení prahu, máte vždy stejné možnosti – liší se pouze to, jak moc musíte táhnout myší a na kterou stranu, abyste dosáhli požadovaného výsledku.
- Select by
-
This option determines which component of the image GIMP uses to calculate the similarity in color.
You can choose from , , , , , , . , , , and .
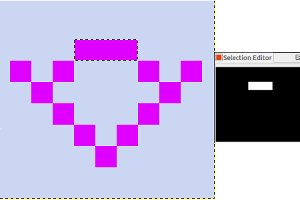
- Draw Mask
-
This option can help to visualize the selection. Selected areas marked with marching ants may not be evident when selecting with Fuzzy Select. If this option is checked, selected areas will be filled with a magenta color as long as you keep pressing on the left mouse button, and this mask will disappear as soon as you release this button.
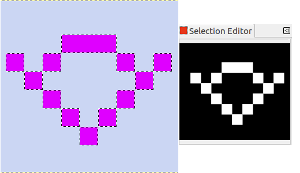
Obrázek 14.22. Example for Draw mask option applied
Fuzzy Select used with Draw Mask option unchecked

Fuzzy Select used with Draw Mask option checked, left mouse button not released yet.


