Het gereedschap Toverstaf (Aaneensluitend gebied selecteren op basis van kleur) is ontworpen om gebieden in de huidige laag of afbeelding te selecteren, gebaseerd op overeenkomst van kleur.
Bij het gebruiken van dit gereedschap is het heel belangrijk om het juiste beginpunt te kiezen. Als u de verkeerde plek kiest, zou u iets heel anders kunnen krijgen dan wat u wilt, of zelfs het tegenovergestelde.
Toverstaf is een goed gereedschap voor het selecteren van objecten met scherpe randen. Het is leuk om te gebruiken, dus beginners beginnen vaak door het veel te gebruiken. U zult echter waarschijnlijk vinden dat, hoe vaker u het gebruikt, hoe meer gefrustreerd u wordt met de moeilijkheid om exact te selecteren wat u wilt, niet meer en niet minder. Meer ervaren gebruikers vinden dat de gereedschappen Paden en Op kleur selecteren vaak meer efficiënt zijn en gebruiken het gereedschap Toverstaf veel minder. Echter, het is nuttig voor het selecteren van een gebied met een omtrek, of het bijwerken van imperfecte selecties. Het werkt vaak heel goed voor het selecteren van een effen gekleurd (of bijna effen gekleurd) gebied op de achtergrond.
Onthoud dat, omdat het geselecteerde gebied zich buitenwaarts uitbreid vanuit het midden, het zich niet alleen verspreid naar beeldpunten die elkaar raken: het is in staat over kleine gaten te springen, afhankelijk van de optie Drempelwaarde. Verhogen/verlagen van de drempelwaarde, gedurende het gebruiken van de Toverstaf, na de eerste keer drukken op de knop, sleep de aanwijzer naar beneden (of naar rechts) of naar boven (of naar links).
U kunt het gereedschap op verschillende manieren activeren:
-
Vanuit het hoofdmenu: → → ,
-
Door te klikken op het pictogram van het gereedschap
in de Gereedschapskist.
-
Door te drukken op de sneltoets U.
Het gereedschap Toverstaf heeft geen speciale hulptoetsen, alleen die welke de gereedschappen voor selectie in het algemeen op dezelfde manier beïnvloeden. Bekijk Paragraaf 2.1, “Algemene eigenschappen” voor hulp daarmee.
Afbeelding 14.18. Gebruiken van het gereedschap Toverstaf: geselecteerde beeldpunten zijn aaneengesloten
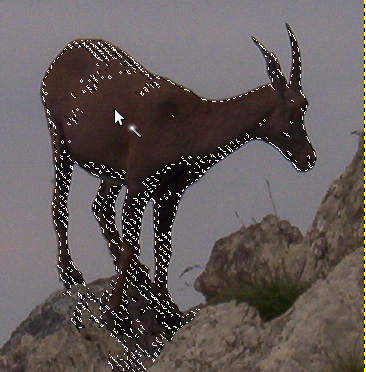
Het begint met het selecteren als u klikt op een plek in de afbeelding en breidt zich naar buiten uit, als water dat laagliggende gebieden overstroomt, aaneengesloten beeldpunten selecterend waarvan de kleuren soortgelijk zijn aan die van het beeldpunt van het begin. U kunt de drempelwaarde voor de gelijksoortigheid beheren door de muis naar beneden of naar rechts te slepen: hoe verder u het sleept, hoe groter het geselecteerde gebied wordt. En u kunt de selectie verkleinen door naar boven of naar links te slepen.
U kunt de gehele selectie verplaatsen met de muis en/of de pijltoetsen door de Alt toets ingedrukt te houden.
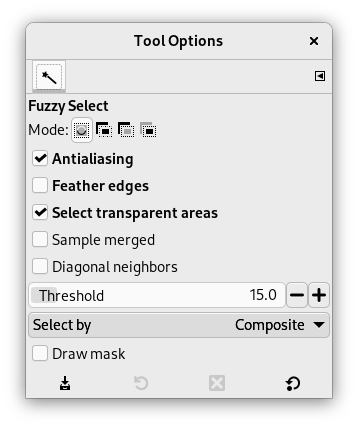
Normaal gesproken worden gereedschapsopties weergegeven in een venster dat is gekoppeld onder de Gereedschapskist, zodra u een gereedschap activeert. Als dat niet zo is, kunt u er toegang toe krijgen vanuit het hoofdmenu met → → , dat het venster met de gereedschapsopties voor het geselecteerde gereedschap opent. De beschikbare gereedschapsopties kunnen ook worden bereikt door te dubbelklikken op het corresponderende pictogram van het gereedschap in de Gereedschapskist.
- Modus, Randen glad maken, Randen verzachten
-
![[Opmerking]](images/note.png)
Opmerking Bekijk Gereedschapsopties Selectie voor hulp met opties die voor al deze gereedschappen gemeenschappelijk zijn. Alleen opties die specifiek voor dit gereedschap zijn, worden hier uitgelegd.
- Overeenkomstige kleuren zoeken
-
Deze opties beïnvloeden de manier waarop Toverstaf de selectie uitbreidt vanuit het initiële punt.
- Transparante gebieden selecteren
-
Deze optie geeft Toverstaf de mogelijkheid om gebieden te selecteren die volledig transparant zijn. Als deze optie niet is geselecteerd, zullen transparante gebieden nooit worden opgenomen in de selectie.
- Samengevoegd monsteren
-
Als u deze optie inschakelt, wordt het nemen van de monsters niet alleen berekend uit de waarden van de actieve laag, maar uit alle zichtbare lagen.
Voor meer informatie, bekijk het item in de woordenlijst.
- Diagonale buren
-
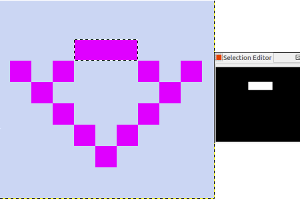
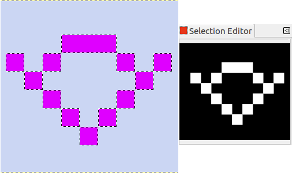
Indien geactiveerd beschouwt het gereedschap diagonale naburige beeldpunten als verbonden bij het berekenen van het betrokken gebied. Met andere woorden: in plaats van te kijken naar de vier loodrechte buren van elk beeldpunt, kijkt het naar alle acht beeldpunten.
Afbeelding 14.20. Voorbeeld voor diagonale buren

Een pixel met 4 rechte buren

Een pixel met 4 diagonale buren

Een pixel met alle 8 buren
- Drempelwaarde
-
Deze schuifbalk bepaalt het bereik aan kleuren dat zal worden geselecteerd op het moment dat u met de aanwijzer klikt op het initiële punt, voor er aan te slepen: hoe hoger de drempelwaarde, hoe groter de resulterende selectie. Na het eerste drukken op de knop zal het slepen van de aanwijzer naar beneden of naar rechts de grootte van de selectie verhogen; slepen naar boven of naar links verkleint die. Dus, u hebt dezelfde set mogelijkheden, ongeacht de instelling Drempelwaarde: wat verschilt is de hoeveelheid slepen die u uit moet voeren om het resultaat te krijgen dat u wilt.
- Selecteren op
-
Met deze optie bepaalt u welke component van de afbeelding GIMP gebruikt om de gelijkenis in kleur te berekenen.
U kunt kiezen uit , , , , , , . , , en .
- Masker tekenen
-
Deze optie kan helpen om de selectie te visualiseren. Geselecteerde gebieden die zijn gemarkeerd met marcherende mieren zouden niet heel duidelijk hoeven te zijn bij het selecteren met Toverstaf. Als deze optie is geselecteerd, zullen geselecteerde gebieden worden gevuld met een kleur magenta, zo lang als u blijft drukken op de linkermuisknop, en dit masker zal verdwijnen zodra u deze muisknop loslaat.
Afbeelding 14.22. Voorbeeld van Masker tekenen
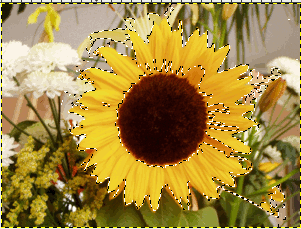
De toverstaf in gebruik zonder Masker tekenen
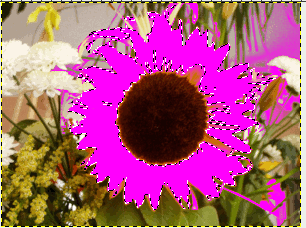
De toverstaf in gebruik met Masker tekenen, linkermuisknop ingedrukt.
