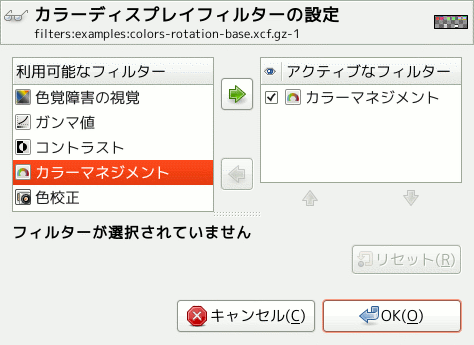
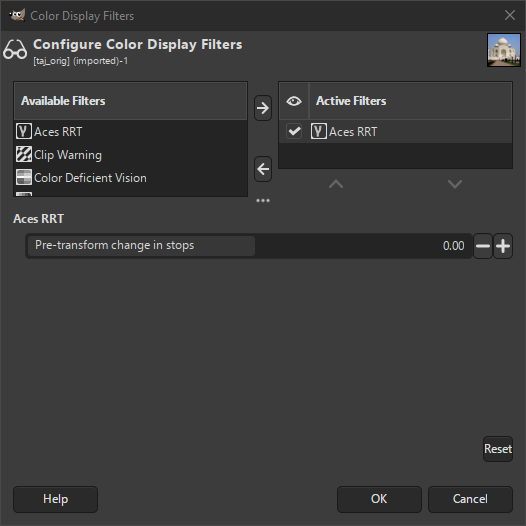
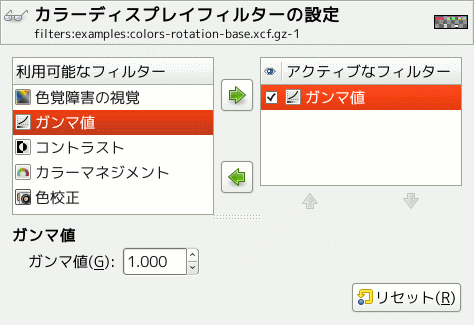
This command shows a dialog window when executed. This window can be used to manage the display filters and their options. Display filters are not to be confused with the filters in the -menu. Display filters do not alter the image data, but only one display of it. You can imagine display filters like big panes before your screen. They change your perception of the image. This can be useful for things like soft-proofing prints, controlling the color management but also simulation of color deficient vision.
This dialog has two small selectboxes. The left selectbox displays the Available Filters. You can move a filter to the right selectbox by selecting it and clicking on the button. The Active Filters window on the right displays filters you have chosen and which will be applied if the adjacent box is checked. You can move filters from the right selectbox to the left selectbox by using the button. If you select a filter by clicking on its name, its options are displayed below the two selectboxes.
-
Digital photography helper (「Clip Warning」)
-
Others (「ガンマ値」)
ACES (Academy Color Encoding Specification) is a specification that defines a color encoding system created to standardize how color is managed to create an accurate color workflow. Within that standard, a RRT (Reference Rendering Transform) converts the colors from the ACES color space to the used color space in your image.
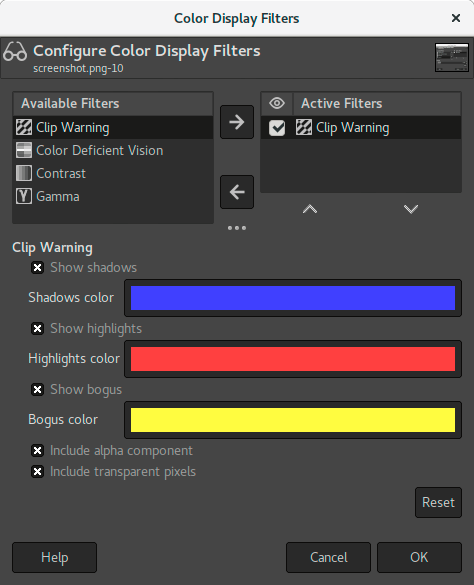
This filter allows to visualize underexposed and overexposed areas of a photo with user-configurable colors. For now, it’s mostly geared towards images where colors are stored with floating point precision. You will mostly benefit from this, if you work on 16-/32-bit per channel float images such as EXR and TIFF.
- Show shadows
-
Enable visualization for underexposed pixels (less than 0 in 32-bit float mode).
- Shadows color
-
User-configurable color that will be used to fill underexposed pixels.
- Show highlights
-
Enable visualization for overexposed pixels (more than 1 in 32-bit float mode).
- Highlights color
-
User-configurable color that will be used to fill overexposed pixels.
- Show bogus
-
Enable visualization for not-a-number (NaN) pixels, only visible when there is a division by zero error and suchlike.
- Bogus color
-
User-configurable color that will be used to fill NaN pixels.
- Include alpha component
-
When enabled, include the alpha component in the warning.
- Include transparent pixels
-
When enabled, include fully transparent pixels in the warning.
作成した画像はできればたくさんの人々がさまざまなシステム上で見られることになるはずですしそうなってほしいと我々は願っています。 ところがお使いのコンピューター画面上では素晴らしい出来に見えた画像が、 色覚に障碍のある方や何か異なる設定の画面で見ている方には多少異なる印象を与える可能性があります。 場合によっては画像の一部の情報が見えないかもしれません。
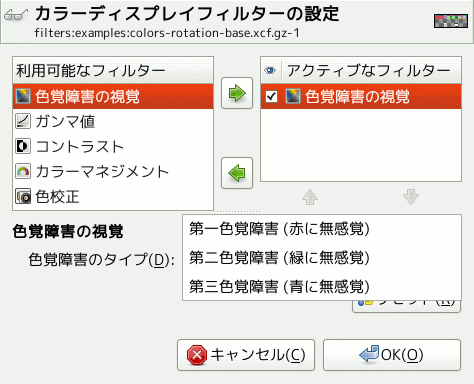
- 色覚障害のタイプ
-
この引き出しメニューで以下に示す 3 つの障碍からひとつを選びます。
- 第一色覚障害[9] (赤に無感覚)
-
第一色覚障害は赤色に対する色覚が弱いか失われています。 よく知られた紅緑色神異常という色覚異常です。 紅緑色神異常の人口は比較的多数あります。
実際のところ第一色覚障害はそれよりも複雑なものです。 この障碍を持つ人はイエローと青の区別はできますが緑と赤が見分けられません。 加えて輝度に対する視覚が弱く、 色相は波長の短い方に遷移しています。
- Deuteranopia (insensitivity to green)
-
第二色覚障害は緑色に対する色覚が弱いか失われています。 赤と緑に対する知覚が比較的劣るところは第一色覚障害とまるで変わりありませんが、 輝度視覚の劣化はなく色相の遷移もありません。
- 第三色覚障害 (青に無感覚)
-
第三色覚障害は緑や赤の知覚はありますが青やイエローの識別に困難があります。 輝度に対する視覚が一部失われており、 色相は波長の長い方に遷移しています。
ここで再び医学的な話をします。 「コントラスト感度」とは僅かなコントラストを判別するための視覚的能力のことです。 白内障 (水晶体が濁り、 網膜を通した光が拡散してしまうこと) や網膜症 (たとえば糖尿病が原因で桿状体や角膜が破壊されてしまうこと) はコントラスト感度の障碍になります。 このような方にとってはたとえばドレスについた染みが見定めづらくなります。
この問題に興味を抱かれた方は コントラスト感度 をキーワードにしてウェブで検索してみてください。
電子的出力強度と色の明るさは必ずしも一致しません。 これはデバイス (カメラ、 スキャナー、 モニターなどの装置) に依存した関係であるためです。 「ガンマ値」はその一致をはかるために使われる係数です。 モニター装置が極度に明るくなっていたり逆に明るさ不足になっていても、 表示した画像の暗く塗られた部分も明るく塗られた部分も見えるようにする必要があるのです。 「ガンマ値」ディスプレイフィルターによりこのような状態で画像表示した様子を体験できます。
![[ヒント]](images/tip.png)
|
ヒント |
|---|---|
|
お使いのディスプレイ装置のガンマ値を変更することなく画像のガンマ値を変更したい場合は、 「Levels」 ツールの説明をお読みください。 |
