The commands in this submenu vary somewhat, depending upon your system, since GIMP makes calls to system functions.
When you copy a selection, it goes into the clipboard. Use → → or press Shift+Ctrl+V to create a new image from the content in the clipboard.
This command has the same action as the Paste as New Image command.
キーボードの Print Screen キーを押すと画面の表示が画像となってクリップボードに取り込まれます。 この機能は次に述べる スクリーンショット ダイアログで 画面全体 のスクリーンショットを撮る機能と同じです。 Alt+Print Screen キーの組み合わせなら活性ウィンドウだけをその装飾枠も含んだ表示から画像を作成しクリップボードに取り込みます。
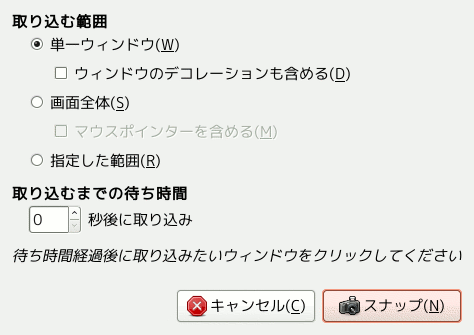
図16.4 The 「Screenshot」 dialog
The Windows version of the Screenshot Dialog, without the Selection delay setting.
![[注記]](images/note.png)
|
注記 |
|---|---|
|
The Screenshot dialog may look different depending on your operating system. For example, on a Linux system which implements the XDG portal specification, the screenshot dialog provided by your operating system may get opened instead of GIMP's built-in dialog described in this section. |
The command opens a dialog with the following options:
- Shoot area
-
- 単一ウィンドウ
-
The mouse pointer becomes a cross. Click in the image window you want to capture. A new image is created.
- 画面全体
-
これは吹き出しメニューなどポップアップするウィンドウを撮り込むときに役立ちます。 メニューなどを引き出す余裕の時間として「待ち時間」が必要になるはずです。
- 指定した範囲
-
The mouse pointer becomes a cross. Click and drag to create a rectangular selection in the image window. This selection will be opened as a new image. Its size is adapted to the selection size. Note: this setting is not available on Windows.
- Contents
-
- Include window decoration
-
If the Include window decoration option is unchecked, the title bar and the frame around the image will be removed.
- Include mouse pointer
-
マウスポインターを含める オプションを有効にするとマウスポインターの姿も撮り込まれます。 マウスポインターだけはもう 1 層のレイヤーになりますので、 あとから画像内で位置を変更できます。
- 取り込むまでの待ち時間
-
- Selection delay (not available on Windows)
-
The seconds to let pass until you select the shoot area.
- Screenshot delay
-
画面全体のスクリーンショットを撮る場合は待ち時間が経過すると自動的に撮り込まれます。 それ以外の範囲を選んだときは待ち時間が経過するとマウスポインターが照準点の姿に変わります。
- Color Profile
-
Select whether to Tag image with monitor profile or to Convert image with sRGB to GIMP's built-in sRGB color space. See 「「Color Management」 Submenu」 for more information.
注記 Due to a software bug, GIMP may assign an incorrect color profile to screenshots.
This item is present in Windows operating system, using TWAIN. Image input devices appear in the dialog, if they are plugged-in. On Linux, you need to install third-party XSane plug-in which will be available in the → → → menu.
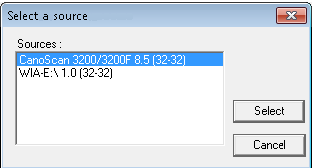
The kinds of devices used to take pictures are too varied to be described here. Fortunately, their use is fairly intuitive. In the example shown (under Windows 7), you can start a scanner or load an image from a camera card.


