The GIMP user interface is available in two modes:
-
modo multi janela,
-
Modo de janela única
When you open GIMP for the first time, it opens in single-window mode by default. You can enable multi-window mode by unchecking the → option in the main menu. After quitting GIMP, GIMP will start in the mode you have selected next time.
- Modo Multi Janela
-
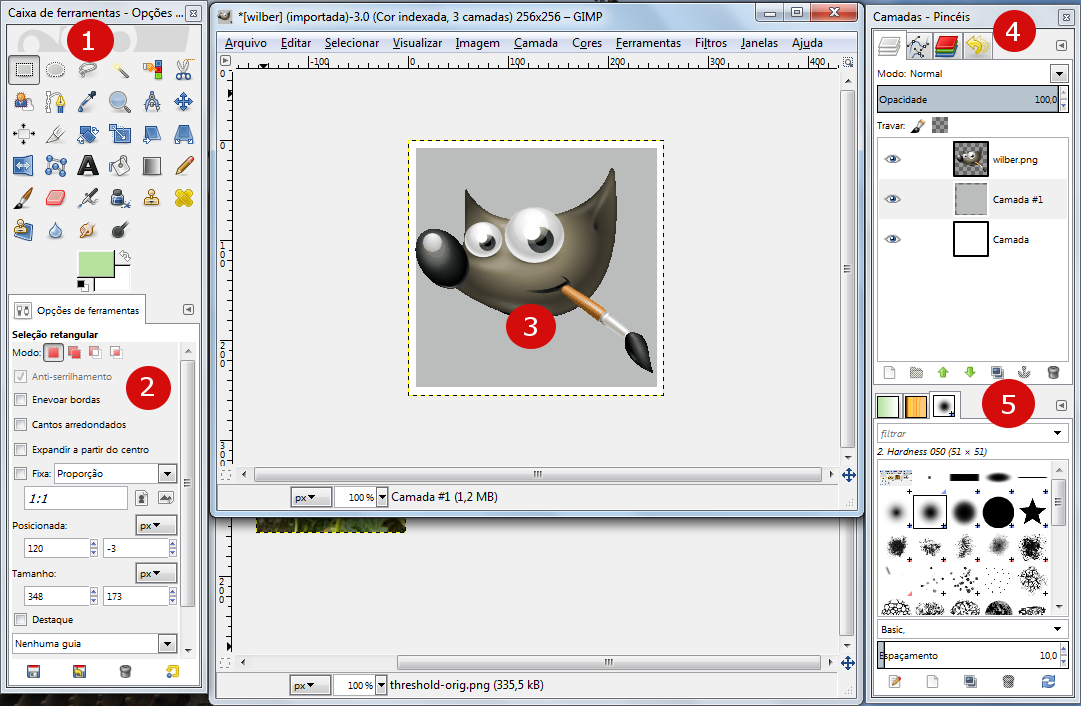
The screenshot above shows the most basic multi-window arrangement for GIMP that can be used effectively.
You will see two panels, left and right, and an image window in the middle. A second image is partially masked. The left panel contains the Toolbox as well as Tool Options, Device Status, Undo History and Images dialogs together. The right panel contains Brushes, Patterns, Fonts and Document History dialogs together in a multi-tab dock, and Layers, Channels and Paths dialogs together in another multi-tab dock.
-
The Toolbox: Contains a set of icon buttons used to select tools. By default, it also contains the foreground and background colors. You can add brush, pattern, gradient and active image icons. Use → → to enable, or disable the extra items.
-
Tool options: Docked below the Toolbox is a Tool Options dialog, showing options for the currently selected tool (in this case, the Move tool).
-
Image windows: Each image open in GIMP is displayed in a separate window. Many images can be open at the same time, limited by only the system resources. Before you can do anything useful in GIMP, you need to have at least one image window open. The image window holds the Menu of the main commands of GIMP (File, Edit, Select, etc.), which you can also get by right-clicking on the window.
Uma imagem pode ser maior do que a janela de imagem. Nesse caso, GIMP exibe a imagem em um nível de zoom reduzido, o que permite ver a imagem completa na janela da imagem. Se você mudar para o nível de zoom de 100%, as barras de rolagem aparecem, o que lhe permite deslocar a imagem para ver todas as partes.
-
The Brushes, Patterns, Fonts, Document History dock — note that the dialogs in the dock are tabs. The Brushes tab is open: it shows the type of brush used by paint tools.
-
Layers, Channels, Paths: The docked dialog below the brushes dialog shows the dialogs (tabs) for managing layers, channels and paths. The Layers tab is open: it shows the layer structure of the currently active image, and allows it to be manipulated in a variety of ways. It is possible to do a few very basic things without using the Layers dialog, but even moderately sophisticated GIMP users find it indispensable to have the Layers dialog available at all times.
O gerenciamento de diálogos e encaixes é descrito em Seção 2.3, “Caixas de diálogo e de encaixe”.
-
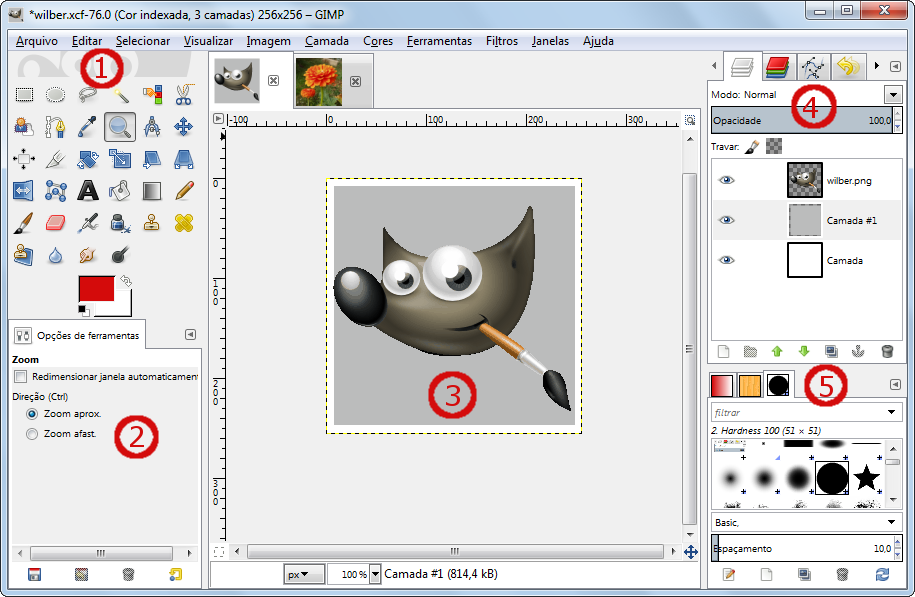
- Modo de janela única
-
Você vê os mesmos elementos, com diferenças em como foram arranjados:
-
Left and right panels are fixed; you can't move them. But you can decrease or increase their width by dragging the moving pointer that appears when the mouse pointer overflies the right border of the left pane. If you want to keep the left pane narrow, please use the scroll bar at the bottom of the tool options to pan across the options display.
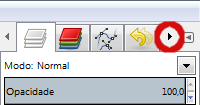
If you reduce the width of a multi-tab dock, there may be not enough room for all tabs; then arrow-heads
 ,
,
 appear allowing you
to scroll through tabs.
appear allowing you
to scroll through tabs.
Como no modo multi-janelas, você pode esconder e mostrar esses painéis usando a teclaTAB.
-
A janela de imagem ocupa todo o espaço entre ambos os painéis.
When several images are open, a new bar appears above the image window, with a tab for every image. You can navigate between images by clicking on tabs or either using Ctrl+Page Up or Page Down or Alt+Number. “Number” is tab number; you must use the number keys of the upper line of your keyboard, not that of keypad (Alt-shift necessary for some national keyboards).
-
Esta é uma configuração mínima. Há mais de uma dúzia de outros tipos de caixas de diálogo utilizadas pelo GIMP para vários fins, mas os usuários normalmente as abrem quando precisam delas e as fecha quando acabaram de usar. Usuários experientes geralmente mantém a Caixa de ferramentas (com as opções de ferramentas) e o diálogo de Camadas abertos o tempo todo. A Caixa de ferramentas é essencial para muitas operações do GIMP. A seção Opções de ferramentas é, na verdade, um diálogo separado, mostrado encaixado na Caixa de ferramentas principal nesta captura de tela, usuários experientes quase sempre a deixam configurada dessa forma: é muito difícil usar as ferramentas de forma eficaz, sem de ver como suas opções estão definidas - se ela for fechada, no entanto, um clique-duplo sobre o ícone de qualquer ferramenta na Caixa de ferramentas, abre de novo a caixa de Opções. A caixa de diálogo de Camadas entra em jogo quando você trabalha com uma imagem com várias camadas: depois de experimentar além dos estágios mais básicos do GIMP, isso significa quase sempre. E é claro que ajuda se você estiver vendo as imagens que você está editando na tela; se você fechar a janela de imagem antes de salvar o seu trabalho, o GIMP irá perguntar se você realmente deseja fechar a imagem;
![[Nota]](images/note.png)
|
Nota |
|---|---|
|
If your GIMP layout is lost, your arrangement
is easy to recover using
→ .
This menu command is only available while an image is open.
To add, close, or detach a tab from a dock, click
|
As seções a seguir instruem você sobre os princípios básicos dos componentes de cada uma das janelas mostradas nessa tela, explicando o que são e como eles funcionam. Uma vez que você as leia, e também a seção que descreve a estrutura básica das imagens no GIMP, você deverá ter aprendido o suficiente para usar o GIMP para realizar várias tarefas simples com imagens. Você poderá então olhar o restante do manual com calma (ou apenas ir experimentando) para conhecer o número quase ilimitado de coisas mais sutis e especializadas que são possíveis. Divirta-se!
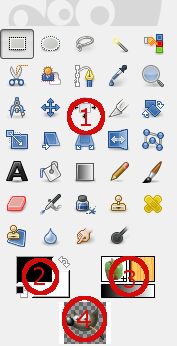
A caixa de ferramentas é o coração do GIMP. Aqui segue uma breve descrição sobre o que você encontrará nela.
![[Dica]](images/tip.png)
|
Dica |
|---|---|
|
Na caixa de ferramentas, como na maior parte do GIMP, mover o mouse sobre um elemento e deixando o parado por um momento, faz surgir uma “dica” que descreve o aquele item. Teclas de atalho também são frequentemente mostradas nessa dica. Em muitos casos, você pode passar o mouse sobre um item e pressionar a tecla F1 para obter ajuda sobre o elemento que está sob o mouse. |
By default, only the Foreground/Background Colors area is visible. You can add the Brush/Pattern/Gradient area and Active Image area through → → : Configuração das ferramentas.
-
The GIMP logo: At the top of the toolbox, you can click-drag-and-drop images from a file browser into this area or into the tool icons to open the images. You can hide this logo by unchecking the Show GIMP logo option in the Toolbox Preferences.
-
Ícones de ferramenta: Estes ícones são botões que ativam ferramentas para uma grande variedade de propósitos: selecionar partes de imagens, pintar uma imagem, transformar uma imagem, etc. Seção 1, “A Caixa de ferramentas” oferece uma visão geral de como trabalhar com as ferramentas, e cada ferramenta é descrita de forma sistemática no Capítulo Ferramentas.
-
Foreground/Background colors:
The color area shows GIMP's current foreground and background colors, which are used for painting, filling, and many other operations. Clicking on either one of them brings up a color selector dialog that allows you to change to a different color.
Clicking on the small symbol in the lower left corner resets the foreground and background colors to black and white. Pressing the D key has the same effect.
Clicking on the double-headed arrow symbol swaps the foreground and background colors. Pressing the X key has the same effect.
-
Brush/Pattern/Gradient: The symbols here show you GIMP's current selections for: the Paintbrush, used by all tools that allow you to paint on the image (“painting” includes operations like erasing and smudging, by the way); for the Pattern, which is used in filling selected areas of an image; and for the Gradient, which comes into play whenever an operation requires a smoothly varying range of colors. Clicking on any of these symbols brings up a dialog window that allows you to change it.
-
Imagem Ativa: No GIMP, você pode trabalhar com várias imagens de uma só vez, mas num determinado momento, apenas uma imagem é a “imagem ativa”. Aqui você encontra uma pequena representação icônica da imagem ativa. Clique no ícone para exibir um diálogo com uma lista das imagens abertas no momento, clique em uma imagem na caixa de diálogo para torná-la ativa. Normalmente você pode você clicar em uma janela de imagem no modo multi-janelas, ou numa guia de imagem no modo janela única, para torná-la a imagem ativa.
If you use GIMP on a Unix-like operating system with the X Window System, you can also drag and drop the thumbnail to an enabled XDS file manager to directly save the corresponding image.
|
|
Nota |
|---|---|
|
At every start, GIMP selects the brush, color, pattern you used when quitting your previous session because the Save input device settings on exit in Preferences/Input Devices, is checked by default. If you uncheck it, GIMP will use a color, a brush and a pattern by default, always the same. |


