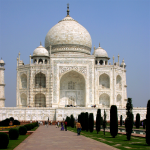
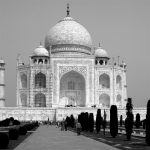
Рисунок 16.169. После применения монохромного микшера каналов

Исходное изображение

После применения «Монохромного микшера каналов» с параметрами по умолчанию
![[Примечание]](images/note.png)
|
Примечание |
|---|---|
|
Эта команда не работает с изображениями в оттенках серого. Если изображение в оттенках серого, этот пункт меню недоступен. |
- Профили, Параметры смешения, Предварительный просмотр, Объединить фильтр, Сравнение до/после
-
![[Примечание]](images/note.png)
Примечание These options are described in Раздел 8.1.2, «Часто встречающиеся возможности команд «Цвет»».
- Сохранять яркость
-
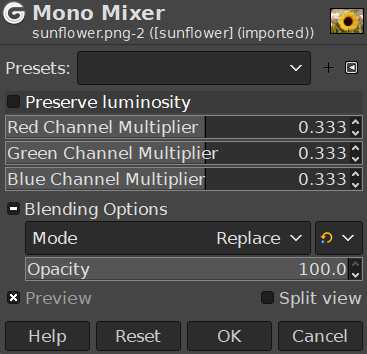
В результате смешивания может получиться изображение, в котором некоторые цвета будут слишком светлыми. Этот параметр уменьшает светлоту цветовых каналов, сохраняя хорошее визуальное соотношение между ними. Таким образом, можно изменить относительный вес цветов без изменения общей светлоты.
- Множитель красного канала, Множитель зелёного канала, Множитель синего канала
-
Коэффициент, применяемый к каждому каналу. Диапазон значений: от -5000 до 5000. Поскольку во всех трёх каналах значения по умолчанию одинаковы, изображение обесцвечено.
Когда используется этот параметр, просмотр изображения переходит в режим градаций серого, но изображение остаётся в режиме RGB, пока фильтр не будет применён.
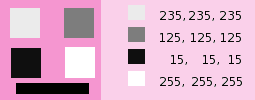
Рисунок 16.171. Красный :100% Зелёный: 50% Синий: 0%. Параметр Сохранять яркость не используется.

В каждом квадрате пиксели преобразовываются в серый цвет того или иного уровня, соответствующего значению красного канала в исходном изображении (фоновый цвет изображён розовым позднее, чтобы белые квадраты были видны).
Вот как работает параметр Сохранять яркость в монохромном режиме, согласно объяснениям автора фильтра: «Предположим, что ползунки имеют следующие значения: красный 75%, зелёный 75%, синий 0%. С включённым параметром Монохром и отключенным параметром Сохранять яркость итоговое изображение будет иметь значение 75%+75%+0% =150%, что на самом деле слишком ярко. Пиксель со значением, скажем, R,G,B=127,100,80 отобразится на значение 127*0,75+100*0,75+80*0=170 для каждого канала. С включённым параметром «Сохранять яркость» значения ползунков будут отрегулированы так, чтобы итоговое значение составляло 100%. В этом примере регулировка выполняется со значением 1/(75%+75%+0%) или 0,667. Пиксели будут иметь значение примерно 113. Параметр «Сохранять яркость» просто обеспечивает общее значение ползунков в 100%. И конечно, странные вещи могут происходить при больших отрицательных значениях одного из ползунков.»
![[Примечание]](images/note.png)
|
Примечание |
|---|---|
|
Какой канал менять? Зависит от того, что необходимо сделать. В принципе, красный канал хорошо подходит для коррекции контраста. Зелёный канал можно успешно использовать для управления детализацией, а синий — для изменений с шумами. Можно использовать команду Разобрать . |


