To access these tools, select → from the main menu.
Inside the Transformation tool dialog, you will find tools to modify the presentation of the image or the presentation of an element of the image, selection, layer or path. Each transform tool has an Option dialog and an Information dialog to set parameters.
Esta categoría incluye las siguientes herramientas:
Algunas opciones se comparten entre varias herramientas de transformación. Se describen aquí. Las opciones más específicas se describirán en su herramienta.
- Transformar
-
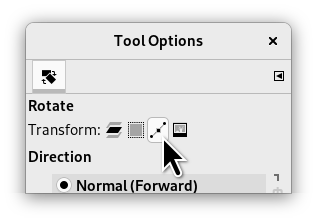
GIMP offers four buttons in the Tool Options which let you select which image element the transform tool will work on.
![[Nota]](images/note.png)
Nota The Transform option for a tool persists after changing tools.
-
Capa
-
When you activate the first button, the tool works on the active layer. If no selection exists in this layer, the whole layer will be transformed.
-
Selección
-
When you activate the second button, the tool works on the selection only, or the whole layer if there is no selection.
-
Ruta
-
When you activate the third button, the tool works on the active path only.
-
Imagen
-
When you activate the fourth button, the transformation is applied to all layers.
Figura 14.86. Ejemplo con rotar
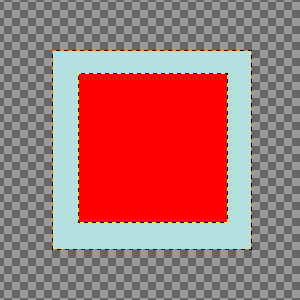
Two layers, the red one being smaller. → option checked.
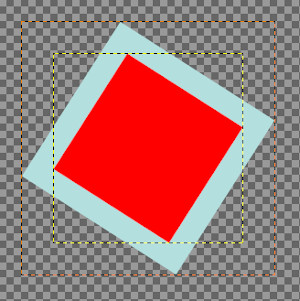
El cuarto botón pulsado con la herramienta rotar aplicada. Note la adaptación de los tamaños de las capas.
-
- Dirección
-
Esta opción configura la manera o la dirección en la que se transforma una capa:
El modo “Normal (hacia adelante)” transformará la imagen o capa como se espera. Use los tiradores para realizar la transformación que quiere. Si usa una rejilla (mire más abajo), la imagen o capa se transforma según la forma y posición que pone en la rejilla.
“Corrective (Backward)” inverts the direction. Primarily used with the Rotation tool to repair digital images that have some geometric errors (a horizon not horizontal, a wall not vertical, etc). See Sección 4.5, “Rotar”.
You can link these two options in Rotate, Scale, Perspective, Unified transform and Handle transform tools. This allows moving handles without affecting the transformation, letting you manually readjust their position.
- Interpolación
-
This drop-down list lets you choose the method of the transformation. The chosen method influences the speed and quality, though it also depends on the image and the type of transformation what will work best in each case.
- Ninguno
-
El color de cada píxel se copia desde su píxel vecino más cercano en la imagen original. A menudo, produce un efecto “diente de sierra” y una imagen tosca, pero es el método más rápido. A veces, a este método se le denomina “Vecino más cercano”.
- Lineal
-
El color de cada píxel se calcula como el color promedio de los cuatro píxeles más cercanos en la imagen original. Este método produce un resultado satisfactorio en la mayoría de las imágenes y es un buen compromiso entre velocidad y calidad. A veces, a este método se le llama “Bilineal”.
- Cúbica
-
The color of each pixel is computed as the average color of the eight closest pixels in the original image. This usually gives a good result, although there are some cases where it can actually look worse than Linear and it is also slower. Sometimes this method is called “Bicubic”.
- LoHalo, NoHalo
-
These methods perform a high quality interpolation. Use the NoHalo method when you downscale an image to less than a half of the original size and the LoHalo method when you do not reduce the size much (rotate, shear).
A “Halo” is an artifact that can be created by interpolation. It reminds of the halo you can get when using Sección 4.8, “Enfocar (Desenfocar máscara)”. Here is a note from Nicolas Robidoux, the creator of these quality samplers for GEGL and GIMP:
"If haloing is not an issue with your content and use case,
which of the two should you try first?
(Clearly, if you want to minimize haloing, NoHalo is the
ticket.)
If you are reducing an image, LoHalo is generally better.
If your transformation is not an all around reduction, for
example if you enlarge, rotate or apply a perspective
transformation that keeps portions of the image at the same or
higher resolution, I generally prefer NoHalo. This preference,
however, changes depending on the image content. If, for
example, the image contains text or text-like objects or has
significant areas with only a handful of different colours,
like old school pixel art, I’d switch to LoHalo. Likewise if
the image is quite noisy or marred by compression artifacts
(as are most JPEGs found on the web). Conversely, if the
image is noise free, very slightly blurry (meaning that when
pixel peeking, the lines and interfaces are smeared over two
or more pixels), and there are delicate skin tones to be
preserved, I’d try NoHalo first. Actually, if I find that
colours have not been preserved nicely after transforming an
image with LoHalo, I’d immediately switch to NoHalo, even if
reducing.
In any case, these recommendations should not be taken as
gospel. I still have much to learn and figure out. For
example, how best to deal with transparency and different
colour spaces is something I’m likely to be thinking about
for a while."
![[Nota]](images/note.png)
Nota You can set the default interpolation method in the Tool Options Preferences.
- Recortar
-
Después de la transformación, la imagen puede ser más grande. Esta opción recortará la imagen transformada al tamaño de la imagen original.
Puede elegir entre varias maneras de recortar:
- Ajustar
-
Figura 14.87. Imagen original para los ejemplos
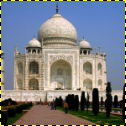
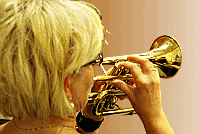
Imagen original
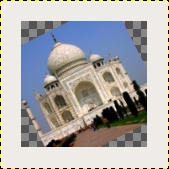
La rotación aplicada con “Ajustar”
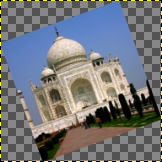
La rotación aplicada con “Ajustar” y el lienzo ampliado al tamaño de la capa
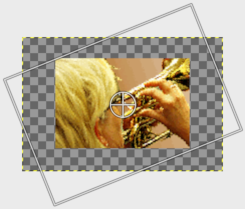
Con «Ajustar»: la capa se amplia para contener toda la capa rotada. El borde de la nueva capa es visible; la capa entera se hace visible al usar la orden → .
- Recortar
-
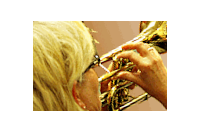
Con «Recortar»: todo lo que excede los límites de la imagen se elimina.
- Recortar al resultado
-
Figura 14.89. Ejemplo de recortar al resultado
Rotación de 45° con recortar al resultado
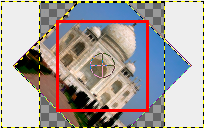
El límite del recorte está marcado en rojo. No se incluyen las áreas transparentes.
Si se selecciona esta opción, la imagen se recorta hasta el área transparente, creada por la operación de transformación en las esquinas, que no se incluyen en la imagen resultante.
- Recortar con aspecto
-
Esta opción funciona como la anterior pero hace que se mantenga la relación de aspecto.
- Mostrar vista previa de la imagen
-
Si está marcada, lo que es la configuración predeterminada, la imagen transformada será visible por encima de la imagen o la capa original. También habrá un deslizador con el que podrá seleccionar la opacidad de la vista previa.
- Vista previa compuesta
-
Inspirado en https://librearts.org/2020/02/gimp-2-10-18-full-review
Mostrar la vista previa como parte de la composición de la imagen: cuando tiene varias capas, cada una con su propio modo de fusión y opacidad, la transformación significa que aparece justo encima de las otras capas. Entonces, en una composición de capas complejas, no puede alinear esta capa con otras capas sin realizar bastante prueba y error.
The Composited Preview option removes this problem in favor of rendering the preview of the transformed layer exactly where it is in the layers stack, exactly with the opacity and blending mode of choice.
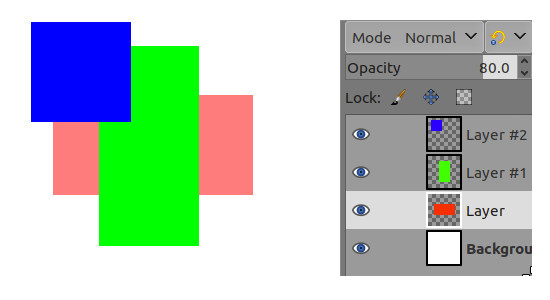
Original image: red layer opacity is 80%.
Figura 14.91. Ejemplo de vista previa compuesta
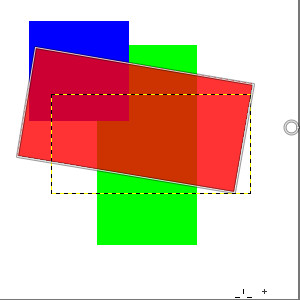
Opción de composición sin marcar: en la vista previa, la capa roja está sobre todas las demás capas.
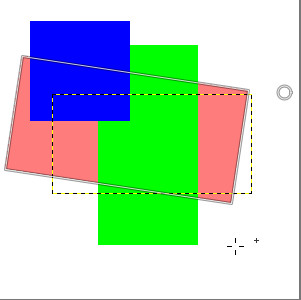
Opción de composición marcada: en la vista previa, la capa roja está en su lugar correcto, como en la pila de capas.
One sub option is available:
-
Vista previa síncrona: esta opción es experimental. La idea es representar la vista previa tan pronto como cambie la transformación. Entonces, en lugar de esperar a que el mouse deje de moverse, muestra el resultado de inmediato. Si GIMP puede representar todo lo suficientemente rápido, esto significa una respuesta mucho más fluida e instantánea.
Pero esta opción también bloquea todo hasta que la vista previa se haya completado. Esto significa que GIMP puede ser mucho menos fluido, generalmente cuando la capa es muy grande. Por esta razón está desactivado de manera predeterminada.
-
- Guías
-
This is a drop-down list where you select the type of guide lines which suits your transforming. All the guides use a frame to mark the image's outline in addition to the lines used by the different selections.
- Sin guías
-
Como el nombre indica, no se han usado guías.
- Centrar líneas
-
Usa una línea vertical y una línea horizontal que se cruzan en el centro de la imagen o capa.
- Regla de los tercios
-
Divide el área de transformación en nueve partes iguales al añadir 2 líneas horizontales y 2 líneas verticales equidistantes. De acuerdo a esta regla las partes más interesantes de la imagen deben estar colocadas en los puntos de intersección.
- Regla de los quintos
-
Igual que la “Regla de los tercios”, pero divide el área en cinco por cinco partes.
- Secciones áureas
-
También llamadas “La relación áurea”. Esto divide el área de transformación en nueve partes usando una fórmula matemática que proporciona las partes a las demás y al área que transformar.
- Líneas diagonales
-
Divide el área de transformación usando líneas diagonales.
- Número de líneas
-
Pone una rejilla rectangular con el mismo número de líneas verticales y horizontales. El número de líneas se establecer en el deslizador que aparece cuando se selecciona la guía.
- Espaciado de la línea
-
Pone una rejilla rectangular en el área de transformación usando el espacio entre las líneas establecidas en el deslizador.
Si por alguna razón quiere transformar rutas, lo puede hacer con las herramientas de transformación.
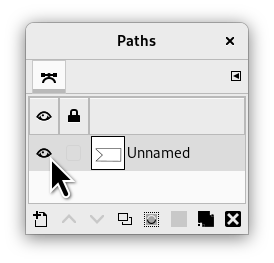
When the path is drawn go to the Paths dialog and click on the first field before the path outline in the dialog window to get the eye icon visible. Then choose the transformation tool and in the upper part of the option dialog click on the path icon to tell the tool to act on the path.
Haga la transformación de la manera habitual y confirme cuando esté finalizada. Puede ser una buena idea establecer las guías en “Sin guías” para obtener una ruta que sea más reconocible.
Cuando la transformación esté terminada, elija la herramienta de ruta y pulse en la ruta cambiada para activarla y así poder seguir trabajando en ella.

