GIMP brukar Lagra-kommandoen berre for å lagre bileta i XCF-format. For å lagre i andre format, må du bruka eksporter-komandoen.
-
Du har tilgang til denne kommandoen frå hovudmenyen via → ,
-
eller frå tastaturet med tastesnarvegen Ctrl+Shift+E.
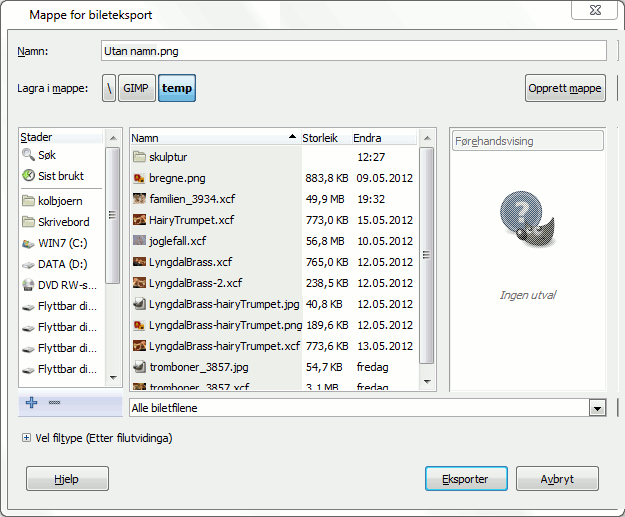
Med denne filutforskaren kan du redigere filnamn og filutvidingar direkte i Namnefeltet standard er «Utan namn.png»), eller ved å velja eit filnamn frå namnelista og overskriva dette. Viss du vil lagra biletet ein annan stad, finn fram denne staden i filutforkaren. Du kan også laga ei ny mappe.
Vel filtype. Dersom utvidar dette valet, kan du velja filformatet og tilhøyrande filutviding for fila i lista.
Dialogvindauget for filformat er omtalt i Del 1, «Filer».
Når finamnet og lagringsplassen er vald, klikk på knappen for å få opp dialogvindauget for det spesifiserte filformatet.
![[Notat]](images/note.png)
|
Notat |
|---|---|
|
Viss namnet du skreiv inn finst frå før, vil du få spørsmål om fila skal overskrivast eller ikkje. Viss ei lagmaske eller ein kanal er vald i staden for eit lag og eksportformatet ikkje har støtte for dette, må du stadfesta dette. |
Viss du har lasta inn ei fil som ikkje er XCF, gjev kommandoen → (etterfølgd av filnamnet) deg høve til å overskriva den opphavlege fila med det nye filformatet.
Dersom du gjer endringar i eit bilete som alt er eksportert, vert kommandoen → (følgd av filnamnet) slik at du kan eksportera fila igjen i det same formatet.


